Okay, I admit it. I stole this idea from Oprah. But I am in a unique position to use and abuse a lot of fly fishing related products and over the years, I have developed some favorites and I thought I’d share them with you. I may even make this a holiday tradition. Who knows? Maybe Santa will see it and put one of these items under your tree!
In any case, it’s worth mentioning that I do not make a dime on any of these items if you buy them. These are just great products that have served me well. They are random items that range in price from about $12.95 – $400.
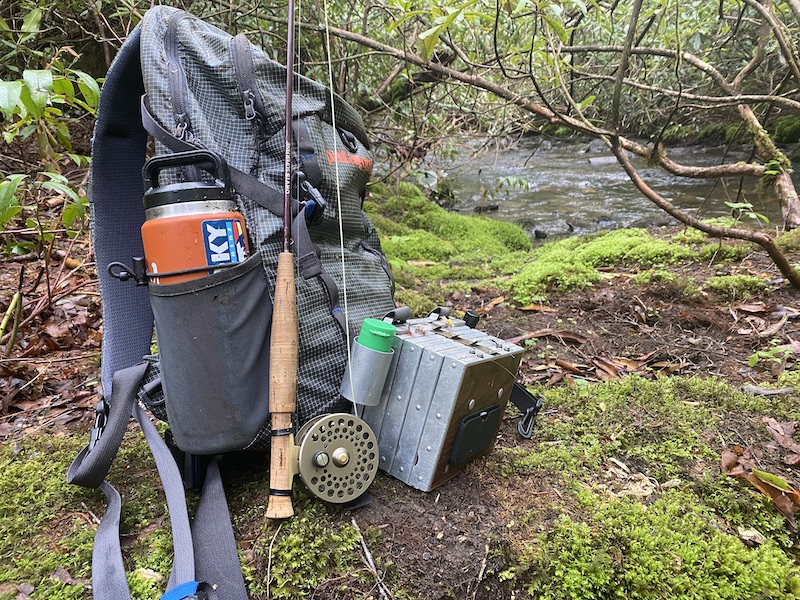
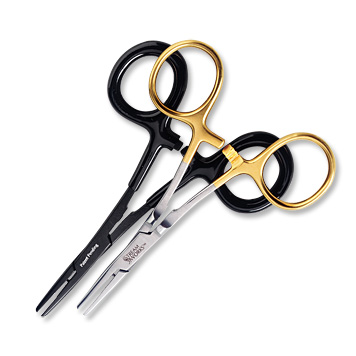
Richardson Chest Fly Box
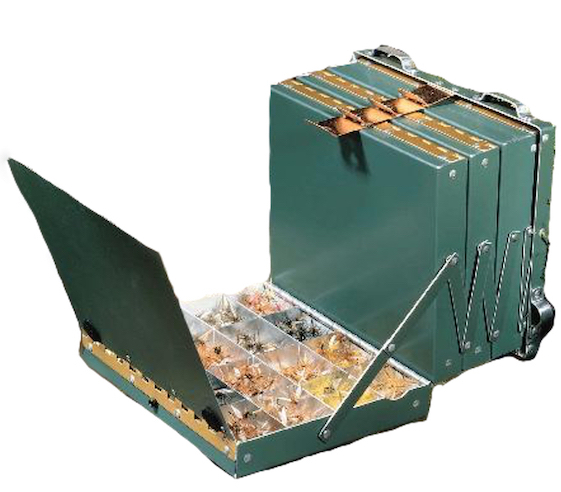
If you’ve been on a guide trip with me, you’ve seen this. It is absolutely my favorite piece of gear and I’ve been wearing it since 1999. They’ve been making these boxes quite a bit longer, though. Ronald Fye developed the first one in 1951. Rex Richardson purchased the company and the patent in 1960 and the current owner, Bob Hegedus, has been making the boxes since the mid 90’s. Each box is built by Bob in Bellefonte, PA and carries a lifetime guarantee.
I love them for the organization and the flexibility they offer. Everything is right in front of me so I’m not digging through pockets to find things, and it acts as a sort of work table, too. It can be used alone or in tandem with a backpack, vest or hip pack.
There are a several different options from which to choose and each box is custom built to your specifications. Choose from one to five trays and build them how you please: compartments, foam, storage, tippet dispenser… Continue accessorizing with floatant holders (built to fit your brand), magnifiers, flashlights and more. $85 – $400. View website.
Fishpond Burrito Wader Bag
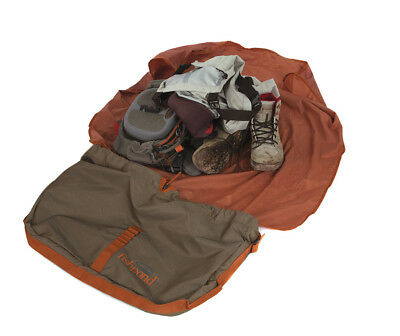
I like keeping my wet stuff separate from my dry stuff when traveling and this bag is the perfect solution. Unlike some products on the market, it is well thought out without being over engineered. You know what I’m talking about.
Simply open the bag, grab the handles and lift and your waders and boots roll right out. The waterproof interior liner acts as a “changing station” where you can stand and protect the feet of your waders while suiting up. At the end of the day, take your wet gear off while standing on the waterproof liner and roll it all up. The video below will explain WAY better!
It’s ideal for one set of boots and waders but you can fit two if you need. $59.95. View website.
Simms Guide Guard Wading Socks
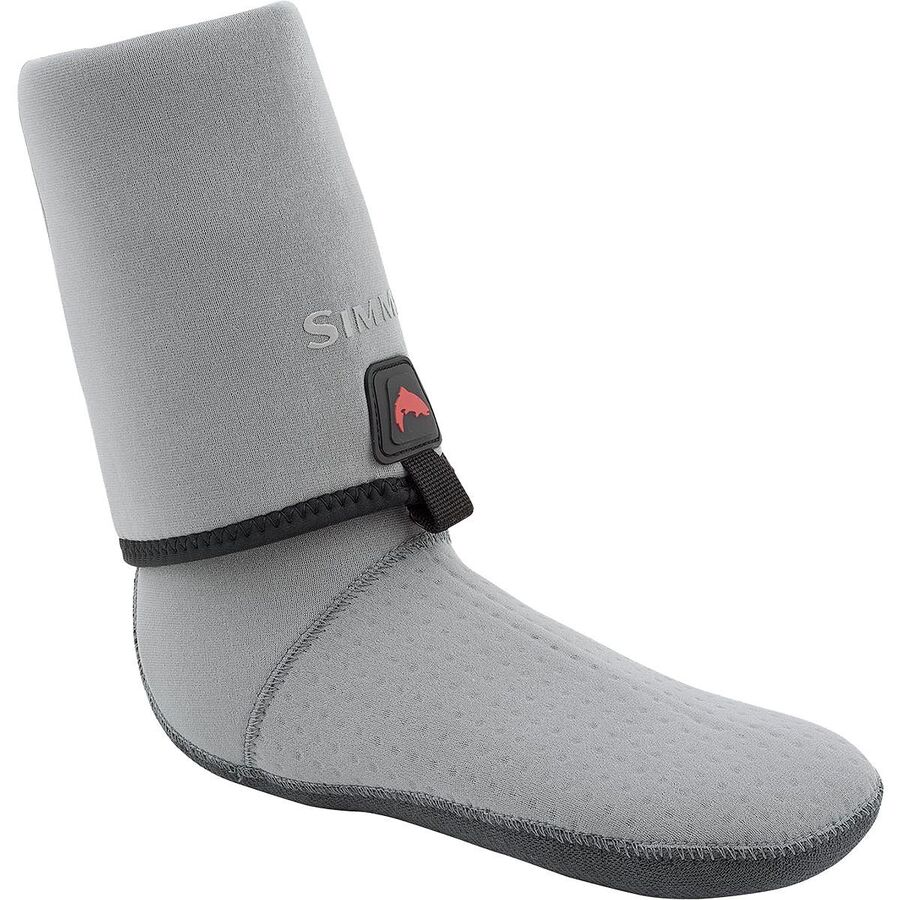
Wading socks are wading socks, right? Wrong. Wet wading season lasts a long time in the Smokies and I’m probably fishing and hiking in wading socks almost 150 days a year. I’ve worn about every brand and style out there and these are hands down the most comfortable and durable.
The biggest problem with most wading socks is that they are usually only 2 – 2.5mm neoprene. Your wading boots are sized to fit over the neoprene foot of a wader, which is usually 3.5mm. So, when you end up with boots that are either too tight when you wear waders or too loose when you wet wade. The Simms Guide Guard sock is 3.5mm which means they’re not only more durable, but you get the same fit whether wearing waders or wet wading. They’re a little more expensive than other brands but in my opinion, worth every penny! $49.95. View website.
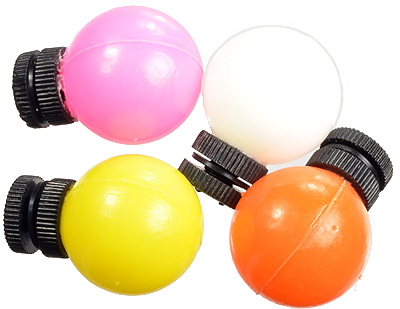
Fishpond PioPod
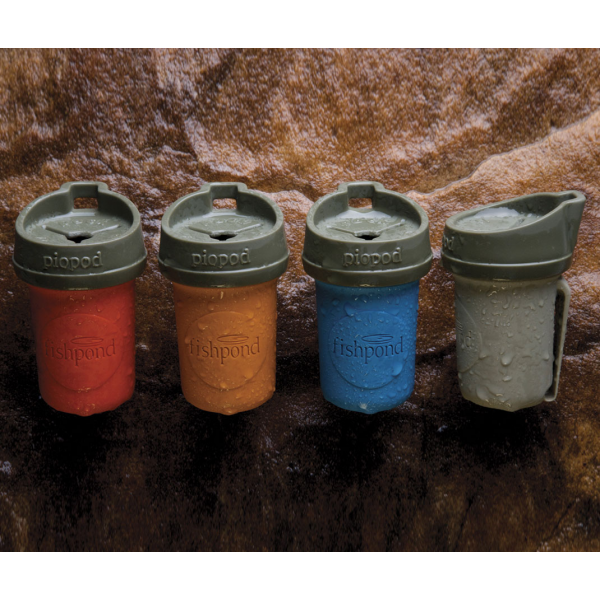
“Pio” stands for “pack it out.” This simple little contraption is meant to act as a small streamside trash can to dispose of monofilament, strike indicators, cigarette butts… you name it. The top has “one way” slits that allow you to push things in without them easily coming back out. The lid can easily be removed to properly dispose of trash when you get home.
It conveniently attaches to most any pack or vest with a dual attachment options. Check out the video below for more details. $12.95. View website.
Shelta Performance Sun Hat
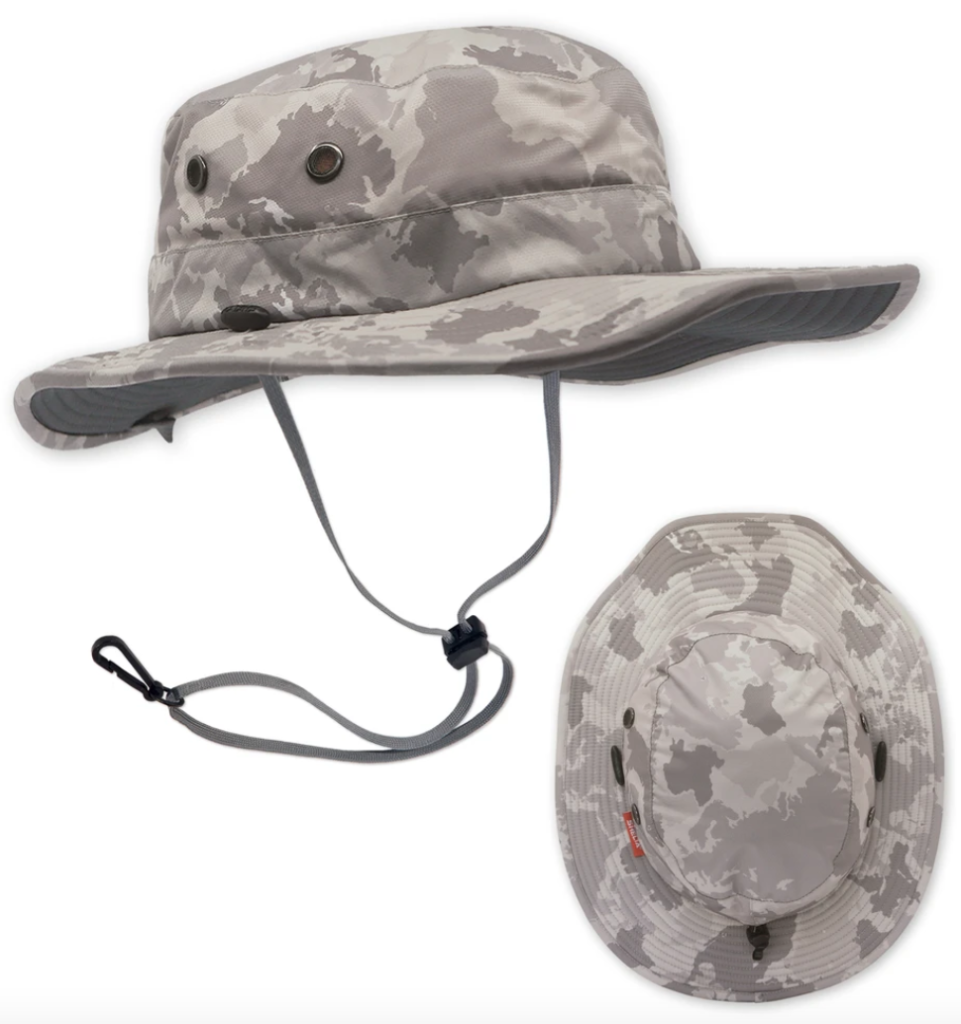
After the recent removal of a basal cell carcinoma, I decided to get more serious about protecting my skin against the sun. That included a new hat. I’ve always been a ball cap guy. I don’t like big, wide brims that seem to get in the way of everything and I don’t like floppy brims flapping around in my face.
I found my solution with Shelta. They make a variety of sun hats with different brim shapes and sizes, all with a rigid front brim that won’t flop! Even better, it’s UPF 50+ and it floats. It’s also fairly water resistant which is a big plus in a climate where there almost always at least a 30% chance of rain. Another big bonus is a chin strap that secures out of the way when you don’t need it.
It’s not a cheap hat. Then again, it’s not a CHEAP hat. This thing is extremely well made and comes with a lifetime guarantee. It’s the best purchase I made in 2021! $69.50. View website.
ThinOptics Readers
I am of a certain age. If you are also of a certain age, you know that you can’t see small , closeup things like you used to. Fly fishing requires seeing a lot of small, closeup things!
Magnifiers or readers are now a must for me when I’m on the stream. I started out using magnifiers that clip on the bill of your hat. They were fine but they require you to look up when you’re working on flies or tippet, and I prefer to look down. I also tried traditional readers but simply didn’t want one more thing hanging around my neck.
ThinOptics readers are the perfect solution for me. Originally designed to attach to a cell phone, they mount to the front of my chest box, out of the way but easily accessible. A nifty little spring design allows them to stay perched on your nose when in use.
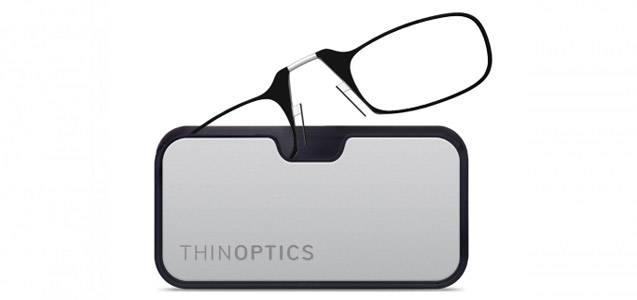
Other designs include a model that will hang from a zipper or any latch point on a pack. There are also full size readers that can slide into a thin pocket.
Numerous magnifications and colors are available and prices start at $20.95. View website.
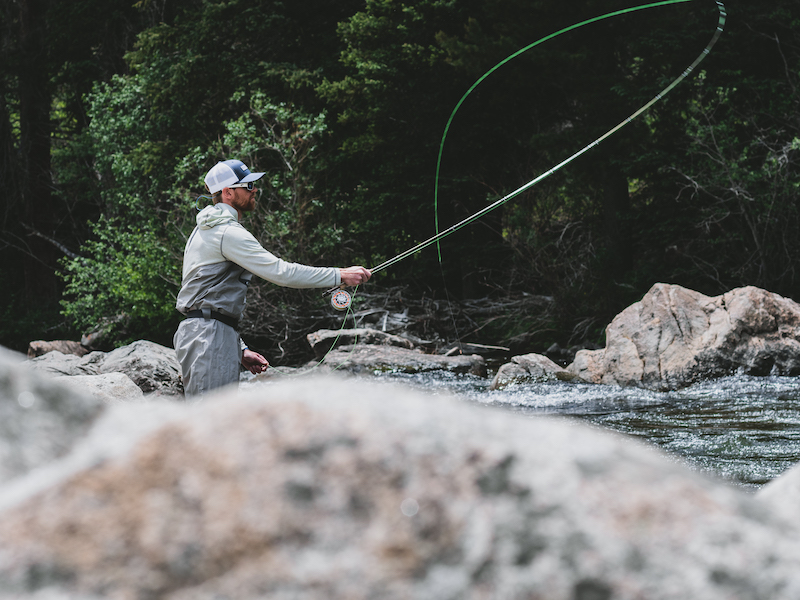
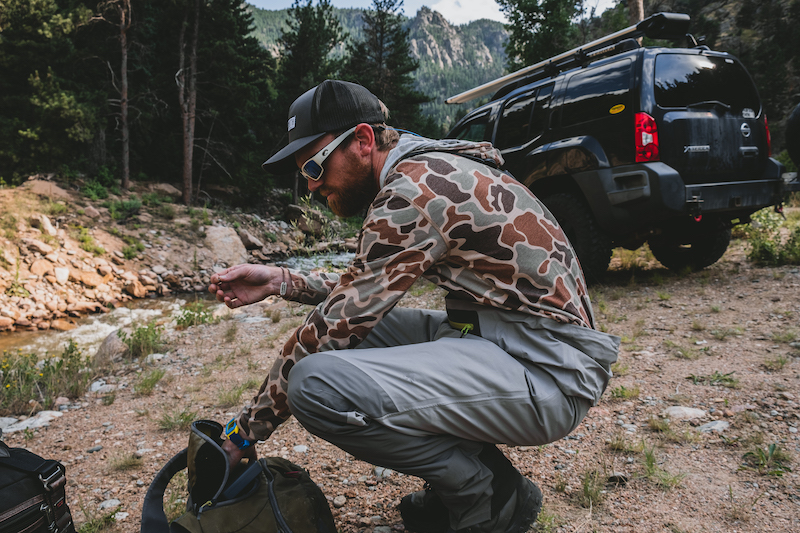
Kühl Pants
In the Smokies, I spend most of the season wet wading. When I wet wade, I prefer to wear long pants to protect my legs from vegetation, rocks, critters, etc. But you don’t want to wear a fabric like denim that will hold a lot of water and dry slowly. Fortunately, there are a lot synthetic fabrics out there that are lightweight and will dry incredibly fast.
Doing this every day, my problem with many of these light synthetics is that hey are not durable. They would be fine if we were standing all day in one spot in the water. But we move a lot in the mountains. We climb over boulders and move in and out of thick vegetation.
I found the perfect solution in Kühl. There are a number of similar models that I’m sure are as good, but I specifically wear the Konfidant. They dry quickly but are constructed of a far more durable fabric that will stand up to anything you throw at them. I’ve been wearing them hard for years and am yet to wear a pair out.
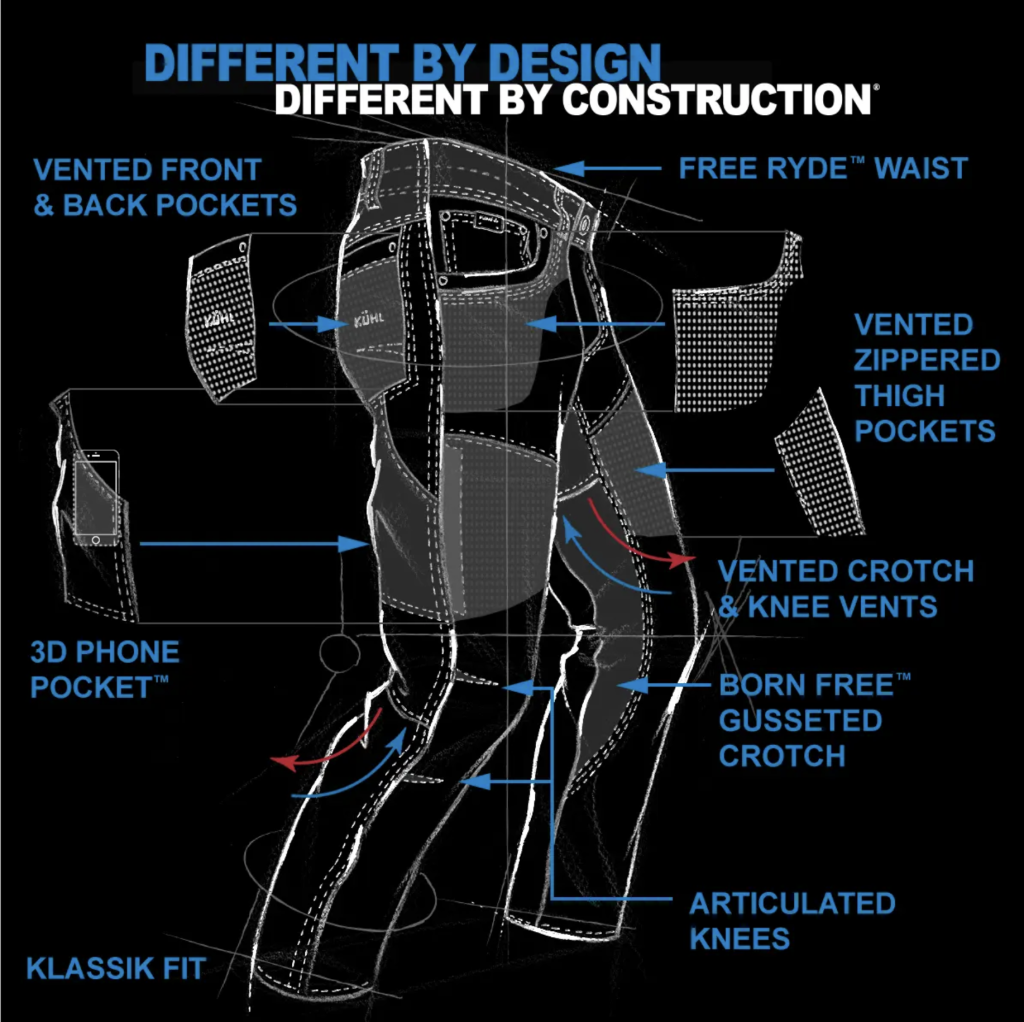
Additionally, they fit well, are comfortable and have a terrific pocket design. Quite simply, they’re the best pants I’ve ever owned! At just under $100, they’re not cheap. But in this fly fishing guide’s humble opinion, they are worth every penny! Visit website.