Spring is slowly easing its way into the Smokies. March was pretty much what we expected. Cold overnights kept water temperatures below 50-degrees for most of the month and fishing was pretty tough. Though, there were some intermittent moments of good fishing mixed in. And things improved a little more during the last week of March with slightly warmer water temperatures stimulating hatches and getting the fish moving.
It looks like that trend will continue into early April. Expect slower mornings but fairly productive afternoons. There will likely be a potpourri of hatches. Hendricksons should be the main event for the early part of the month. Red Quills and March Browns will likely start making appearances later in April. Interspersed will be a periodic BWO’s and a variety of caddis and stoneflies.
A #14 Parachute Adams will be my default dry fly choice this month. If fish are rising and won’t take the Adams, start looking around and try to better match the color and size of bugs on the water.
All and all, things look good for April. There will most certainly be a few dips in temperature that turn the fish off, but the long range forecast suggests a mostly mild and dry month.
Clinch River
The Clinch didn’t fish at all in March. Nearly every day saw discharges of more than 25,000 cfs all day. I don’t know for sure when it will be back in shape. Flows have reduced to an average of 8000 cfs. That’s still too much but it’s a step in the right direction! If dry conditions persist, we may see fishable water by the end of the month – hopefully in time for a sulphur hatch! I’ll be keeping an eye on it.
Hendricksons have long been a favorite springtime hatch for Eastern fly fishermen. In the Smokies, they typically follow the Quill Gordon and Blue Quill hatches by two or three weeks. Most years, that means we don’t see Hendricksons until mid to late April. Because a warm stretch of weather in February triggered an early Quill Gordon hatch, things are a little out of whack and we are beginning to see Hendricksons now. I expect them to be around until about mid April.
Like many hatches in the Smokies, Hendricksons rarely come
off in enormous, widespread numbers. But in the right place at the right time,
you can find enough of these bugs to inspire some steady rises from trout. And
while generic, attractor fly patterns will get you through most situations,
having a fly that more closely matches what the fish are seeing never hurts!
Hendricksons hatch sporadically throughout the day in the
Smokies but tend to be most active in sunny areas during the warmest part of
the day. Most days this time of year, that means in the 2pm – 5pm range. They
inhabit all types of water but I tend to see emergence occurring most in slow
to medium currents.
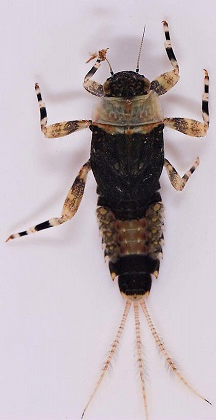
Hendrickson Nymph
The nymphs are not particularly good swimmers and they have an unusually robust profile. This combination of traits makes them very popular with the trout. Their color varies from reddish tan to dark, reddish brown. Tan and olive Hare’s Ear Nymphs work well for imitations. Whitlock’s Red Fox Squirrel Nymph is another great pattern during this hatch. Pheasant Tail Nymphs provide a nice color match but are pretty slender compared to the beefy naturals. In any case, they range in hook size from #14-12.
The adults also vary a bit in color. Much of that depends on the gender of the bug. The males tend to be darker, varying from grayish olive to grayish brown. However, the females are often a little lighter, sometimes taking on a tan or even pinkish hue.
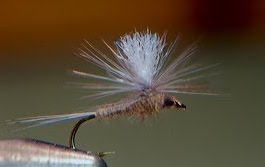
Parachute Hendrickson
While there are certainly numerous fly patterns specifically designed to imitate all of the variations of a Hendrickson, you can do pretty well with generic patterns as well. A Parachute Hare’s Ear works well, particularly when you’re seeing more of the lighter colored adults. And there’s always the Parachute Adams, especially when you’re seeing the darker variations. Like the nymphs, you’ll best match the naturals in sizes #14 – 12.
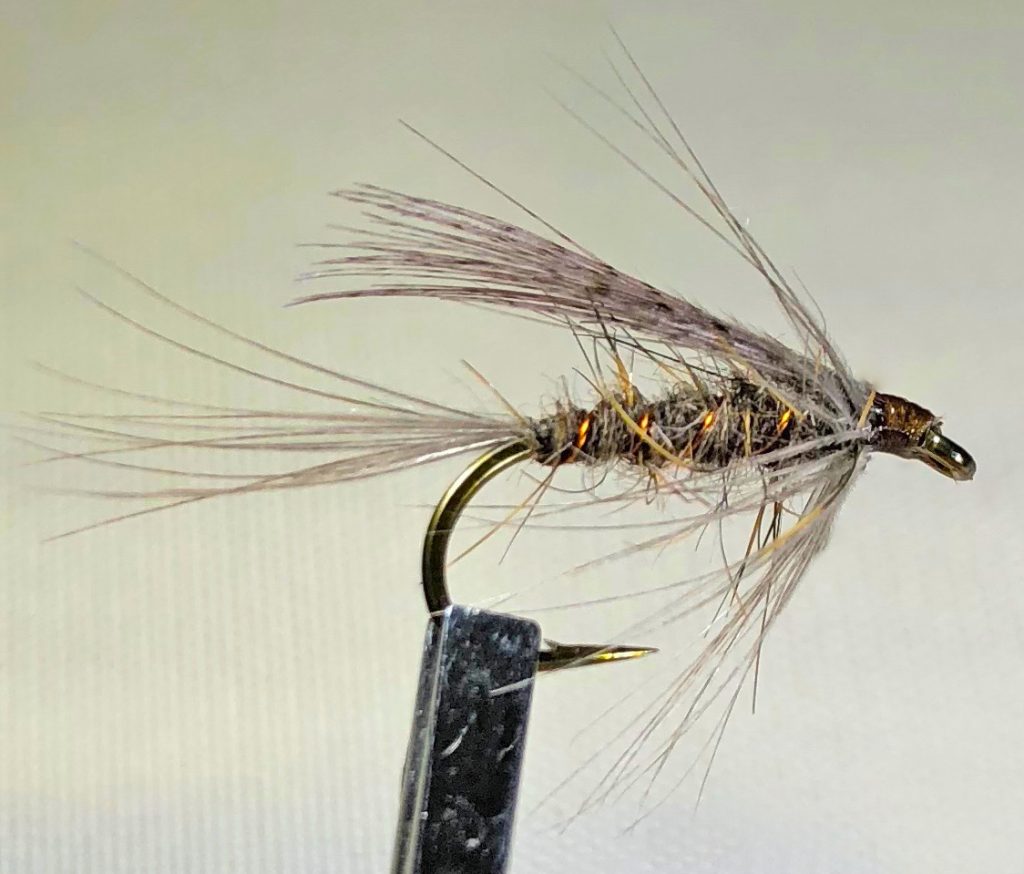
Early Season Wet Fly
Finally, trout love taking the emerging insects during this hatch, so a wet fly can be an excellent choice. One of my favorites is the Early Season Wet Fly. I often fish it in tandem with another fly. Try it as the top fly of a nymphing rig with a Hare’s Ear or Red Fox Squirrel nymph down below. Or tie it as a dropper off the back of your dry fly of choice.
For beginners, the leader and tippet represent one of the most misunderstood, or unrealized, components of critical fly fishing gear. Many don’t understand the relationship between the tippet and leader or tippet and fly, while others simply don’t understand what the difference is between the leader and tippet. And while intermediate anglers may have a working knowledge of how the tippet relates to the fly, few take the time to contemplate how the right overall leader design can contribute to their success on the water.
To better understand leader design, let’s start from the beginning and define what the leader is. In simple terms, the leader is the monofilament connection between the heavier plastic fly line and the fly. While it varies in length, the leader typically measures between 7 1/2′ and 9’ and has two primary purposes: To allow for a less visible connection from fly to line and to transfer energy during the fly cast. It tapers from a thick butt section that attaches to the fly line, down to a very fine section that attaches to the fly. The finest section that attaches to the fly is referred to as the tippet.
So, the tippet is the piece
attached to the fly and its appropriate size is determined by what size fly you’re
fishing and how you’re fishing that fly.
At least those are the primary reasons.
Other factors such as water level, water speed, and clarity can also
contribute to that decision. Smaller
tippet sizes are not only less visible to the fish, they offer less resistance
in the water, allowing for such benefits as less drag and/or faster sink
rates. Of course, smaller tippets are
not as strong, but when dead-drifting dry flies or nymphs, the fish is
typically “sipping” the passing fly, not ambushing it, so it is not often an
aggressive strike that will snap the line.
Rather, you are lifting the rod and tightening the line somewhat
smoothly, and then all of the shock absorbing properties of your rod come into
play to, when used properly, help protect that fine tippet and keep it from
breaking.
However, when fishing a streamer
fly, you are usually stripping the fly to suggest the movement of a wounded or
fleeing baitfish, crayfish, etc. This
will most often provoke a more violent strike from the fish, and too light a tippet
will often snap under such a jolt. Since
you are imparting movement on these flies anyway and a dead drift is not
desired, a heavier tippet will better move the fly and better withstand the
more aggressive strike.
Tippet Sizing Chart
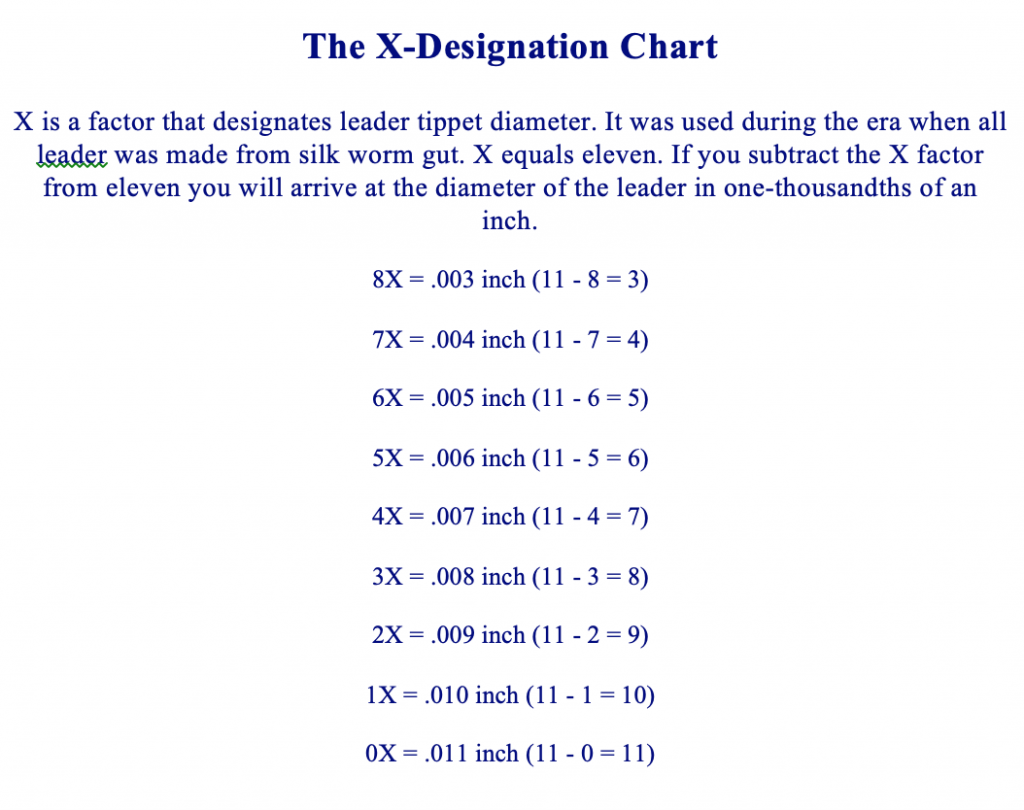
In essence, you want the tippet to balance with the fly for a more efficient cast and drift. For this reason, tippets are sized primarily by their diameter, but also have pound test ratings like spin fishermen may be more accustomed. Those details are all given in the fine print on a tippet spool or leader package but the most obvious marking is a single number followed by an “x” – 4x, 1x, 6x, etc.
It’s a strange system that can be confusing at first, but it relates directly to the diameter of the tippet, so 6x does not mean 6 pound test. Rather it all corresponds to the base measurement of 0x tippet, which is .011”. If I subtract the diameter of my tippet from this base of .011” I get the appropriate “x” designation and vice versa. In other words, if I have tippet that is .005”, 11 – 5 = 6, or 6x. On the other hand if I subtract the “x” number from .011”, it gives me the actual diameter. For 3x, 11 – 3 = 7, or .007”. I know. Wouldn’t you think there’d be a simpler system?
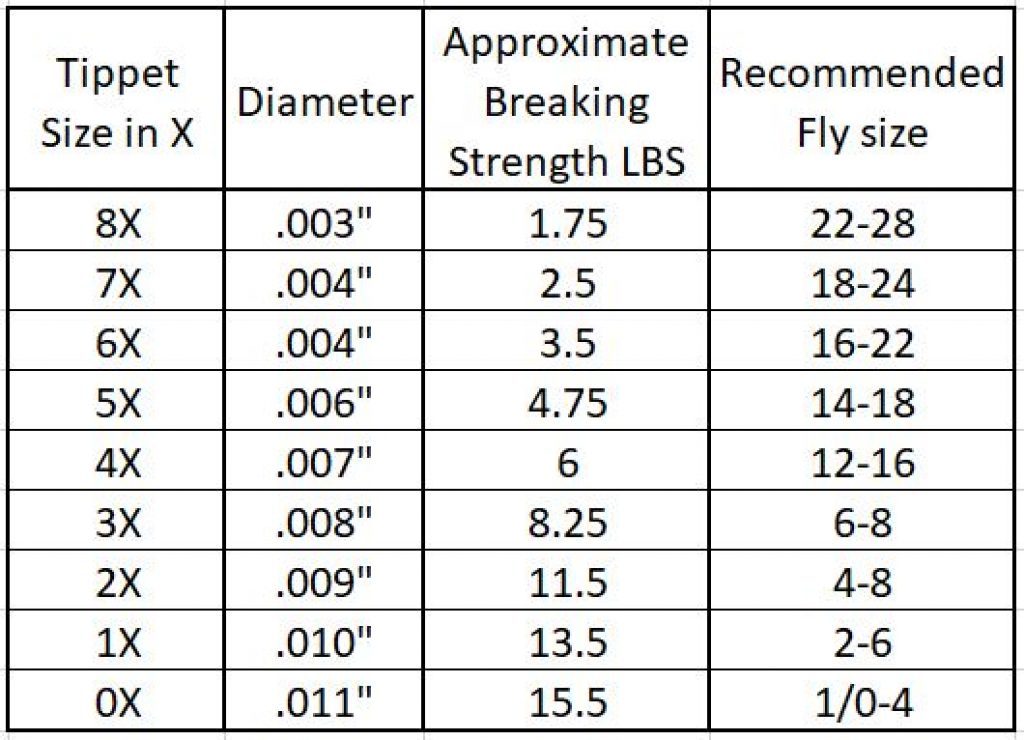
What you should notice is that the bigger the number, the smaller the tippet. So, 6x is smaller than 3x. Fly (hook) sizes work the same way. A size #18 fly is considerably smaller than a #4 fly. But if you know the size of your fly, there is a pretty simple formula to determine the perfect tippet size to match it. Take the size of the fly and divide by 3. As example, for a size #12 fly, the perfect tippet size is a 4x. Who knew there would be so much math in fly fishing?
Tippet to Fly Sizing Chart
It doesn’t need to be this scientific, but using this formula will give you a good baseline in determining a tippet size that will balance with your fly size. You can always fudge up and down as needed. Just keep in mind that when using the above formula, the more you stray to the small side of ideal, the more difficult it will be to turn the fly over with a cast and there’s a better chance of snapping the fly off. The more you stray to big the big side of ideal, the more visible your tippet will be and the more it will negatively impact natural drift.
Without trying to complicate
matters too much, the length of the tippet will also impact things like how
freely the fly drifts. For example, if
you’re trying to dead-drift a size #14 dry fly, you will likely be able to
better achieve a drag-free drift with a 5x tippet that is 20” long than with a
6x tippet that is 10” long. Conversely,
if you are trying to impart movement on a streamer, a 4x tippet that is 10”
long will provide much more control and immediate movement than a 3x tippet
that is 20” long.
All of this is a piece to a
bigger part which is the leader, and a lot of people don’t understand the
difference in the two. Tippet is just a
part of what makes up a leader just like tires are part of what makes up a car. If you merely tied 9’ of straight tippet to
the fly line, you would certainly be able to execute good drifts but you would
have an extremely difficult time casting the fly where you wanted to and would
regularly experience the fly and tippet landing in a pile, just inches from the
fly line.
Therefore, the leader is tapered and consists of three parts: The butt, the taper, and the tippet. We already know what the tippet does. The thicker butt section turns the leader over with the rest of the cast, which helps eliminate piling. The taper section essentially dampens the energy of the fly cast, allowing the fly and tippet to land softly on the water.
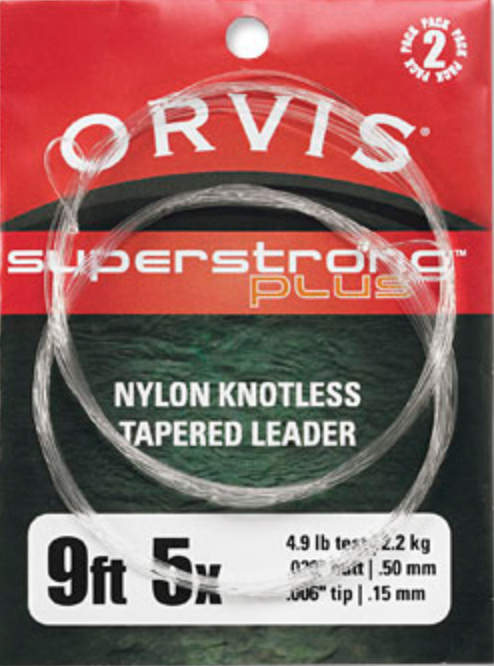
When you buy a tapered leader at
a fly shop, it is usually knotless. They
achieve the taper by running the nylon material through a machine. On the package, it will indicate the leader’s
overall length and its tippet size. So it
might indicate that it is a 9’ 5x leader.
In fine print, you can also see the exact diameters of the butt and
tippet as well as the pound test. It has
tippet built in and is ready to go right out of the package. So what’s with the spools of tippet?
Spool of Tippet
Tippet material can also be purchased on a spool with a number designation as described earlier – 3x, 4x, 5x, etc. This is purely straight tippet with no taper and its primary purpose is to rebuild or alter your leader. When you wear out the tires on your car, you can replace them without having to replace the entire car, and it’s the same with a leader and tippet. Through the course of a day, the tippet on your leader will get gradually shorter as you change flies. Or it may quickly get dramatically shorter if you hang up in a tree or two. What started out as a 9’ 5x leader is no longer 9’ and no longer 5x.
Rather than going to the trouble and expense of changing the entire leader when this happens, you can simply pull an appropriate length of 5x tippet off the spool, tie it to the leader, and you’re back in business. Over time, you’ll cut back so far into the taper that you eventually have to change the leader, but by rebuilding with tippet, you can significantly extend the life of your leader.
As mentioned, you can also use tippet material to alter your leader. You may be using a 9’ 6x leader and want to add an additional few feet of 6x for a better drift, making it a 12’ 6x leader. Or you may be changing flies that vary dramatically in size and style. For example, you might be stripping a #6 Wooly Bugger on a 7 ½’ 3x leader when a hatch of #16 Sulfurs starts to come off. Instead of changing your entire leader, you can simply add a couple of feet of 6x tippet and you have a 9 ½’ 6x leader. Just be sure you’re adding the same size or smaller. Adding a bigger piece to a smaller piece will not only create a weak link above the final section of tippet, it will also create an undesired hinging effect in the leader.
I sometimes tie my leaders rather than buy them from a fly shop. This is done by knotting together different diameters of monofilament to achieve a taper. There are established formulas you can use for this, but through the experience of trial and error, I developed my own formulas that best suit my needs. While I have a lot of specialty leaders, my go-to, everyday trout leaders are all tied ahead of time in a length of 7 ½’ to a tippet size of 3x. Since I’m rarely fishing a tippet size bigger than 3x for trout, this allows me the flexibility to add the final piece of tippet on the stream to match the fly and situation. If I’m going to fish a #14 Parachute Adams, for example, I’ll add a 2’ section of 5x and I’m ready to go.
I first started tying my own leaders when I was on the limited budget of a college student because I realized I could pay $3.50 for a leader or I could make them for about 30 cents each. Over the years, I continued making my own because I prefer them and like being able to design them for my needs. For instance, I find the commercial trout leaders to have too big of a butt section and I don’t like the way they turn over or straighten out. By using a thinner diameter butt and a different type of monofilament for the butt and taper sections, I get a leader that turns over and lays out beautifully. I also like having a few knots throughout the leader as locations to place split shot and strike indicators without them sliding down the line.
I have a variety of other specialized leaders for specific situations. My bass leaders have thicker butt sections to turn over large flies. I have hatch leaders that are long and thin, designed to achieve perfect drifts over wary trout. And I have shorter, small stream leaders for punching flies under tree limbs in extra tight conditions. I also make short leaders designed to fish on sink tip lines when streamer fishing big water.
These are all things to take into
consideration when making your own leaders or even when you buy them at the fly
shop. Understanding the basics like
length and tippet size will inevitably make a difference in your success on the
stream. Better understanding how the
butt and taper figure into the equation will give you vital tools to begin
catching fish that other anglers can’t!
In the general population of humans, you regularly find two
extreme views when those humans are contemplating two similar items that are
priced significantly different. One perspective reasons that the two items are
so similar that there is no way the more expensive item could be that much
better. The other perspective assumes that because an item is more expensive,
it must be better. When it comes to
choosing fluorocarbon or nylon fishing line, you can bet both of those assumptions
are regularly made. And both of those assumptions are very wrong.
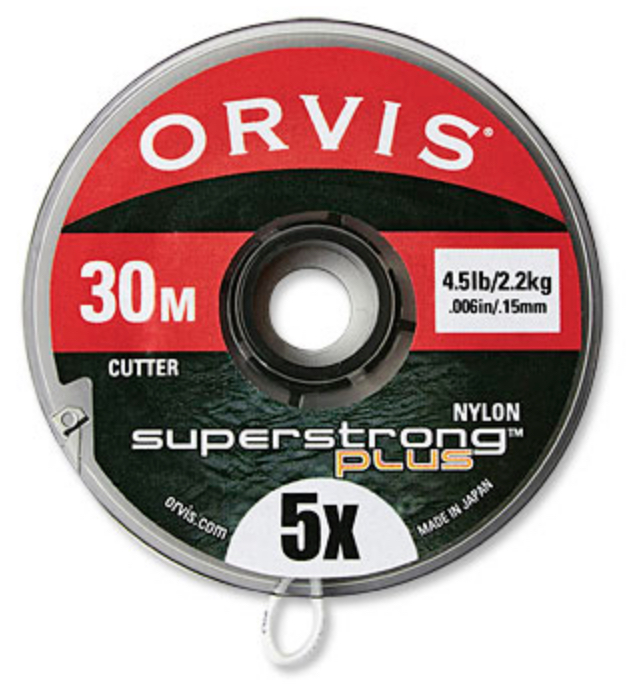
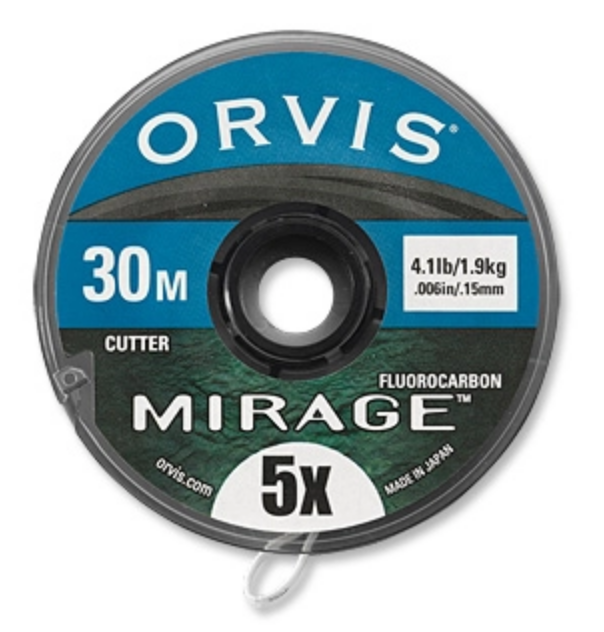
Fluorocarbon began gaining popularity as a material for fishing line in the early 2000’s. It was billed as invisible and came with a cost nearly three times that of its nylon counterpart. That pricing disparity is still present today. For example, a 30-meter spool of Orvis nylon tippet costs $4.95. A 30-meter spool of Orvis fluorocarbon tippet costs $14.95. That’s a pretty big difference! But is fluorocarbon that much better?
First, it’s important to understand that the higher price of
fluorocarbon is more a result of its manufacturing process than it is its
fishing value. With that said, it does have some significant advantages over
nylon, but it has a few disadvantages too.
Where you’re fishing, what you’re fishing with and what you’re trying to
accomplish should ultimately determine which material will best suit your
needs. Below is a categorical contrast
between fluorocarbon and nylon to help you decide.
Strength:
When you compare nylon and fluorocarbon of the same diameter, it will vary a little from brand to brand, but fluorocarbon nearly always has a higher breaking strength. And fluorocarbon is a harder material so it is significantly more abrasion resistant.
Visibility:
The light refractive index of fluorocarbon is very similar to that of fresh water. For this reason, it is far less visible in the water than nylon. Do you want to see for yourself? Take a piece of 5X nylon tippet and a piece of 5X fluorocarbon tippet and dip them in a glass of water.
Density:
Fluorocarbon is denser than water, which means it sinks. That’s a good thing if you’re trying to drift a nymph near the bottom. It’s not a good thing if you’re trying to drift a dry fly on the surface. Nylon suspends on the water, making it a far better choice when fishing dry flies.
Knotability:
Nylon is far suppler than fluorocarbon, giving it a big edge when it comes to knots. Because fluorocarbon is stiffer, the knot often doesn’t seat properly. Since the knot is always the weakest link in your set-up, this can sometimes offset the superior breaking strength of fluorocarbon. When tying knots with fluorocarbon, take your time and use extra care to ensure that your knots seat well.
Summary:
I personally use both of these materials, depending mostly on where I’m fishing. In the Smokies, I fish a lot of dry flies. And even when I’m nymph fishing, it’s usually in fast, broken water where line visibility is just not an issue. For those reasons, I almost exclusively use nylon. Fluorocarbon just doesn’t seem to provide any real advantage.
However, on many tailwaters like the Clinch, most of the
runs are very clear, unbroken and slow moving. Therefore, line visibility can
be a major factor. Additionally, I am fishing with nymphs probably 90% of the
time on rivers like the Clinch. Other than the handful of times I’m using a dry
fly, you can bet I have fluorocarbon tippet tied to my fly on the tailwaters.
What I do not use, however, are fluorocarbon leaders. Even when I’m nymphing, I still need to control the depth of the fly and I don’t want the entire leader to sink. On the Clinch, I’m usually only fishing a couple of feet deep. So, I prefer to use a traditional nylon leader with the appropriate amount of fluorocarbon tippet attached to the end.
Another situation when I routinely use fluorocarbon is when
I’m sight fishing for carp on mud flats. The water on these flats is usually
slightly stained so tippet visibility is not a great concern. But I’m hooking a
commonly 5 to 20-pound fish in about a foot of water. That fish is inevitably
going to run me over rocks and chunks of wood while I fight him and I like
having the superior abrasion resistance of fluorocarbon to get him landed.
In conclusion, don’t let price dictate your choice one way
or another. Think about the place you’re going to be fishing. Consider the
methods you’ll be using. Weigh these things in your mind and choose the best
tool for the job!
From Townsend, travel southeast on 73 to GSMNP
entrance. At the “Y” in the road, turn
left toward Gatlinburg on Little River Road.
This road will follow Little River for approximately twelve and a half
miles and provide numerous pull-offs throughout. The lower stretch has fewer trout but offers
opportunities for smallmouth. The trout
you find in this stretch will be a mix of wild fish and the occasional stocker
from Townsend. The trout fishing gets
much more consistent above “The Sinks,” which is about five and a half miles up
the road. Near the twelve and a half
mile point, you can turn right toward Elkmont Campground and continue to access
the river by road up to the campground entrance. The river winds through the campground and
can be accessed by foot.
Alternate Route:
To skip approximately the bottom eight miles of river, you
can come in from Wears Valley Road which runs from Townsend to Pigeon
Forge. From Townsend, turn on Wears
Valley road at the only traffic light in town.
At about six and a half miles, turn right on Lyon Springs Road. This road will eventually end at Little River
Road at Metcalf Bottoms picnic area, approximately two and a half miles above
“The Sinks.”