A while back I shared a video on how to tie the Double Surgeons Knot. The Blood Knot is used to accomplish the same task, to splice two pieces of tippet together. However, there are a few differences between these two knots.
Day in and day out on the stream, I’m going to use the Double Surgeons. It’s quick and easy to tie and it’s a little bit stronger. It also does a better job than the Blood Knot when it comes to connecting tippet that varies significantly in diameter.
The downside to the Surgeons Knot is that it sets a little cockeyed and it’s a little bulkier knot. Neither of these things matter much when you’re working with 5X tippet. You probably won’t even notice. But when you’re splicing thicker pieces of mono together, like butt and mid sections of leader, a more uniform and less bulky knot becomes extremely important. And that’s when the Blood Knot is at it’s best.
Additionally, I’ll sometimes use the Blood Knot with smaller tippet if I’m rigging a two fly rig where I want the top fly to swing independently, rather than fixed as with the in-line system. Fishing two wet flies is a perfect example of when I might do this. I can tie a Blood Knot and leave one of the tags long to attach the top fly. The tag ends on a Blood Knot come out at a perfect right angle and foul far less than the cockeyed tags on a Double Surgeons.
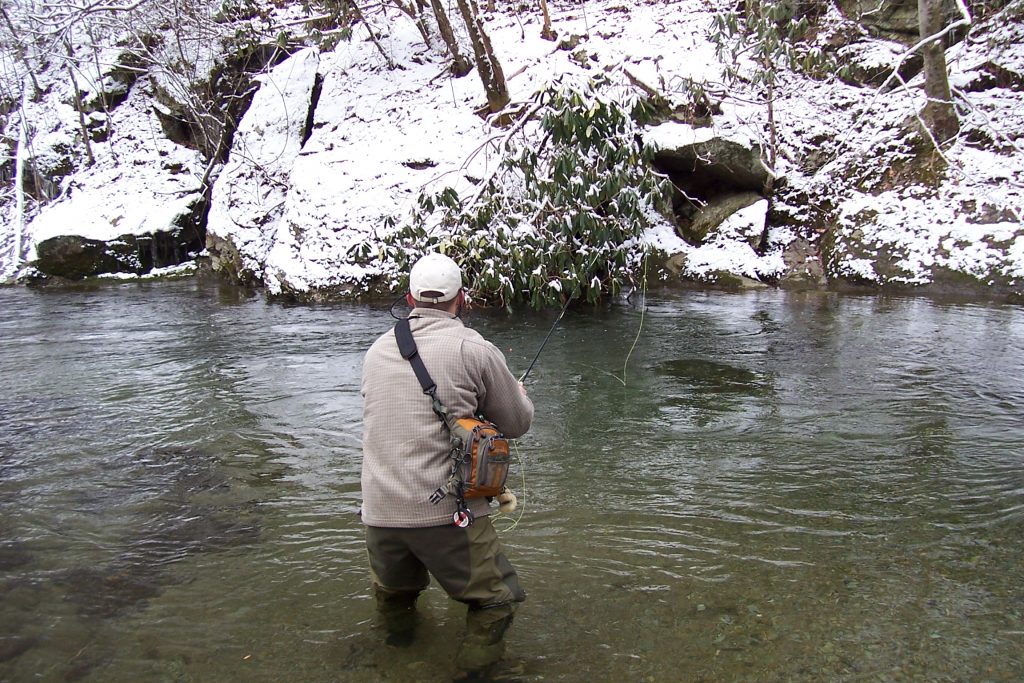
January has been relatively mild for the most part but very
wet. So water levels have been up more than they’ve been down. And even in a
mild January we’re talking about water temperatures in the 40’s at best, so not
exactly stellar fishing. But a few fish have been caught and the mountains look
completely different in the winter, so it’s always nice to get out.
February will likely be more of the same. You never know what you’re going to get around here but February usually stays pretty cold and things don’t consistently start warming up until about mid March. I know I sound like a broken record but I do find myself having to explain this to wannabe winter fishermen more than anything else… It’s not that I’m worried about being uncomfortable in the cold. I have great gear and don’t mind the cold one bit. It’s all about the water temperature with wild fish and if that water temperature is significantly below 50-degrees, they just don’t do much feeding.
And in the winter, it takes a lot to reach those
temperatures. Even when you get a couple of nice 60-degree days, the overnight
lows are still often in the 30’s and your water temperature just won’t climb
much. When the days get longer and the overnight lows get warmer, you’ll start
to see better water temperatures and active fish!
If you do get out this month, expect to be nymphing. Go with darker patterns and try to fish them right on the bottom, focusing on pools and slower runs. Here’s a little bit on winter fishing in the mountains.
Delayed Harvest
February is the last month for Delayed Harvest streams. These stocked fish should be quite a bit more active than their wild brothers in the Smokies. However, by February, poaching has usually taken its toll and there just aren’t a lot of fish left. Nymphing will definitely be the ticket on these streams. Standard nymph patterns are worth a try and anything bright and shiny is a good bet!
Clinch River
As usual, the fishery that does have good water temperatures year round and should fish well in the winter is cranking 2+ generators 24 hours a day. Last year was a tough one on the Clinch. A very wet spring resulted in very few days of low water. Unfortunately, this year is starting out the same way. Man, every year seems to be flood or drought. Is an “average” year too much to ask for?
Every year, it seems every fly rod company comes out with a
new rod that is not only supposed to cast itself, but is substantially lighter
than its predecessor. As a matter of fact, the average graphite rod today is
probably about 1/3 the weight of the average graphite rod of 30 years ago. And
that difference is far more substantial when you start comparing the weight of
today’s graphite rods to the bamboo and fiberglass rods that your father or
grandfather may have used. But none of this matters if your rod is not properly
balanced by your reel.
It’s a phenomenon called “levered weight.” If you carry two
20lb. buckets of water, one in each hand, it will feel more comfortable than
carrying just one 20lb. bucket of water in one hand. One side balances out the
other. The same concept applies if you have the lightest fly rod on the market
but have a reel on it that is too heavy. It will feel heavier in your hand than
a heavier rod that is properly balanced by its reel.
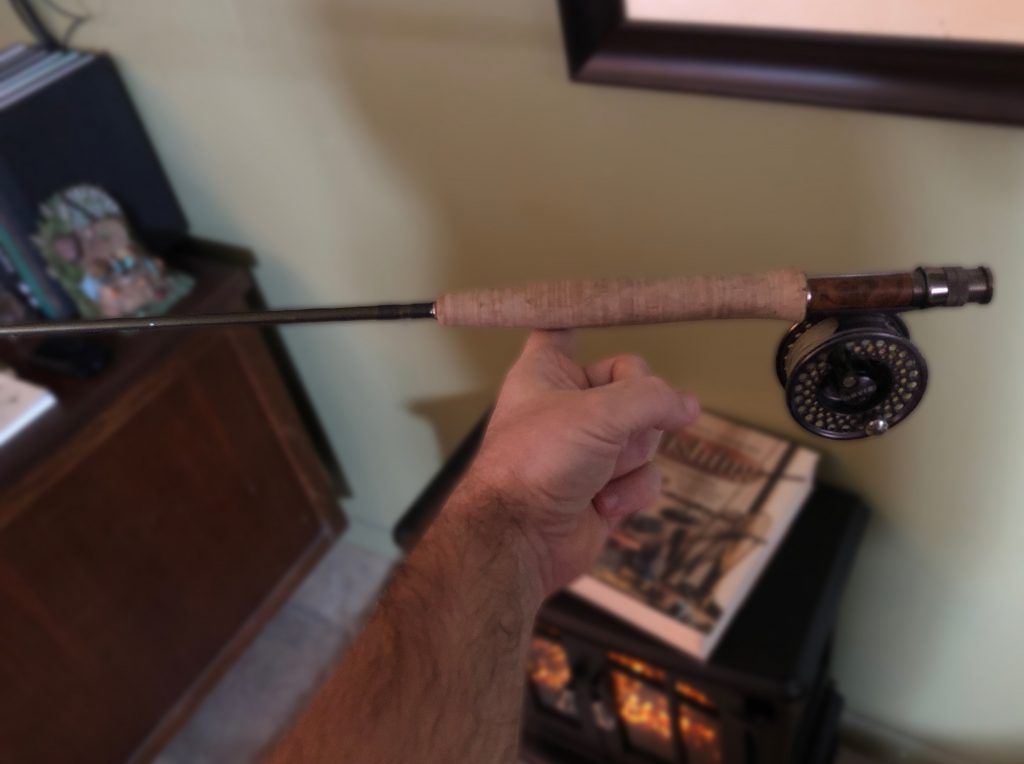
Pretty well balanced rod
When it comes to trout fishing and really, most freshwater in general, your reel does not play a very significant role. Unless, you just have to have “the best,” it is not necessary to sink a lot of money into a reel. However, just because it may not be the most important piece of equipment, doesn’t mean you shouldn’t put some consideration into things like its size. It needs to be big enough to comfortably hold the fly line and appropriate amount of backing, and it needs to balance the rod. In most cases, a rod and reel are balanced if it will self-balance when you set it on one finger positioned near the tip of the cork grip.
In the picture above, the reel is just a little too heavy for the rod. I prefer the balance point to be just a little closer to the tip of the cork. But it’s close enough to not feel uncomfortable.
Most companies will designate specific reel sizes for specific line and rod sizes. If a reel is for 4 – 6 weight lines, it not only means it has the capacity to store those line sizes, but it should balance most 4 – 6 weight rods. Of course, things like the material from which the rod is made and the length of the rod can determine if it actually falls in the “balance range” of that particular reel. If your rod is a short, super light 4-weight, you may want to bump down to the next smaller size. On the other hand, if your rod is a 6-weight bamboo, you may want to bump up to the next larger reel size.
The design of the reel seat on the rod will also be a factor. Almost all modern graphite rods have an uplocking reel seat, which positions the reel just behind the cork grip. Some bamboo rods may have a downlocking reel seat, which puts the reel almost right at the butt of the rod. The latter can help when trying to balance a heavier rod.
As reels become lighter and lighter, it has become far more difficult to find appropriate size reels to balance bamboo rods. However, one reel manufacturer, Ursus, has designed a reel that has removable brass plates on the interior. The weight of the brass plates help to balance heavier bamboo rods. When using the reel on a lighter graphite rod, the plates can be removed. Pretty cool.
In any case, no matter what rod you fish with, keep this in
mind when selecting your reel. It will greatly reduce casting fatigue and
result in much more enjoyable days on the water!
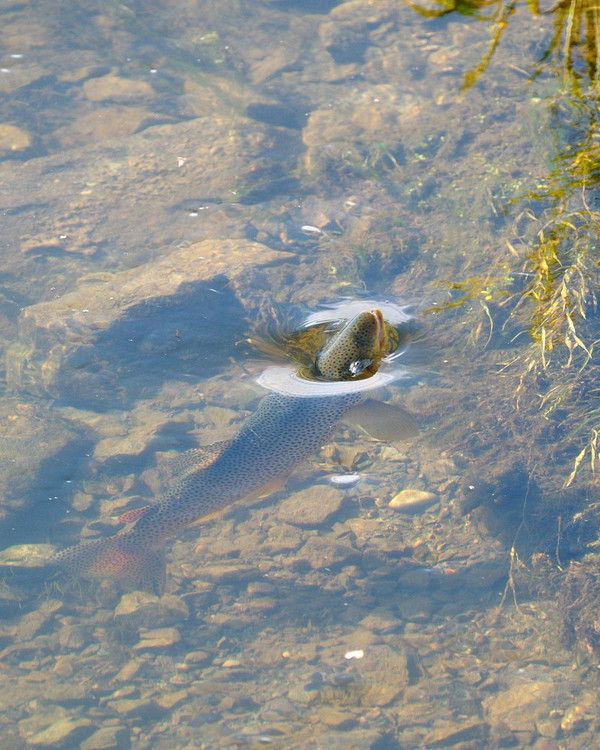
When a trout feeds on or near the surface, it creates a ring
in the water that can appear as a violent splash or a mere dimple. Recognizing
certain characteristics of this rise ring can tell you a lot about where the
fish is positioned, where his feeding lane is, his size and possibly what he’s
feeding on.
Lengthy chapters of vast and detailed information on this topic can be found in a number of well known fly fishing books. I recommend reading them. This article will attempt to condense that information into a useful overview. As always, these are general rules to which there are always exceptions!
Dimple Rise
Common or Simple Rise
A common rise is characterized by a quick view of the trout’s head, dorsal fin, and often “wagging” tail, followed by a boil of water. It indicates that the trout is positioned near the surface and feeding on insects on the surface or near the surface film. The insects are probably medium to large in size. Because of the increased exposure to predators, trout rarely position themselves near the surface unless there is a lot of food available. So, if you see this kind of rise, keep watching. Chances are you will see the same fish repeatedly feeding.
Surface Swirl
The surface swirl is similar to the common rise but without
the appearance of the head, fin or tail. You only see the water boil. In this
case, the fish is probably positioned within a foot or two of the surface and
is feeding on insects at least two inches below the surface. You can spend
hours casting dry flies to these kind of rises without a take, but an
unweighted nymph or wet fly fished just below the surface can be deadly.
Poking or Dimple Rise
As the name implies, this rise form appears as just a dimple on the surface and if you look carefully, you can often see just the nose of the trout penetrate the surface. This rise form also suggests the trout is positioned near the surface but likely feeding on small insects on or just below the surface. This type of rise is most often seen in slower pools and runs, slow edges of currents and eddies.
Splashy Rise
When a rise ring is more of a splash, it can mean a few things. Usually, it just indicates that the trout is positioned deeper in the water. By traveling farther up the column for food, the trout’s momentum often results in more of a splash on the surface. If the trout is positioned deeper, this was likely an opportunistic rise from a fish not necessarily focused on the surface. You may never see him come up again.
Similarly, trout feeding on insects that emerge and get off
the water quickly can display a splashier rise. Caddis flies fit this description,
so many anglers assume (sometimes incorrectly) that a splashy rise means trout
are feeding on caddis. And sometimes a splashy rise can simply be the result of
a smaller, eager trout rising recklessly.
Gulping Rise
A gulping rise is like a greatly exaggerated common rise.
The trout’s mouth is wide open and his entire backside breaks the surface,
followed by an often audible “gulp.” You’re likely to see this type of rise
during very heavy hatches when there are frequently multiple bugs very close
together on the surface. The trout may eat as many as six bugs in one rise. If
you’re seeing this, you’re at the right place at the right time. Try to match
what you see on the water and don’t get your leader in a big tangle!
Jumping Rise
A jumping rise is when the trout completely clears the water, sometimes by a few feet! This could mean the fish is feeding on bugs in the air just above the surface, or possibly something large like a mouse or even baitfish. In any case, a jumping rise suggests a brief moment of opportunity and not a steadily feeding trout. I don’t recall ever standing in a pool and seeing dozens of trout routinely jumping out of the water. Most experienced anglers recognize the jumping rise as fool’s gold, shake their heads and move on.
Where is the trout?
As mentioned above, certain types of rise rings can suggest
how deep the trout may be. However, there are other things to consider when
determining where in the stream that trout is positioned.
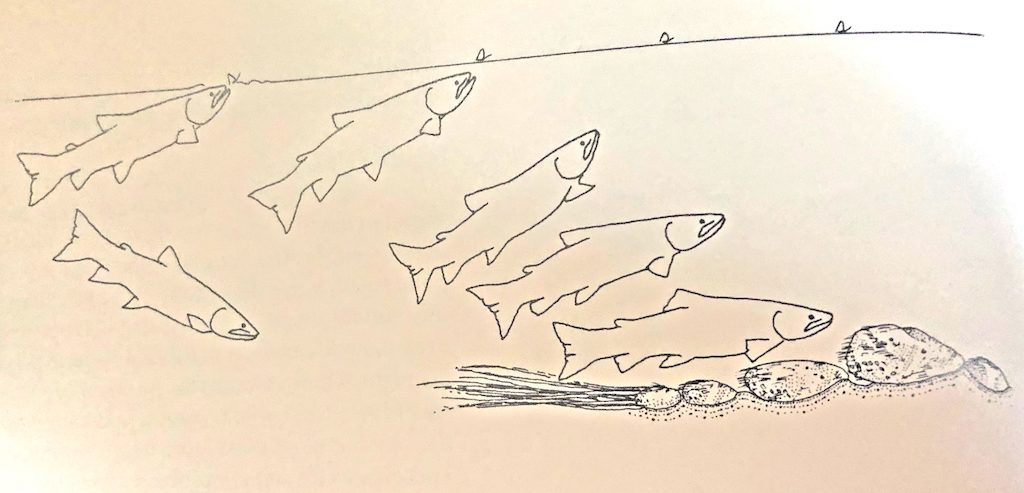
Trout Position vs. Rise Location – Illustration by Jason Borger
First and foremost, when a trout rises in a stream, he is
going to drift back during the process, then return to his original position. So
the trout is actually positioned upstream of where you saw him rise. If he is
holding near the surface, his position may only be a few inches upstream of the
rise. If he’s holding in deeper water, his position may be several feet
upstream of the rise.
When a trout rises, you’re also going to see a “push” of
water, like a little wave. That wave usually pushes upstream. But if the wave
pushes to one side or another, it indicates that the trout came over to feed.
So, he may be holding in one lane and feeding in another.
There’s a lot to this, I know. The best advice I can offer
is when you see a trout rise, don’t immediately cast a dry fly to that spot.
Think about what the rise looked like and stop and look for others. Identifying
rise rings may not give you all the answers, but it will give you a great place
to start!
Caddis flies have just never been given the same attention
as mayflies by fly fishermen. Pick any mayfly out there and it’s not difficult
to find its Latin name and a separate common name. Likely, you’ll also find
multiple fly patterns imitating every possible stage of just that one
particular species.
That’s not the case with caddis. They are often just described by their size and color: green caddis, yellow caddis, dun caddis, etc. Sure there are different patterns out there like the Neversink Caddis and the Henryville Special, but they are just different variations of generic patterns, intended to represent a host of different caddis by varying the size and color. I don’t know exactly why that is, but I suppose in a sport where we often overcomplicate things, a little simplicity is refreshing. But don’t confuse simplicity with lack of importance as caddis flies can be found on most every trout stream in the United States.
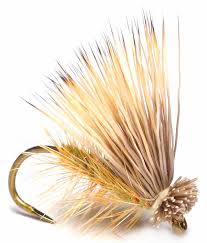
The most popular and widely used fly pattern for a caddis adult is the Elk Wing Caddis, also called the Elk Hair Caddis. It was created by Pennsylvania fly fishing legend, Al Troth, in 1957. At least that seems to be when it was first written about. I’m sure he was fishing it before then. Since that time, it has become a staple in most every fly angler’s box not only as a caddis imitation, but also as an effective searching pattern when no hatch is present. It’s a great fly in the Smokies almost all year.
Seasonal Variations
In the early spring, I use smaller versions, usually with darker bodies to represent the darker caddis and stoneflies we see that time of year. As we get into late spring and early summer, the patterns get a little bigger and lighter, with tan bodies mostly. From late spring through early fall, a yellow body makes a great imitation for the prolific Little Yellow Sally stonefly. And by fall, I’m back to using tan, olive and even rust colored bodies.
The Elk Wing Caddis is a fairly simple dry fly to tie and again, allows for a lot of variation. By changing the color of the body, the hackle and/or the wing, you can imitate most any down-wing fly on the water. Below is a recipe for the Elk Wing Caddis I fish most often.
Elk Wing Caddis – Tan
Hook: Standard dry fly, size 16-12* Thread: Brown 8/0 Hackle: Brown rooster, palmered Body: Superfine dubbing, tan Wing: Natural elk hair
* This is the common size range in which I tie this tan caddis. General hook size for caddis imitations can range from size 10 down to size 20 (and smaller).