Finding the Perfect Mountain Fly Rod

The Forgotten 4-weight

Orvis Superfine fly rod, Patagonia pack and Richardson chest fly box

Everyone is always looking for the one easy answer to a question and the one simple solution to a problem. In fly fishing, maybe it’s the dry fly that won’t sink, the nymph that won’t hang the bottom, the wading boot that won’t slip or the perfect size mountain fly rod. Well, I can tell you if you’re still hoping to find any of those things, you will be sorely disappointed. But with the latter, the perfect size mountain fly rod, I believe you can come close!

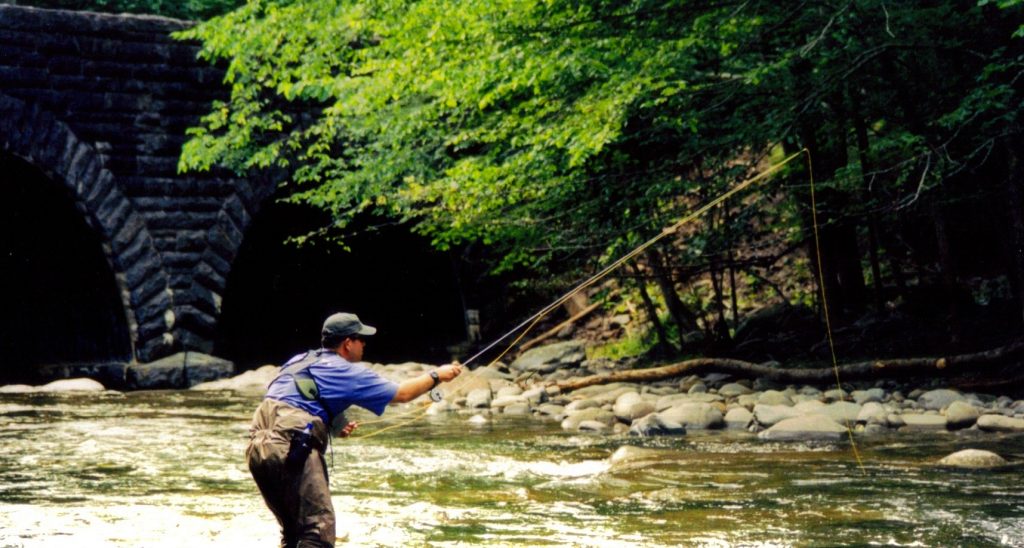
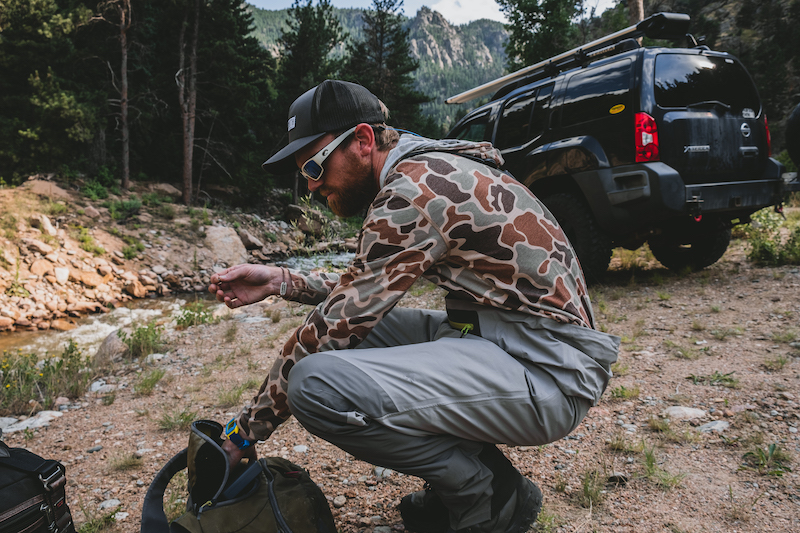
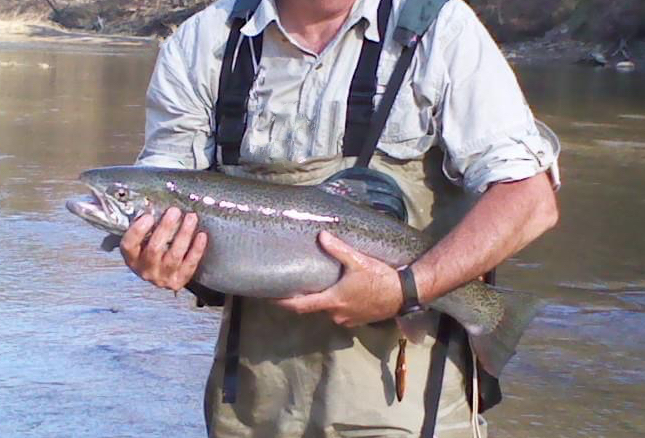
A few years ago, I was guiding a couple of guys on what I would classify as a mid-size stream in the Smoky Mountains. They were both fishing 12’ tenkara rods and absolutely clobbering fish. They wanted to fish at the same time, so I had them spread out in different sections of the stream, and I repeatedly walked the trail back and forth between them to help and advise as needed.

During my travels up and down the trail, I ran into two other fishermen on three different occasions. They were friendly and chatted with me about the fishing each time. As usual in those situations, I was pleasant but tried to be brief. By the way, if you ever engage a working guide on the stream or trail and he or she seems short with you, don’t take it personally. They’re working.

But in my brief interactions with them, they were quick to tell me that they were not catching fish, and were asking for advice, mainly regarding fly patterns. The third time I saw them, they told me that they still weren’t catching fish but had figured out that the problem was their rods were too long. Each of them had a 7 ½’ rod. I didn’t have the heart to tell them that my clients were catching fish left and right with 12’ rods, but I did mention the benefits of longer rods and offered a little advice on how to fish the stream.

So, obviously you need a 12’ tenkara rod to catch a lot of fish in the Smokies, right? Wrong. I’ve seen plenty of fish caught on 7’ fly rods, too! Many anglers fall into the trap of blaming or crediting all of their success or failure on the gear, whether rods or flies. All of these things are just tools. And in the hands of someone who knows how to use them, all of these tools can be effective. A good carpenter will build a fine deck whether he uses a handsaw or a power saw. And a bad carpenter will build a crappy deck regardless of the tool he uses.

Of course, when it comes to choosing the right tool for the job, it often comes down to the task at hand. But it just as often comes down to the style, preference and philosophy of the person using the tool. It’s why I often give such cryptic replies to people who ask me what rod they should use in a specific location.

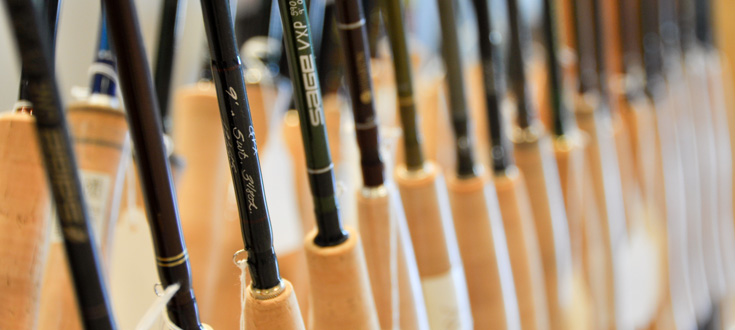
When it comes to mountain rods, or really, just trout rods in general, I immediately eliminate anything bigger than a 6-weight. Yes, you can catch a trout on an 8-weight, but unless you’re big river fishing with oversized streamers for huge trout, it just doesn’t make much sense. 3, 4 and 5-weight lines are really your bread and butter trout weights, particularly in the mountains. They’re heavy enough to cast most anything you’d need to cast, and still light enough to achieve delicate presentations and offer less drag on the water. 1 and 2-weight rods fall more into the specialty category. They are a lot of fun but a little too light to qualify as a legitimate all-purpose rod.

It’s similar when we talk about rod length. It used to be that everybody thought you needed a really short rod, like a 6 or 7-footer, to fish in the tighter streams found in the mountains. I think they envisioned making these really long casts and thought the shorter rod would help with that. However, for most folks who know what they’re doing on a mountain stream, the casts are very short, and a longer rod gives you more reach to keep the line off varying currents. Recently, we’ve gone the total opposite direction with folks wanting to use a long rod like the 12’ tenkara mentioned earlier, or an 11’ fly rod popular with what people like to call “Euro-nymphing,”

Small Mountain Stream
Tough place for an 11′ fly rod

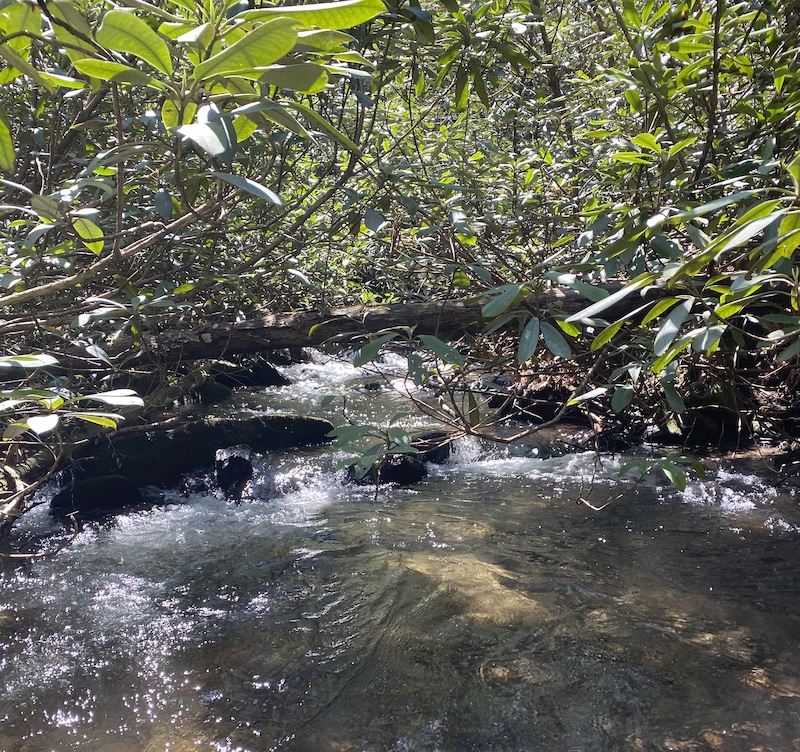
I am regularly asked by guide clients which rod they should bring for a particular stream, the 7’ 3-weight or the 11’ 2-weight. Most of the time, the answer is “either.” Which one do you enjoy fishing with? Because most of the time, neither one is ideal. They’re both specialty rods in my book. The 7’ rod will give you a decided advantage on very small streams and in tighter areas of a bigger stream, but the lack of reach will put you at a significant disadvantage in open pocket water. The 11’ rod puts you at a distinct advantage in larger rivers or open pocket water areas of smaller streams, but it will be a major hindrance in tight spots.

And that’s fine. Which one do you enjoy fishing with? The short rod? Just know that you’ll be sacrificing reach and make it work. The long rod? Just skip past the tight stuff. But if you’re looking for versatility on streams that vary in characteristics, you may want to shift more toward the middle.

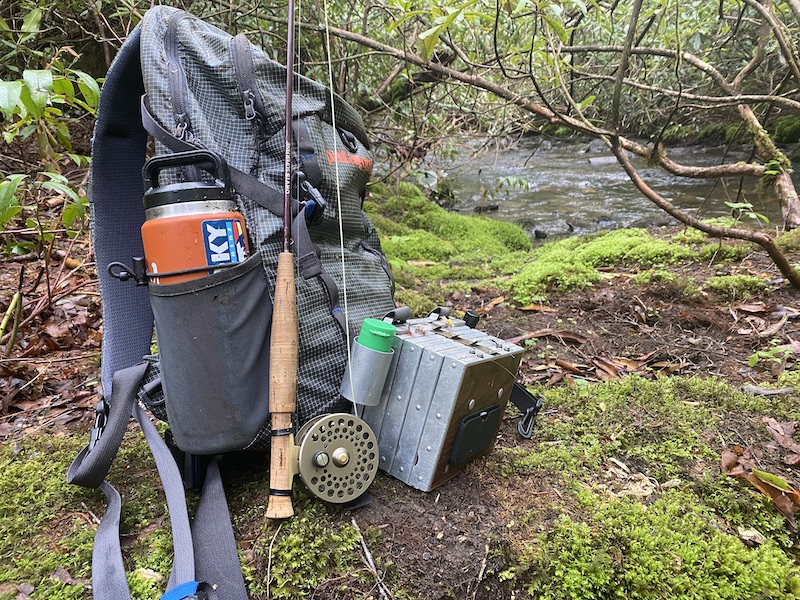
I said it 20 years ago and I still say it today. The perfect fly rod for fishing someplace like the Smoky Mountains is a 4-weight in a length between 8’ – 8 ½.’ Is it the absolute perfect rod for every situation? Of course not. But it’s the most versatile. It’s long enough to provide adequate reach when using high-sticking techniques in open water and it’s short enough to be able to maneuver in all but the tightest of streams. If I could only have one rod for the mountains, that’s what it would be.

Hopefully, if you don’t already, you will one day have the desire, passion and means to possess more than one rod for mountain fishing. But even then, I think you’re really pigeon-holing yourself by only getting rods at either extreme. I would start in the middle, with something like an 8 ½’ 4-weight, and add specialty rods from there.

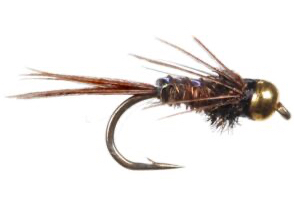
As fly fishermen, we often love to jump on every latest trend, usually in an attempt to improve or simplify. However, in these perpetual attempts to improve and simply, we often end up over complicating things. Because most of the time, the best fly to imitate that nymph is a Pheasant Tail, and the best rod to fish that stream is an 8 ½’ 4-weight.

Wet Flies and Soft Hackles

Late 1800’s Wet Flies

On numerous occasions I have been asked at the beginning of the day whether we’re going to be fishing dry flies or wets. But what the person usually means by “wets” is nymphs. Actual wet flies are a very specific style of fly that differ in many ways from a nymph. It’s a simple mistake that is of little consequence when chatting with your fly fishing guide. But making the same mistake when fishing on your own might be the difference in catching fish or getting skunked.

Let’s say you had the good fortune to run into another angler on the stream who tells you he clobbered them swinging a yellow wet fly. This is obviously a valuable piece of information. But if you tie on a yellow nymph and swing it through the currents, you’re likely not going to have much success. It’s kind of like assembling something and the instructions indicate that all you need is a Phillips screwdriver and you try to use a Flat Head.

Fly fishing terminology can be a bit confusing and sometimes overwhelming. However, learning this terminology will not only give you a better understanding of the sport, but will also help you better communicate with other anglers. One of the greatest sources of confusion for many is the topic of sinking flies. We’re going to ultimately focus more on wet flies, but let’s get started by listing different categories of sinking flies and what differentiates them.

Streamers

This is probably the easiest category to define so we’ll start here. Any imitation you fish with a fly rod is just generically called a fly. However, streamers are flies that sink and imitate something that swims. Flies that imitate things like minnows, crayfish and leeches are all types of streamers.

Streamer

These flies often have a long profile. They are frequently weighted with tin wire wrapped around the hook shank or a bead or cone on the head. However, some streamers are tied unweighted to be fished near the surface or to allow freedom of movement when fished on a sink tip line.

While there are always exceptions, streamers are typically fished with movement. The fly is often cast beyond a target zone and pulled through that zone by actively stripping the fly line.  

Nymphs

Nymphs are usually designed to imitate the juvenile stage of an aquatic insect. However, some fly patterns get lumped into the nymph category simply because they are fished like a nymph. For instance, a Green Weenie is thought by most to imitate an inchworm that has fallen in the water, not a juvenile aquatic insect. But since it is often fished subsurface on a dead drift, it is sometimes qualified as a nymph.

Beadhead Nymph

Compared to streamers, nymphs usually have a shorter, streamline profile that often tapers from a fuller thorax down to a slenderer abdomen. Many imitations, especially mayflies and stoneflies will include a tail and legs. Nymph patterns are commonly weighted by a brass or tungsten bead at the head or tin wire wrapped around the hook shank. For a variety of reasons, some nymphs may be tied unweighted, but this is not common.

As with anything, there are plenty of exceptions, but nymphs are most often fished on a dead drift near the stream bottom. This can be accomplished by suspending the nymph under a strike indicator or at close range, without an indicator using straight line nymphing tactics.

Wet Flies and Soft Hackles

This is where things get a little cloudy. Wet flies and soft hackles are technically different but are so similar we’re going to group them together. There are a rare few who will make a really big deal about you referring to a wet fly as a soft hackle or vice versa. These are typically the same people who start many of their sentences with “actually” and who will call you out in public if you end a sentence in a preposition. You know the ones.

If you spend any time at all researching the difference in wet flies and soft hackles you’re going to find a number of passionate arguments that all seem to lead you back to the same question: Now WHAT exactly is the difference? Right or wrong, I routinely use the two terms interchangeably. For the sake of simplicity, I’m going to use the term wet fly for now. Later, we can split hairs about what makes a soft hackle different.   

What’s Hackle?

Let’s start by defining hackle. Hackle is a feather that is wrapped around the hook when constructing a fly. When the feather is wrapped around the hook, the individual fibers of the feather splay out. Different types of feathers and different wrapping techniques will result in different fly looks and behaviors.

Many dry fly patterns use a hackle feather from the neck of a rooster. The fibers on this feather are relatively stiff and uniform, and they don’t cling together. These features help create a buoyant fly that will float well on the water. Body feathers from many game birds like a grouse or partridge are short and soft. They cling together more and when submerged, undulate in a lively manner.

As you may have guessed, those “soft hackles” are used to construct wet flies. There is often a tail on these patterns but not always. There is a slender body constructed of floss, dubbing or a number of other materials. Sometimes there is a wing that is usually angled rearward. The soft hackle is tied in near the head, wrapped around the hook a few times and swept rearward.

Wet Fly

Classic wet fly patterns have no weight added. They were designed to imitate that ‘middle ground” in an aquatic insect’s life. Fished more upstream, the fly will ride in or just under the surface, suggesting a drowned adult or maybe a bug struggling to hatch. Or fished down and across, the fly will swing in a current allowing those soft hackle fibers to undulate in an enticing manner. In this situation, the fly most likely suggests an actively hatching insect.

The Difference in Wet Flies and Soft Hackles

Again, I tend to interchange the terms and don’t think much about it but for those keeping score, there are some who try to differentiate the two. And many of the people that argue there’s a difference, don’t even know what the difference is.

One writer said that the difference is how you retrieve them and went on to describe in confusing and excruciating detail the nuances of fly retrieval. That explanation just seemed like a lot of BS to me. Another person told me that the difference is wet flies have wings and soft hackles don’t. But there are some fly patterns classified as wingless wets. So that argument just raises more questions.

Soft Hackle

The best description I have been able to find contrasting the two is how the flies are hackled. Both styles use a soft hackle of some sort. If the fly is hackled over approximately the front quarter of the hook and it has a wing, it’s a wet fly. If it is hackled in that manner but does not have a wing, it’s a wingless wet. However, a soft hackle has no wing and a hackle sparsely wrapped just behind the eye. There is typically a “wall” of material, usually dubbing, behind the hackle that makes it stand straight up at a near 90-degree angle, rather than sweeping rearward.  

Benefits of Different Hackling Styles

In theory, the strength of the wet fly style is its profile. It has a more realistic silhouette with the wing and the hackle fibers wrapped farther back on the hook look more like legs. But the denser hackle clings to itself and the hook more, allowing less movement. The strength of the soft hackle is its movement. The lack of wing and slender body serve as merely a backdrop to the hackle. By tying the hackle sparsely and at more of a 90-degree angle, the fibers have nothing to cling to and dance freely in the water.

Much of this could be considered trivial or just semantics. I completely believe in the logic behind the two different hackling styles but don’t personally find them unique enough to warrant their own fly pattern classification. I hackle some dry flies more heavily for fast water and some more sparsely for slow water, but I don’t call one a dry fly and the other a dense hackle. They’re both just called dry flies.  

Again, I think it’s going to be the very rare (and probably annoying) person who is going to passionately differentiate between the two. Most of the industry, like me, will use the two terms interchangeably. For example, there is a common fly pattern called a Soft Hackle Pheasant Tail. It is not a Pheasant Tail with a hackle tied sparsely at a 90-degree angle behind the eye. It’s just a Pheasant Tail Nymph with a soft hackle.

Implementing Wet Flies

Unless you’re just into obscure trivia, the real takeaway from this article shouldn’t be the subtle difference between wet flies and soft hackles. The more important contrast is between wet flies and nymphs. Most people have a pretty good understanding of dead drifting a beadhead nymph under a strike indicator but implementing wet flies into your arsenal can make real differences on the stream.

For instance, Quill Gordon mayflies are one of the first good hatches of the year in the Smokies but they are notorious for getting off the water quickly, especially on sunny days. In other words, even though there’s a big hatch, fish aren’t getting a very good look at those adults and will often focus on the emergers. A Quill Gordon wet fly can be extremely productive during that hatch.  

Fishing wet flies in pocket water when there’s no hatch can also be productive. While classic techniques like the down and across swing can work, don’t get locked into one method. Play around with different things. I frequently fish soft hackles the same way I would a nymph with a straight line method, but at the end of the drift I’ll allow the fly to swing. I catch a lot of fish on the drift and a lot on the swing. Sometimes I’ll “pump” the rod a little during the drift, causing the fly to twitch.

Are wet flies the secret weapon that will instantly and magically catch you more fish? Not necessarily, but it’s one more arrow in your quiver. Wet flies were some of the earliest flies ever devised but like many things, kind of fell out of fashion over the years. They’ve lost out to everything from dry fly purists to euronymphers. But you know what? The fish still like them.

9 Items You Should Have in Your Backcountry Fishing Kit

One of my favorite things to do is fish in very remote places. I love going to places where I’m unlikely to see anyone else and even better, places that few have ever been. But traveling to these places, or anyplace in the backcountry involves a certain amount of risk.

No one ever plans to get lost or to get hurt. And certainly, nobody ever expects that a day of fishing will turn into an overnight stay in the woods. However, no matter who you are, something can always go wrong and when you’re in the backcountry of the mountains, there is a name for people who are not prepared for those unforeseen occurrences when they arise… “Statistics.”

I’ve always been accused of being over prepared and some will probably roll their eyes when they read this article. But things can go bad in a hurry in the wilderness. And if they do, you can hope that someone happens by to help, or you can be prepared to deal with it yourself. And when you travel to some of the remote places I do, the chances of someone happening by are slim. Even when I’m traveling to a location where I’m more likely to see someone, I would much rather be the person prepared to provide aid than to need it.

I always wear a daypack in the backcountry, and I define the backcountry as anyplace I can’t exit and get aid fairly immediately. So, it could be five miles up a trail or it could be a deep roadside gorge that I can’t exit until I get to the other end. In addition to my fishing supplies, I always carry the following items in my backcountry kit and suggest that you do the same.

1) Knife

Whether in the backcountry or not, I was taught as a boy that you never go to the woods without a knife. The needs and uses for a knife in the outdoors are endless.

2) First Aid Kit

From a fall to a sting to a severe cut, you just don’t know when you’re going to hurt yourself. A first aid kit is a must and I’d recommend putting together your own rather than using the pre-made kits. Think about the most likely injuries you could suffer as well as any personal issues you may have, such as bee allergies, and pack your first aid kit with items to treat those things.

3) Whistle

Even when you’re in an area where there are more people, if you should injure yourself in the stream or anywhere else out of sight of the trail, help may not be able to see or hear you. A whistle or other loud sounding device can signal others that you’re in distress. It can also be a tool to scare away aggressive wildlife.

4) Bear Spray

Speaking of aggressive wildlife, I always carry bear spray with me in the backcountry. While it can provide comfort and protection against aggressive bears and other wildlife, it can also be a useful weapon against undesirable people. Anyone remember the machete wielding killer on the Appalachian Trail a few years ago?

5) Topo Map

Certainly this can include GPS devices but a good old fashion paper map won’t run out of batteries. Learn how to read a topo map if you don’t already and keep one with you. I can’t tell you how many lost hikers I’ve encountered and set straight in the backcountry who didn’t have a map.

6) Fire Starting Tools

I always carry waterproof matches, a fire stick and a small amount of dry tinder in my pack. This is in case I, for whatever reason, unexpectedly must spend the night in the woods. Or maybe I take a spill in the water on a cool day and need to prevent hypothermia.

7) Emergency Space Blanket

Much like fire starting tools, this may be used for warmth and/or shelter in case of an unexpected overnight stay or as prevention/treatment for hypothermia.

8) Water Purification

I always carry water with me on a fishing trip or hike. But if it becomes an unexpected extended stay, I want a way to purify water. A LifeStraw is a simple, light, packable option.

9) Paracord

Much like a knife, paracord has multiple uses in the outdoors whether in the backcountry or not. It’s light, small and strong and can be used for simple “emergencies” like replacing a broken boot lace to more serious tasks like constructing a shelter for an unforeseen overnight.

Additional Thoughts

I don’t usually carry a map on guided trips or on many solo trips in the Smokies, only because I am so intimately familiar with those locations. But I take one anytime I go someplace I’ve never been or have only been to a few times. Otherwise, I never travel in the backcountry without the above-mentioned items.

Additionally, although I do it routinely, it’s not a very good idea to fish the backcountry by yourself. Take a buddy and always let someone know where you’re going to be. If you tend to go to really remote spots, you may consider carrying some sort of GPS beacon. They allow you to send an SOS if you get into trouble and some offer text messaging if you need to message a potentially worried loved one when you’re running way late. It didn’t make my list of essentials, but my wife insisted I take one on my “extreme” excursions.

The Bear Necessities

How to Deal with Bears in the Backcountry

“Do you ever see any bears when you fish?” It’s one of the most common questions I get. Probably the only question I get more often is, “Is that your real last name?” “Yes” to both. If you spend enough time in the Smokies, especially in the backcountry, you’re going to eventually run into a bear. In fact, Great Smoky Mountains National Park is thought to have the densest population of black bears east of the Mississippi.

Likelihood of Seeing a Bear

Other than pure chance, the number of bears you’re likely to see depends on how much time you spend in the mountains and how abundant food is. When bears have plenty to eat, they don’t roam around as much. However, when food is in short supply, such as following a drought, bears need to do more looking and that tends to take them closer to trails and roads. I typically spend about 200 days a year in the mountains and I see anywhere from 3 to 40 bears in a year.

On a recent backcountry guide trip, we saw 4 bears in one day! Seeing a bear when you’re fishing or hiking is usually a good thing. They’re pretty and they’re really cool to watch. The key to enjoying bears is knowing how to behave around them.

Concern for Bears

Many people tend to be far too afraid of bears, allowing that anxiety to disrupt what should be a peaceful day in the mountains. Or worse, their fear incites panic when they encounter a bear and they make poor choices. However, on the other end of the spectrum, you have people who do not give black bears the respect they deserve. I routinely see tourists getting far too close to bears when trying to photograph them. And I’ve had more than a few “macho” guide clients chuckle when they learn that I carry bear spray in the backcountry – “They’re just black bears.”

It’s true that black bears don’t get as big as brown bears and grizzlies, but they can still get as big as 600 pounds. It’s also true that black bears are rarely aggressive toward humans. On the list of top causes of injuries in the Smokies every year, bear attacks don’t even rank, which means that, on average, there are less than four a year. As a matter of fact, in the entire history of Great Smoky Mountains National Park, there have only been two bear attacks that resulted in human death. One of those was just last year on Hazel Creek.

So, I don’t carry bear spray out of an abundance of fear but more as a precaution in case I run into one of those few bears who don’t know the rules. For one thing, I’m in the backcountry far more than, well, the average bear, so I have far more opportunities for an encounter. Additionally, I am responsible for the safety of paying clients and I don’t take that lightly.

In any case, whether or not you decide to carry bear spray is up to you. But I have learned over the years from talking to guide clients and passing hikers and fishermen that most people don’t have any idea what to do when they encounter a bear. Hopefully this article will help a little.  

Black Bear Facts and Statistics

As I typed that header, I couldn’t help thinking about Dwight Schrute. Fans of The Office will understand. Before we get into managing a bear encounter, let’s get a little information on black bears, at least when it comes to the Smoky Mountains.

  • There are an estimated 1500 – 2000 bears in the Smoky Mountains. This works out to roughly four bears per square mile and is thought to be the densest population of black bears east of the Mississippi River.
  • Black bears are omnivores and they are scavengers. They feed mostly on plants, nuts and berries. Black bears also feed regularly on insects (grubs, larvae, etc.) and crustaceans (like crayfish), and they eat meat but rarely kill for it. In other words, they are unlikely to kill a deer for meat but will feed on a deer carcass if they come across it, much like a buzzard.
  • Some black bears turn to scavenging in towns for food, raiding dumpsters and trash cans. This behavior should never be encouraged as it increasing endangers the bear and the humans around the town.
  • While they may appear to be slow and clumsy, black bears are quite agile and can reach speeds of 35mph. They are also exceptionally good climbers.
  • Black bears in the Smokies are usually most active during the early morning and late evening and they typically mate sometime in July.
  • Black bears do not truly hibernate in the Smokies but in winter, do enter long periods of sleep. They may leave the den for short periods if disturbed or during brief warming spells.
  • Their cubs are born during this period of deep sleep, usually in late January or early February.
  • Females with newborn cubs usually emerge from the den in late March or early April. The cubs, which are usually born in pairs, will typically stay with the mother about a year and a half.

Video of Bear Scavenging on Stream Bank

Preparation for Travel in Bear Country

Preparing for travel in bear country mostly means packing to prevent a bad encounter but also to deal with a bad encounter should one arise. Of course, by bad encounter we’re talking about the rare occurrence when a bear behaves aggressively toward you. Any bear will behave aggressively if it feels that it or its cubs are being threatened, and understandably so. If you were at the supermarket and a stranger approached your kid in an unusual manner, you’d do the same! “Problem bears” may behave aggressively if they view you as a source of food. This behavior is rare but may occur from a bear that has been fed by people at some point or that is simply a victim of starvation.

Airtight Food Containers

You can significantly reduce the chances of an encounter with the latter by packing your food properly. Always have any food (including trash after you eat) you’re carrying sealed in an airtight container. Ziplock bags, for example, will do the trick or better yet, cut down on those single use plastics and carry your food in a reusable container. If you’ve ever been on a full day guided trip with me, you may recall your lunch was packed in a sealed container.

Another suggestion many experts make to prevent a surprise encounter is to put bells on your pack when you’re hiking. The idea is that you won’t accidentally startle a bear that might be upwind of you because it will hear you coming. This approach absolutely has merit but it is not one that I personally choose to take. When I visit the backcountry, I enjoy taking in ALL of nature, including the sounds. I want to hear the wind in the trees, the sound of the stream, chirping birds, etc. and not the sound of bells. Furthermore, I don’t want to scare off wildlife.

To prepare for a bad encounter, carry bear spray and a whistle. The whistle can be used to scare off an aggressive bear and also as a signaling device if you get into any other kind of trouble. Keep the bear spray in a place where it is immediately accessible. You likely won’t need it but if you do, you’re not going to have time to rummage through your pack.

Dealing with an Encounter

When you encounter a bear, stop what you’re doing and observe. Many people have heard that you should look big and make a lot of noise when you see a black bear. There is a time and place for that but it’s not every time you see a bear. If it’s far away and minding its business, you don’t want to start harassing it by yelling and waving your arms!

Bear Minding His Own Business

You want to watch and see what it’s doing. Look around to make sure there are no cubs and if there are, that you don’t put yourself between the adult and cubs. More often than not, your course of action will be to do nothing. As long as you’re at a respectable distance, the bear will likely ignore you and go about his business. Bears are cool and fun to watch. Enjoy the show and after it moves on, go back to what you were doing.

Just always be sure to give the bear plenty of space and make sure it has a clear path. You don’t want it to feel cornered. If you encounter one a little too closely, keep watching it and slowly back away. As long as its behavior doesn’t change, it doesn’t feel threatened and you don’t need to worry.

I frequently see bears walking stream banks and turning over rocks for food. If you see this when you’re fishing and the bear is heading your direction, quit what you’re doing, get out of the stream and go to the opposite bank of the bear. Typically, it will totally ignore you and go right by you. In any situation, try not to turn your back on the bear and never run. Running can often trigger a predatory response in a bear that was otherwise minding his own business.

When Bear Encounters Go Bad

If a bear changes its behavior around you, it’s time to get serious. While it may be difficult, try to remain calm and pay attention to what the bear is doing. If it is doing things like swatting the ground or making a quick step and stop (bluff charging) toward you, it is demanding space. If you have bear spray, now is the time to get it out as you slowly back away from the bear. Keep backing away until the bear quits this behavior. As mentioned above, do not run. Black bears can run 35mph! And don’t try to throw food at it. You don’t want the bear to view you as a food source.

If a black bear continues toward you, even after you attempt to give it space, it’s time to stand your ground. Now is the time to look bigger by stretching your arms out. If you’re with someone else, stand together with your arms out. Act big and make a lot of noise. You’re trying to scare the bear at this point. Blow your whistle, bang rocks together, etc.

If, after all of this, the bear is still approaching in an aggressive manner, it’s time to fight. You don’t want to play dead as is often suggested with other types of bears. Blast it with your bear spray. If you don’t have bear spray, use whatever is nearby. For example, in a stream, you are surrounded by rocks that you can throw at it. Or use a stick. Use whatever you can. Just fight.

About Bear Spray

Bear spray is essentially high intensity pepper spray that is compressed in a container resembling a small fire extinguisher. It usually comes with a holster that you can easily attach to your belt or pack. Unlike personal defense pepper spray you might carry on a keychain to spray into the face of an attacking human at close range, bear spray containers fire a cloud of chemical about 30 feet.

While I have test fired bear spray, I’ve fortunately never had to use it for actual defense. If you do have to use it against a bear, it’s recommended that you give a few short blasts rather than emptying the container. If the bear continues approaching after those few short blasts, unload it. Needless to say, after you have stopped the bear, get the hell out of there, go home and pour yourself a stiff drink!

Traveling with Your Fly Fishing Gear

Note: This is a “guest column” generously provided by the good folks at Riversmith!

The solution to any problem — work, love, money, whatever — is to go fishing, and the worse the problem, the longer the trip should be. – John Gierach

While there is palpable satisfaction in catching an actual fish, fly fishing is a sport taken up by ladies and gents that need some space to breathe and some time to think. It certainly doesn’t hurt their chances of having a good time if the place he or she is wetting their line is beautiful and chock full of fish.

Riversmith

For the best chances of having yourself an ideal trip, it requires a little thought up front. Whether you are traveling by plane or car, the more preparation and consideration you put into how you will get there, what gear will accompany you, and how you should pack that gear, the more time you can spend in the moment, with the fish.

Plane Travel- Don’t Forget to Smile at TSA

Good manners, common sense, and doing a little homework goes a long way, and they go even further in the presence of a TSA agent. Above all else, humble yourself and remember that you are not above a TSA agent and they can make or break your trip before it even starts. While it may say on their website what fly fishing gear they will allow and what they will not, it will do you absolutely no good to debate or argue. Ultimately, every agent’s discernment varies from their comrades. Know that going into your experience at the airport and pack accordingly.

What exactly does that look like? Let’s take it item by item.

Item No. 1- Fly Rod(s)

According to the TSA website (which might not be a bad idea to visit before you pack for your trip), you may pack your fly rods as your carry-on or in your checked bag. That said, it’s best to take an extra minute or two and look up your specific airline carrier to ensure your rod fits within the size limitations they state.

They design most fly rod tubes to fall within the airline’s parameters, but double checking will make boarding your flight all the easier. If you don’t have a fly rod tube and don’t have time to purchase one, your safest bet is to pack your fly rod in your large checked bag with plenty of padding. When it gets tossed about like it inevitably will, the shock and rough treatment should make no difference to your fly rod if it’s properly padded in your checked bag.

Riversmith
Item No. 2- Fly Reel(s)

Fly reels are fairly easy to get past TSA with no gripe, since none of their components are dangerous. But there are a couple points with reels worth keeping in mind.

Save yourself a potential headache with TSA and remove the fishing line from reels. Pack a not even opened cord of fishing line in your checked bag. Then pack the fly reel itself in your carry-on if it fits; even better, in its original packaging or in a travel reel case. This should easily fit in your carry-on bag, but again, proper padding is always a safe bet.

Remaining Items- Flies and Other Equipment

This may sound like Captain Obvious speaking, but pack any equipment that could be used as a weapon in your checked bag. This includes your flies, knives, forceps, etc. A good rule of thumb is if it could hurt someone or raise a TSA eyebrow, it does not belong in your carry-on period.

To save yourself some prime real estate, only pack what you need; in fact, there are items you need that can most likely be purchased at your destination such as sunscreen, insect repellent, personal hygiene items, etc. that are not critical in your pack.

But if you pack smart and have the room in your luggage, you may be able to bring everything you need. Start off with what is absolutely necessary in order to fish (weather appropriate clothing, your fly rod, reel, line, lures, and net). After that has all made its way into your pack, consider waders, wading boots, sunglasses, a hat, medical supplies, and so on. If it can’t catch you a fish and doesn’t fit, consider going without.

And finally, look for luggage that makes it easy to separate your fishing gear that will get wet from the rest of your pack. Luggage made from strong, high-denier nylon material, with durable wheels, and big enough to carry all your equipment but small enough to fit within airline parameters will make traversing the airport a breeze.

Car Travel- Drive Like A Veteran Fishing Guide

There has to be a fair collection of snack wrappers and crushed plastic bottles. The odor should be a mix of salami and skunk. — Mike Schmidt

Alright, so maybe you don’t want your vehicle to smell like a fly fishing guide’s, but it should definitely function like one. Although you may not be in the financial or logistical position to purchase a vehicle tailored to your fly fishing addiction, you’ll want to pick fishing destinations your vehicle can easily get to.

If you are in a position where you can consider a vehicle that suits your fishing needs, bar none, it has to be off-road with a high clearance. You wouldn’t bring a knife to a gunfight, so don’t take a Kia Soul to a switchback-filled, rocky as rocky roads get fishing spot.

Riversmith

Now once you’ve got a vehicle that can get you there (and back) there’s a few accessories definitely worth considering to keep your gear organized and protected. A tailgater organizer is so handy and can prevent hooks from being caught on your vehicle interior or carpet, and keep all your tiny equipment from getting lost or thrown around the vehicle. A plastic bin that fits in the trunk or hatchback of your vehicle for waders and wade boots is also super handy to have.

Speaking of items that will inevitably get wet, an accessory often overlooked until you’re covered in mud and water and trying to get back into your vehicle are some weather tech floor mats. Although you won’t be driving or riding in your wading boots or waders, that mud-soaked gear needs somewhere to go. If you don’t have room for the plastic bin previously mentioned, some weather tech floor mats lining the entire vehicle floor will keep things in easy-to-clean up condition.

And finally, you can keep it greatly old-school and pop your fly rod in the bed of your truck fully assembled, or you can protect your precious rod and look into a fly rod roof rack like the Riversmith River Quiver. Not only can a River Quiver accommodate several fly rods, all varying in weights and lengths, but it’s highly shock absorbent frame and horizontal case cover and locking mechanism protect your fully assembled rod, saving you room in the cabin and providing peace of mind.

Don’t Be Such a Greenhorn… or at Least Don’t Travel Like One

You can overthink your fly fishing trip and potentially rob some fun from the experience, but you can definitely under think your trip and ruin it. For traveling with your gear, whether it’s by plane or car, pay a little attention and protect your gear. Put a little money from your wallet into accessories that will protect the investment you put into the hobby so you can pursue it more frequently.

Don’t be such a greenhorn… or at least don’t travel like one. Safe travels and happy casting!

Understanding Stream Gauges

Little River Tennessee water level

Guides and fly shops routinely spit out numbers from stream gauges, often expecting you to react with pure delight or sheer terror when you hear them. The fact is, unless you spend a lot of time on the water as an angler, paddler or other related water bum, those numbers won’t make a lot of sense to you. Most folks would probably just like to know whether or not they can go fishing. But the better you understand these numbers, the better decision you’ll be able to make on if to go, where to go and what to expect when you get there.

Stream Gauge Basics

There are a lot of things about reading these gauges that are extremely simple while other aspects can get a bit complex. Many things regarding how water flow is going to impact a stream, you just have to see for yourself to truly understand. Then you can relate that to a gauge number and get a pretty good idea of what that water will look like before you leave the house.

Before these gauge readings were posted on the internet, you had to just make your best guess and/or drive to the river to see if it was going to be too high to fish. Even now, with these numbers so easily accessible, there will sometimes be some guesswork, but at least it’s a much more educated guess!

Accessing Stream Gauge Info

Water Flow Data for smartphone
River Data App

The USGS has stations all over the country and there are a number of different search features to locate the gauge on or nearest the fishery in which you’re interested. Many larger rivers will have multiple stations spread out on different parts of the river. You can, of course, use a search engine to locate a specific place. Or go to usgs.gov and begin your search there. There are also a number of apps that can be downloaded. They make searching for a particular location much simpler and keep that information right in your pocket. I use an app called RiverData that gives you access to any river gauge in the country.

Stream Gauge Locations

It’s important to note that not every stream has a gauge. So, you sometimes have to rely on the closest gauge to your fishery and assume that both water systems received similar weather. For example, if I’m going to fish Deep Creek in the Smokies, the nearest gauge is on the Oconaluftee. Most of the time, Deep Creek is going to get the same or similar rain events as the Oconaluftee… but not always.

And even when you have a gauge on the stream you’re specifically interested in, isolated weather systems will sometimes skew the data. For instance, Little River has a gauge located in Townsend, below the confluence of the three prongs. So, if the water rises on any of those prongs, it will ultimately impact the numbers on the gauge downstream in Townsend. Usually if the gauge numbers are reading high in Townsend, the water will be up on all three prongs as they are close enough together that they typically receive similar weather. However, there have been occasions when there was an isolated heavy rain on East Prong that only raised water levels on that branch. Of course, the downstream gauge in Townsend reflected that spike but the West Prong didn’t come up at all.

Unless you’re closely tracking every weather system, there’s just no way to account for something like that. Stream gauges are wonderful tools for determining water levels before you make the trip to the river. But without multiple stream gauges spread out on different sections of every stream in a watershed, you will often, to some extent, be making decisions based on probability rather than 100% certainty.

Understanding Stream Gauge Tools

stream gauge options smoky mountains

Not every gauge provides the same information. Some will provide a cubic feet per second (cfs) reading, some will provide a height reading (usually measured in feet), some will include a temperature reading and many have all three. A handful will get even more in the weeds and provide things like dissolved oxygen readings. For real water flow nerds, most will also allow you view charts in weekly, monthly and annual views. As long as a gauge has been in a location for forty years, I can probably look up what the flow was in that location forty years ago!

It’s also worth mentioning that different gauges may update at different intervals. Most will update at least once an hour while some may provide updates every 15 minutes. But none (that I know of) are providing data feedback in real time. Just above the selected chart will usually indicate the last time the data was updated.

CFS Reading
Smoky Mountains water flow
Stream gauge in CFS

This reading tells you what the flow of the stream is. If the reading is 125cfs, it means that the flow is 125 cubic feet per second. A lot of anglers that really know a stream rely heavily on this number. However, the more casual angler may be easily deceived by this number as the “ideal flow” can vary significantly from stream to stream. The broader and sometimes flatter a streambed is, the more water flow it can comfortably accommodate.

So, 800cfs on a steep, narrow mountain stream may be a total blowout and not fishable at all. On a wider, flatter, low elevation mountain stream, 800cfs might be perfect. On a flat, 75-yard wide tailwater like the Clinch, 800cfs might be considered as a low flow. On a side note, I use generation schedules and data provided by TVA for local tailwater information.

Gauge Height Feet
Little River stream gauge
Stream Gauge in Feet

This reading tells you how high the water is on the gauge and gives you, I think, a little more “universal” reading. At least when it comes to mountain streams, about 2’ on that gauge is nearly always going to be close to “normal flow,” regardless of how wide or steep the stream is. For instance, the Oconaluftee is at a normal, near perfect level when it is at 2’ but may be flowing at around 550cfs. Little River is also normal and near perfect at 2’ but may be flowing at around 200cfs.

Again, there are a lot of variables like stream size and gradient but typically, in most Smoky Mountain streams, 2.5’ is the high side of good. In other words it is still wadeable in most of the usual spots but more difficult. When you reach 3’ on the gauge, you might still find some wadeable spots in isolated areas of small streams but pickings will be really slim. If you don’t know the water really well, don’t mess around with this. Beyond 3’, you’re likely just looking at a blown out river!

Water Temperature
Stream Gauge Water Temperature

You won’t find this feature on every gauge, but some will have it. It’s a nice feature but you have to keep in mind that it’s reading temperature where the gauge is and water temperature will change significantly as you gain elevation on a stream. For example, the Little River gauge is located in Townsend at about 1100’ in elevation. If you’re going to fish Little River around Elkmont Campground, your elevation will be around 2300’. That coupled with more stream canopy, means your water temperature at Elkmont should be considerably cooler than the gauge reading at Townsend.

It’s not an exact science but as a general rule, you drop about 4-degrees water temperature for every 1000’ you gain in elevation. So, if the stream gauge for Little River reads 62-degrees, the water temperature at Elmont should be closer to 58-degrees. This can make an enormous difference when you’re trying to find feeding trout.

Getting Started in Fly Fishing

Getting into fly fishing can seem overwhelming. And one of the most overwhelming aspects can be the gear. You see fly fishers on the stream who look like members of SEAL Team 6 with the arsenal of gadgets, gear and packs strapped to various places on their bodies. If you walk into a fly shop, it gets even more complicated when you see the endless displays of rods, reels, lines, tools, waders and thousands of fly patterns. Where in the world do you start?

First, it’s important to understand that there are things that you need to go fly fishing and there are other things that might just make a certain task easier but aren’t essential. And there are other things that are just fun or cool! Listed below is a list and description of necessary items to get going in fly fishing. From there you can add all of the extra bells and whistles you want.

The Essential Essentials

Fly Rod: Probably goes without saying but you’ll need a fly rod to get started. Rods vary in size and what exactly you need depends on where you plan to be fishing and what you plan to fish for. And prices are all over the place. You don’t need a $1000  fly rod to get into the sport, but buy the best rod you can afford. Learn more about fly rods.

Fly Reel: The reel will need to be an appropriate size to match the rod and line size you’ll be using. For most freshwater fly fishing, the reel is more of a line storage device than a fish fighting tool and it doesn’t require much of an investment. In saltwater fly fishing, the reel is probably the most valuable piece of equipment and you will want to invest a significant amount of your fly fishing budget. Learn more about fly reels.

Fly Line: The fly line is a critical piece of the equation as it is the weighted line that you will be casting. You don’t need a $100 fly line to start fly fishing but, like the rod, a good fly line can make a big difference and you should buy the best you can afford. Learn more about fly lines.

Terminal Tackle

Leader: The leader is the tapered, “invisible” connection between your fly line and the fly. It provides the critical transfer of energy during the cast that allows the fly to land properly on the water. The skinny tippet end of the leader allows the fly to drift properly. Leaders are relatively inexpensive and are something that you will replace regularly. Learn more about leaders.

Tippet: When you buy a leader, it has a tippet section built in. It’s the thinnest part of the tapered leader. You will want to have spools of tippet material to rebuild or alter the leader as the tippet section gets shorter through the process of changing or breaking off flies. Learn more about tippet.

Flies: Flies are what we use as lures in fly fishing and there are A LOT of choices! Sometimes specific flies that match a hatch are required but often, a few generic fly patterns are all you need to catch fish. Get started with a basic selection of generic patterns and add to them gradually. Learn more about fly selection.

Tools & Gadgetry

Nippers: I suppose you could use your teeth but I’d recommend a pair nippers for cutting your line. Nail clippers will work in a pinch but they are made of incredibly cheap metal. You’ll start seeing nicks in the blades almost immediately and it won’t take long for them to rust. For about $10 you can get a pair of stainless nippers that will last a whole lot longer and they include a nifty “needle tool” for clearing the hook eye. Learn more about nippers.

Hemostats: I use these for everything. They’re helpful for hook extraction, crimping barbs, crimping split shot… you name it! You can use the ones your buddy that works at the hospital gave you, but those are built to be disposable. They’re fine to get started but I wouldn’t wait to long before buying some durable ones made for fly fishing. Learn more about hemostats.

Fly Box: You’re going to need something to put those flies in. An Altoid box might do the trick in the beginning but it won’t take long to outgrow that. There are a lot of different sizes and styles of fly boxes to suit any organizational and storage needs. Learn more about fly boxes.

Not Essential but Pretty Darn Useful

Strike Indicators: If you’re going to do much nymphing, particularly in slower water, you’ll want some of these. Just don’t call them bobbers. They come in a variety of styles, shapes and colors. Learn more about strike indicators.

Split Shot: Again, if you plan to do much nymphing, this will be something you want. Many nymphs have their own weight built in but some don’t. And some that do need more. These are just small weights of various sizes that can be crimped on to leader to add weight. Learn more about split shot.

Polarized Sunglasses: It’s all I can do to not put these on the essential list. Polarized glasses cut glare on the water allowing you to better see the stream bottom, your fly and sometime the fish. I never fish without them. Learn more about polarized sunglasses.

Fishing Pack or Vest: While not essential, you’re going to need some way to carry all of this stuff around with you on the stream. You can probably find something to get you by in the beginning. For me, it was my uncle’s marine shirt with the two big chest pockets. But you’ll soon want something designed for the task. Learn more about packs and vests.

Waders and Wading Boots: How soon or how badly you need these items will depend on where you fish and what time of year you fish. Learn more about waders. Learn more about wading boots.

Landing and Handling Trout

Smoky Mountain Rainbow
A lovely release

It all finally came together. You made a good cast to the right spot and your fly is drifting down the current for mere seconds before a trout intercepts it. You react quickly with a smooth lift of the rod and the fish is hooked. Maintaining steady pressure, you resist against the trout’s evasive maneuvers and inch him closer to you. Now what?

For many, this is when a panic party ensues in an attempt to wrangle the trout and remove the hook from his mouth. You end up dropping your rod in the water and filling the reel with sand all while tying yourself up in a web of fly line and leader. For others, this may be when they begin a long, slow process of torturing the fish in an attempt for that perfect photo.

Catching a fish should be a fun experience and it should be quick and painless for you and the fish! Here are a few tips to show you how:

Playing the Fish

The first rule here is you want to make the fight as quick as possible. Don’t try to keep the fish on longer than necessary in order to feel it more or hope he jumps. Put solid, steady pressure on the fish with the rod and get him in as soon as you can. This is a stressful experience for a fish. Trying to extend the fight only exhausts the fish and can reduce his chance of survival.

Playing Fish with Side Pressure
Good use of side pressure

This is especially true with bigger fish. Certainly it will take longer to bring in a large fish, but it shouldn’t be an all day affair. Don’t be afraid to use that flexible lever called a fly rod to put pressure on the fish. You always want to have a bend in that rod and try to do the opposite of what the fish does. If the fish runs to the left, drop your rod to the right and put side pressure on him. If he goes to the right, drop your rod to the left. If he runs straight away, hold the rod straight up.

Try to always have a bend in the rod and never point the rod tip toward the fish. If he pulls so hard that the rod tip is being pulled forward, let him take some line while still maintaining that steady pressure. If you find yourself at a standstill with the fish where he’s not really running or coming to, try to bring his head to the surface. This will usually accomplish one of two things. He’ll either submit and slide right to you, or he’ll make another run and hopefully burn off one last bit of energy so you can land him. Remember that you want to be the one in control – as much as possible! All of this will not only help ensure that the fish will stay on the line, but it will shorten the fight, which benefits you and the fish.

Landing the Fish

I see a lot of people, beginners mostly, bring in line to where the fish is just inches from the tip of the rod. This habit probably comes from fishing with a shorter spin or bait rod. But your average fly rod is 8-9′ long and if you reel or strip your fly line and leader all the way into the rod guides you’re going to encounter three problems.

First, if it’s a large fish that decides to make one last run, the knot connection between the leader and fly line can easily get hung in the guides resulting in a break off. Second, if you pull that much line in, it leaves the fish close to your rod tip and you can’t reach him without sticking your rod in the water or trying to set it on a bank. Not only does that increase risk of damage to your rod and reel, it’s just really awkward. Third, if and when you do get hold of the fish, you don’t have any slack line, which makes it extremely difficult to remove the hook.

Landing a Trout
A nice example of landing a fish

Always try to leave at least a little bit of fly line past the tip. To land the fish, reach your rod up and behind you and grab the fish or the end of the leader with your other hand. Once you have it, bring your rod back down and forward and you’ll have slack line for easier hook removal. A landing net makes this process easier, where you just scoop the fish in the net rather than grabbing it. I don’t usually fool with a net in the mountains because your average fish isn’t very big and can be easily managed by hand. I always try to have a net in places like tailwaters where I’m more apt to catch bigger average fish.

Handling the Fish

There’s a reason we don’t see fish walking around in our yard. They can’t live out of water. And the longer we keep them out of water when landing them, the more harm we are causing them. Try to make this process as quick as possible.

I will often not remove the fish from the water at all. I land them as described above but rather than grabbing the line or fish, I will simply clamp the fly with my hemostats. With a little twist of the wrist, the hook usually comes right out and the fish swims away happy and unharmed without ever coming out of the water. You can do the same with a fish that has been netted. Just put the hemostats on the fly while the fish is in the net. This works even better (as does any hook removal) with barbless hooks. I almost always crimp the barbs on my hooks and encourage you to do the same.

The only reason I can think of that you would need to remove the fish from the water is if you’re going to take a picture of it. Actually, you can get some pretty cool pictures of the fish in the water, but if you want to be in it too, than the fish will need to come out of the water – or you’ll need to go in!

Photographing Fish

If you are going to handle trout, it is important to first wet your hands. They have skin, rather than scales, that contains a “slimy” protective coating. Dry hands can remove or damage that coating making them more susceptible to disease. Now back to the obvious statement above, fish don’t live out of the water, so try to do this as quickly as possible.

Don’t hold the fish in one hand while you fumble around to pack or vest looking for your camera. And most definitely don’t walk downstream with the fish so your buddy can take a picture. Preparation is the key here.

For starters, keep your camera in a place that’s easy to get to, not tucked away in your backpack. Try to keep the fish in the water until the camera is out, on and ready. Then grab the fish gently (with wet hands), take your picture and get him right back in the water. Remember you’re not shooting the cover of Vogue. You don’t need ten different poses from the fish. Get one or two quick shots then get him back in the water.

I can’t resist a brief rant here. You don’t need a picture of every fish you catch! I definitely understand getting a couple of photographic memories from the day. I certainly do the same. Maybe get a shot of the two or three bigger ones, or maybe that one that was just a little more colorful. But your Instagram followers don’t need to see fifteen pictures of what looks like the exact same fish. I know. It’s the world in which we live.

Tips for Better Photos

Face cropped to protect the innocent

While we’re on the subject of photographing fish, there are a few things to keep in mind that will be better on the fish and will result in a better photo. The first thing is to show the fish to the camera, not your hands. Don’t grip the fish like it’s a baseball bat. The fish won’t love it and you’ll be disappointed in your picture. Instead, gently cup the fish from behind so that you can see as much of it as possible. I recommend one hand for smaller fish and two hands for bigger fish – assuming you have someone else to take the picture.

The guitar pose

Try to avoid putting pressure on his fins and certainly try to keep your fingers away from his gills. Hold him right-side up (yes, a lot of people hold them upside down) and try to extend him away from your body a little, rather than pinning him against your body like a guitar.

While I do recommend handling the fish as little as possible, I do suggest holding the fish for a good photo, even if it’s in the net. Many anglers try to hold the line with the fish suspended. This results in a rotating fish and a “Hail Mary” for the photographer, attempting to snap the shot at just the right time in the rotation.

The million dollar question is what to do with the rod. The trendy thing for a while was for anglers to put the rod in their teeth. More recently, folks have taken to resting the rod behind their head on their shoulders. Y’all are stuck with my opinion here, but my opinion is that both of these things look stupid. If you’re near the bank, you can set the rod down. If you’re not, just stick it under your shoulder. But it’s your picture and if you want to stick your rod in your mouth like a dog with a bone, have at it!

Releasing the Fish

Smaller fish tend to be a bit more resilient. Typically, you just set them back in the water and they dart away. Bigger fish, however, tend to need a little more time. They are often tired from the fight and will sometimes want to float on you if you just toss them back in the water. This doesn’t mean that you need to do some weird version of fish CPR that I’ve seen many anglers attempt.

Releasing Trout
A nice release

Just find a little slower patch of water out of the main current and set the fish in it. Before you let him go, simply keep a hand on him underwater, gently supporting him and keeping him upright. The fish will soon begin to wiggle his tail and eventually swim away on his own power.

Tying the Clinch Knot

The Clinch Knot is a common knot used throughout all types of fishing and was the first knot I ever learned to tie. It is used to attach the fly to the tippet. With a little practice, it is simple to tie and will serve you well in most trout fishing situations.

Finding Feeding Trout

You can have the best gear and be a great caster, but it won’t mean a thing if you don’t know where to find feeding fish. We’ve covered a lot of these things separately in other articles, but here is a quick breakdown of the four things you really want to look for before you make that first cast.

Water temperature

A wild trout’s water temperature range for feeding is typically between 50 – 67 degrees. Ideal temperature is upper 50’s to low 60’s. There are plenty of exceptions that you can read about in Understanding Water Temperature, but this is a pretty good rule of thumb and should be your first consideration when trying to locate feeding trout.

Check that water temperature

If you’re not already familiar with a particular stream’s seasonal variations and trends, a stream thermometer will be your most useful tool. Submerge it for a minute in water that’s about 1-2 feet deep. If, for instance, it’s July and you get a reading of 68-degrees, you should, at the very least, seek out shadier parts of the stream. Ideally, you should try to get to a higher elevation where it’s a little cooler. If it’s March and you get a reading of 47-degrees, seek out sunnier places and, if possible, move to a lower elevation.

Part of this may require a little research on your part as well. If you’re fishing in a low elevation stream where the water temperature stays above 70-degrees for much of the year, there likely won’t be trout in there at all, even during colder months. Again, this is for wild trout. Some streams that might be too warm to support wild trout year round, could be stocked with trout during the colder months.

Depth

Once you have located an area with a suitable water temperature, you need to look for deeper water. We’re not talking about water that has to be over your head, but something at least a foot or two deep. In times when food is incredibly abundant like a heavy hatch, trout will sometimes feed in shallower water. But in general, they will choose water with a little more depth for more protection from predators.

Current

Even if you have ideal water temperature and adequate depth, trout don’t do a lot of feeding in still pools. And even when they do, they can be very difficult to locate and catch because they’re often cruising and feeding sporadically. A defined current is essentially a conveyor belt of food. Most feeding trout will be near currents, watching and waiting for food to come to them.

Abrams Creek Smoky Mountains
Currents can vary significantly in a single run

In currents with a slow to medium speed, trout will likely hold right in the middle of the current and on the edges. Hard currents with a lot of speed are a little different.  A trout won’t hold in the middle of a hard current because it requires too much energy. Instead, the trout will be on the edges of these currents or between currents in seams and pockets.

Structure

A trout often has a few places in an area where he likes to hang out. He may have a favorite spot to feed and a spot under a rock where he likes to hide when he senses danger. Sometimes, you’ll find a place that looks perfect as far as depth and current speed go, but the stream bottom may be nothing but flat bedrock. These areas usually don’t hold many fish because there are few, if any, safe places. Try to look for a bottom with a lot of rocks where fish can hide.

Significant structure like fallen trees or large boulders often attracts the bigger fish, particularly if that spot meets all of the other criteria mentioned above. If you find any of the characteristics mentioned above, you’re apt to find a few feeding trout. When you locate a spot with ALL of these characteristics, you’ll likely find the most and/or the biggest trout.