Over approximately 30 years of fly fishing, I have broken
one rod. And that was kind of a fluke. About 25 years ago, I was floating
extremely high water on the Cumberland River in Kentucky when I hung a streamer
on some submerged wood. While trying to dislodge it, the river began pushing
the boat toward a “sweeper” that likely would have capsized the boat. Since I
was in charge of steering the vessel, I had to act quickly and the rod was an
unfortunate casualty in my evasive maneuver.
Some might say I’m lucky to have such a long streak without
breaking a rod. And the fact that I’m putting this in writing all but
guarantees I’ll break one the next time I go fishing! It is certainly possible
as accidents do happen. But in the span of approximately 25 years of guiding,
I’ve seen dozens of rods broken by clients. Dozens… and that’s being
conservative! With that kind of disparity, I can’t help but think there may be
a little more than luck at play.
Yes, accidents are going to happen, but there are a number
of things I see anglers repeatedly do with their fly rods that lead to
breakage. And there are plenty of other things that may not instantly break the
rod but will stress it, leading to a seemingly inexplicable break at a later
time. So here we go… Here are the top 10 ways to prevent breaking your fly rod.
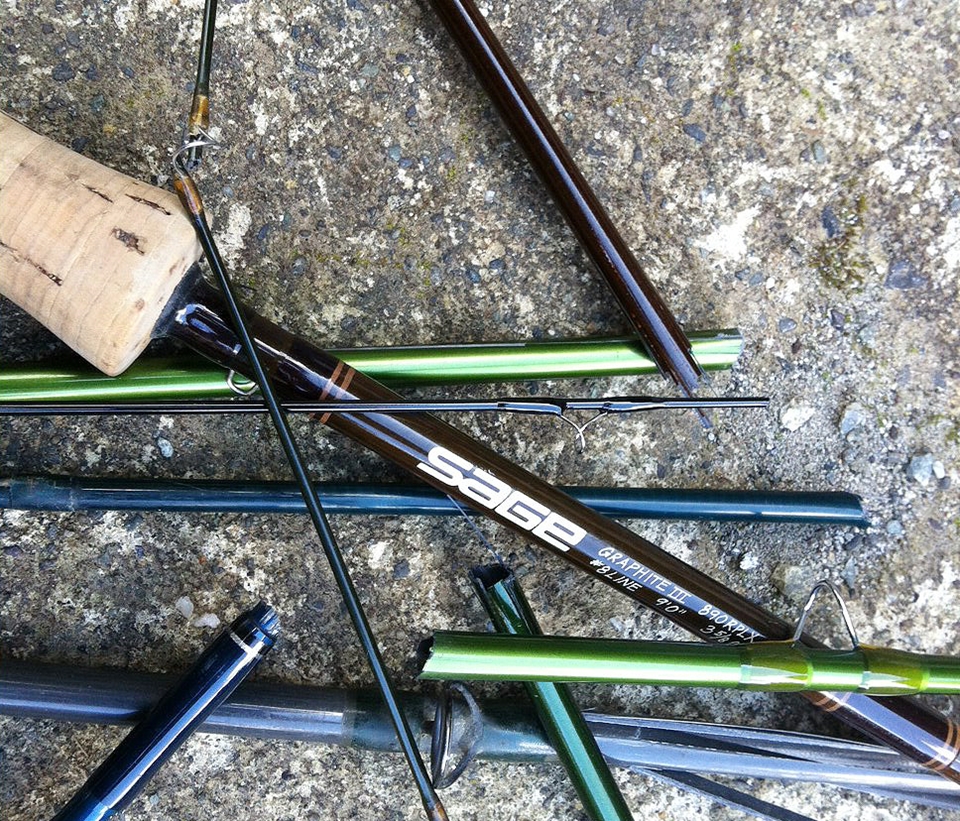
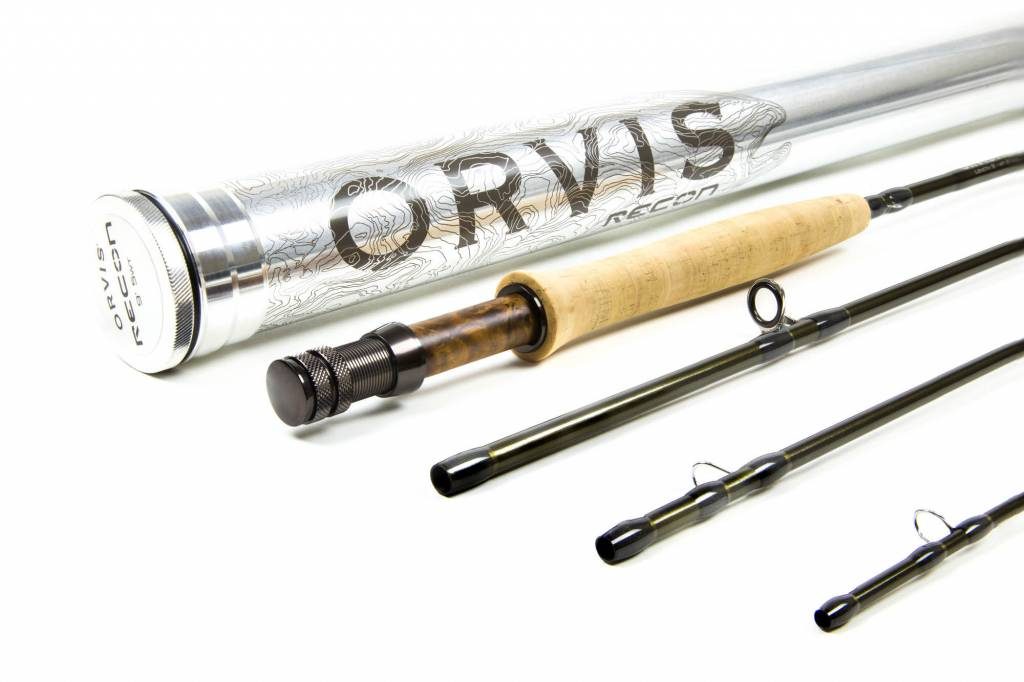
1) Store your rod in a tube.
Rod and Tube
Many rods get broken or weakened in transit. Folks toss them in the back of a truck or the trunk of a car and then set something on them, a cooler shifts, etc. I’ve never seen a rod break while it was in its tube!
2) Be gentle.
This one should be obvious, but it’s not for many. Set you rod down. Don’t toss it. Few things make me cringe more!
3) Keep the tip up.
When walking with your rod, be mindful to
keep the tip pointing up. I can’t tell you how many times I see people jab the
tip into the ground when walking on a trail. Even if it doesn’t break, you’re
potentially damaging the rod every time that happens.
4) Keep the rod ahead of you when walking through the brush.
There are many who disagree with this and
argue that the rod should be pointing behind you when traveling through the
brush. I’m sure I’ll hear from you! Fly line, leaders or rod guides can easily
get caught on branches when carrying the rod pointing behind you. Because you
don’t see it happen, you continue moving full speed ahead and pull hard against
the branch. I’ve seen guides get completely ripped off and I’ve seen rod tips
snap. I like to see where the rod is going so I can steer it around obstacles
in the woods.
5) Don’t hold the rod by its tip section.
I sometimes see this happen when people are
stringing up the rod at the beginning of the day. However, it mostly occurs on
the stream when the line gets tangled near the tip. To reach the tangle, the
fisherman will hold the rod somewhere between the tip and mid section of the
rod while the heavier butt end causes the rod to bend. Your rod is not designed
to do this and it stresses the graphite tremendously. You don’t want to hold
the rod like this in any circumstance, but it’s even worse in the stream when
the reel is attached. To reach a tangle at the tip of the rod, set the butt end
of the rod on the bank or a rock to support the weight.
6) Don’t pull against the limb with the rod when trying to pull a fly out of a tree.
If the line is wrapped in the limb, you may
end up with a broken rod tip. Instead, point the rod straight at the limb and
pull straight back. Or grab the line and pull it with your hand. You’ll not
only protect your rod tip, but you’ll be more likely to break the line near the
fly.
7) Don’t set the rod flat on the ground (or boat bottom).
When taking a break, lean the rod upward
somewhere, like against a tree. Setting the rod flat on the ground is an
invitation for you or a buddy to step on it.
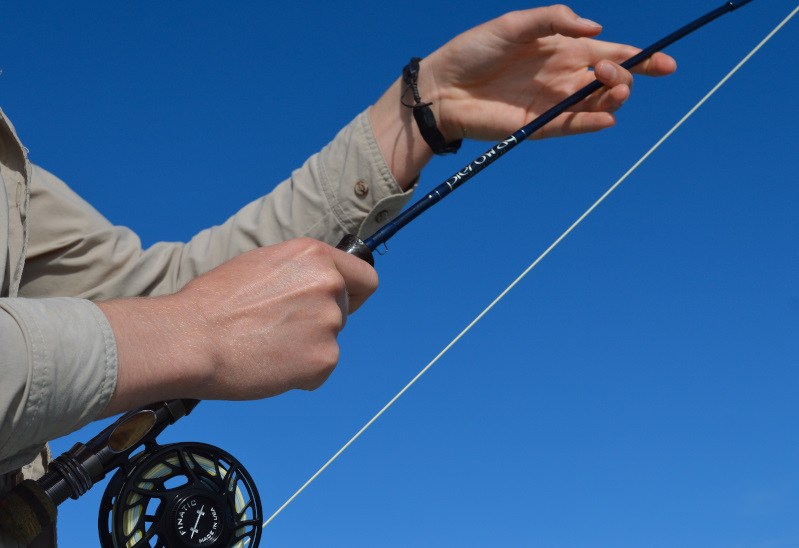
8) When fighting a big fish, use the whole rod.
Don’t Do This!
Many fishermen are taught to put their hand
or finger midway up the rod to apply more pressure on a large fish. Instead,
you are applying more pressure on your rod. Your fly rod is a precision tool
designed to bend in a very specific way. Holding the rod by the handle and not
applying pressure farther up the rod will ensure that your rod is bending where
it should, protecting your tippet and your rod tip from breakage on a big fish.
9) Use the recommended fly line to match your rod.
If you have a 5-weight rod, use a 5-weight line. Sure it’s okay to fudge up one size if you deem it necessary, but routinely overloading a rod with a significantly heavier line can stress the rod over time.
10) Learn how to fall.
I know, I know. This one sounds harsh, but respect the rod! I learned very early on in my fly fishing career to break my fall with my non rod hand. As a matter of fact, when I stumble in the stream, my rod hand immediately goes up!
People are telling me all the time that they don’t fly fish very often because they don’t have anyplace to go. I know as well as anyone that there are an endless number of things that keep us from fishing as often as we’d like, but not having a place to go should never be one. While you may not have a world-class trout stream in your backyard, or even in your state, there are plenty of other alternatives. You may just have to get a little creative.
Bluegill
For instance, almost every city has some sort of park or
green space with a pond. These can be productive little fisheries, typically
containing bass, carp, catfish and some sort of variation(s) of sunfish. They
are a lot of fun to fish and at the very least, they will keep your casting
skills and fishing instincts sharp between fly fishing vacations.
If you’re really lucky, you’ll find a friend who has a farm
pond. These provide all of the same benefits as those city ponds but without
all of the people. I had access to one when I lived in Kentucky that I fished
three or four times a week. Sunfish like bluegill will readily take a fly and
fight as hard as any fish I know. And a big bass boiling on your surface bug at
dusk is a tough thing to beat.
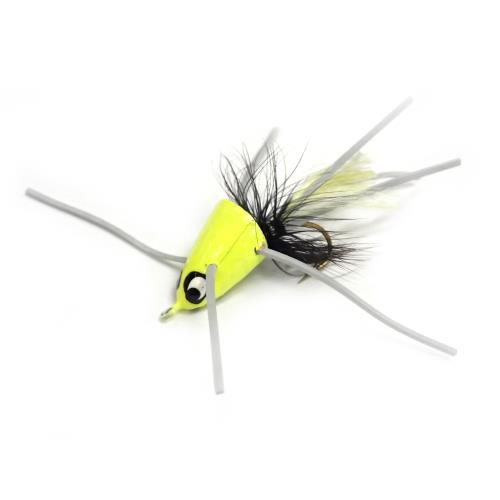
Sneaky Pete
It helps to know what fish are in the pond when deciding what gear to use. You can effectively fish for bluegill with the same outfit you use for trout. A number of small to medium topwater terrestrials will work well. Small popping bugs are a good choice, too. They’ll eat trout flies but they’ll tear them up in a hurry. Therefore, I’d recommend more durable foam or hard-body flies.
As exciting as it is to catch those bluegill up top, I often catch the biggest ones below the surface. Wooly Buggers are productive, as are a large variety of rubber-leg nymphs. However, if you want to get a little more specific about imitating their food source, try crayfish patterns and damsel and dragonfly nymphs. They tend to be attracted to brighter colors. An old fashion Green Weenie has been one of my favorite subsurface flies for bluegill. As a matter of fact, fishing a Green Weenie as a dropper off a popping bug can be very productive.
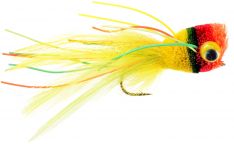
Whitlock’s Fruit Cocktail
Bass will eat many of the same flies as mentioned above, but big bass are often looking for a little more of a mouthful. A variety of streamer patterns can take bass in ponds and are always a good choice. But I love getting them on the surface when I can. Large hard-body poppers and sliders and spun deer hair bugs are a blast to fish with. However, these larger flies are very difficult to cast with a light trout outfit. If you do much of this type of fly fishing, I’d recommend picking up an 8-weight.
When fishing ponds, look for structure like rock piles and tree stumps. Also, these fish like the edges of things. Cast to shadow edges and the edges of shallow and deep water. In addition, during summer months, expect better fishing early and late in the day.
For beginners, the leader and tippet represent one of the most misunderstood, or unrealized, components of critical fly fishing gear. Many don’t understand the relationship between the tippet and leader or tippet and fly, while others simply don’t understand what the difference is between the leader and tippet. And while intermediate anglers may have a working knowledge of how the tippet relates to the fly, few take the time to contemplate how the right overall leader design can contribute to their success on the water.
To better understand leader design, let’s start from the beginning and define what the leader is. In simple terms, the leader is the monofilament connection between the heavier plastic fly line and the fly. While it varies in length, the leader typically measures between 7 1/2′ and 9’ and has two primary purposes: To allow for a less visible connection from fly to line and to transfer energy during the fly cast. It tapers from a thick butt section that attaches to the fly line, down to a very fine section that attaches to the fly. The finest section that attaches to the fly is referred to as the tippet.
So, the tippet is the piece
attached to the fly and its appropriate size is determined by what size fly you’re
fishing and how you’re fishing that fly.
At least those are the primary reasons.
Other factors such as water level, water speed, and clarity can also
contribute to that decision. Smaller
tippet sizes are not only less visible to the fish, they offer less resistance
in the water, allowing for such benefits as less drag and/or faster sink
rates. Of course, smaller tippets are
not as strong, but when dead-drifting dry flies or nymphs, the fish is
typically “sipping” the passing fly, not ambushing it, so it is not often an
aggressive strike that will snap the line.
Rather, you are lifting the rod and tightening the line somewhat
smoothly, and then all of the shock absorbing properties of your rod come into
play to, when used properly, help protect that fine tippet and keep it from
breaking.
However, when fishing a streamer
fly, you are usually stripping the fly to suggest the movement of a wounded or
fleeing baitfish, crayfish, etc. This
will most often provoke a more violent strike from the fish, and too light a tippet
will often snap under such a jolt. Since
you are imparting movement on these flies anyway and a dead drift is not
desired, a heavier tippet will better move the fly and better withstand the
more aggressive strike.
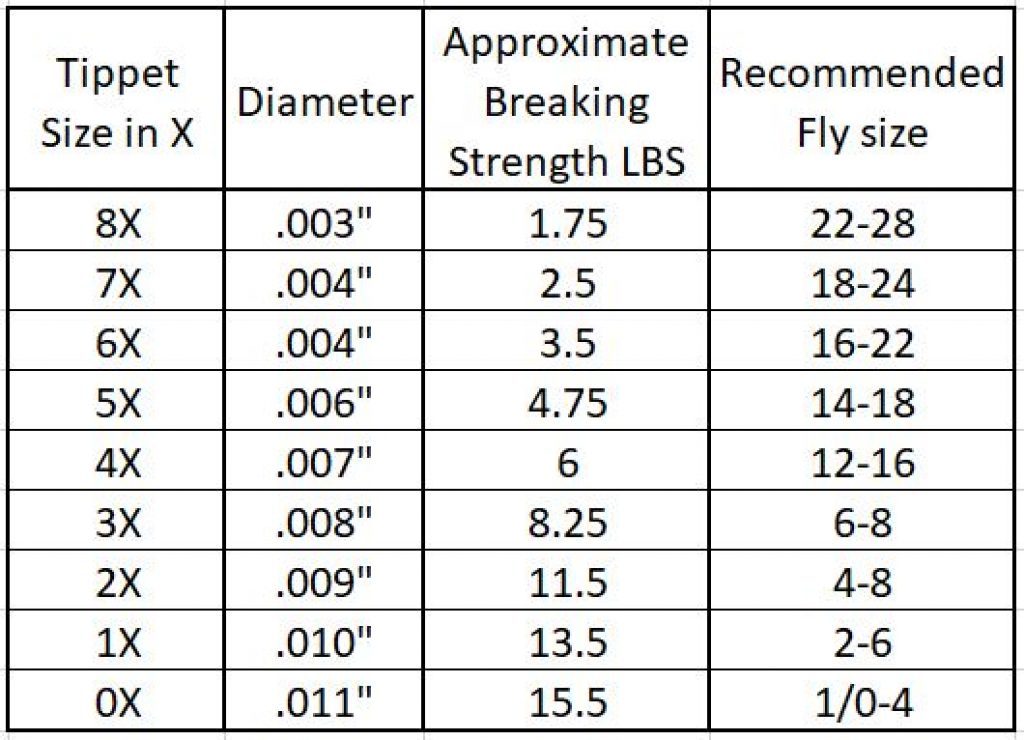
Tippet Sizing Chart
In essence, you want the tippet to balance with the fly for a more efficient cast and drift. For this reason, tippets are sized primarily by their diameter, but also have pound test ratings like spin fishermen may be more accustomed. Those details are all given in the fine print on a tippet spool or leader package but the most obvious marking is a single number followed by an “x” – 4x, 1x, 6x, etc.
It’s a strange system that can be confusing at first, but it relates directly to the diameter of the tippet, so 6x does not mean 6 pound test. Rather it all corresponds to the base measurement of 0x tippet, which is .011”. If I subtract the diameter of my tippet from this base of .011” I get the appropriate “x” designation and vice versa. In other words, if I have tippet that is .005”, 11 – 5 = 6, or 6x. On the other hand if I subtract the “x” number from .011”, it gives me the actual diameter. For 3x, 11 – 3 = 7, or .007”. I know. Wouldn’t you think there’d be a simpler system?
What you should notice is that the bigger the number, the smaller the tippet. So, 6x is smaller than 3x. Fly (hook) sizes work the same way. A size #18 fly is considerably smaller than a #4 fly. But if you know the size of your fly, there is a pretty simple formula to determine the perfect tippet size to match it. Take the size of the fly and divide by 3. As example, for a size #12 fly, the perfect tippet size is a 4x. Who knew there would be so much math in fly fishing?
Tippet to Fly Sizing Chart
It doesn’t need to be this scientific, but using this formula will give you a good baseline in determining a tippet size that will balance with your fly size. You can always fudge up and down as needed. Just keep in mind that when using the above formula, the more you stray to the small side of ideal, the more difficult it will be to turn the fly over with a cast and there’s a better chance of snapping the fly off. The more you stray to big the big side of ideal, the more visible your tippet will be and the more it will negatively impact natural drift.
Without trying to complicate
matters too much, the length of the tippet will also impact things like how
freely the fly drifts. For example, if
you’re trying to dead-drift a size #14 dry fly, you will likely be able to
better achieve a drag-free drift with a 5x tippet that is 20” long than with a
6x tippet that is 10” long. Conversely,
if you are trying to impart movement on a streamer, a 4x tippet that is 10”
long will provide much more control and immediate movement than a 3x tippet
that is 20” long.
All of this is a piece to a
bigger part which is the leader, and a lot of people don’t understand the
difference in the two. Tippet is just a
part of what makes up a leader just like tires are part of what makes up a car. If you merely tied 9’ of straight tippet to
the fly line, you would certainly be able to execute good drifts but you would
have an extremely difficult time casting the fly where you wanted to and would
regularly experience the fly and tippet landing in a pile, just inches from the
fly line.
Therefore, the leader is tapered and consists of three parts: The butt, the taper, and the tippet. We already know what the tippet does. The thicker butt section turns the leader over with the rest of the cast, which helps eliminate piling. The taper section essentially dampens the energy of the fly cast, allowing the fly and tippet to land softly on the water.
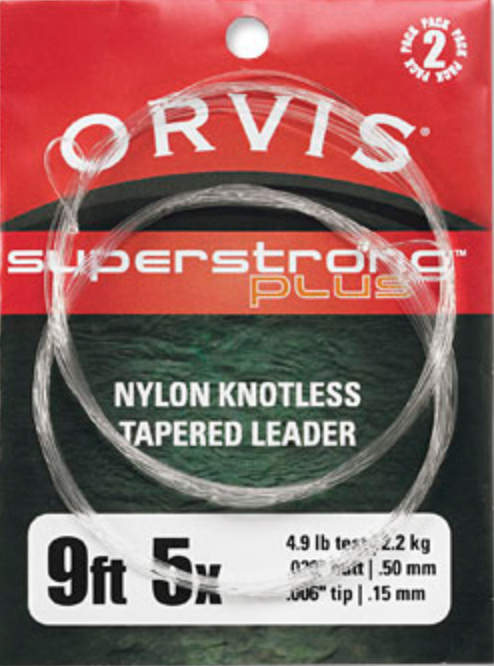
When you buy a tapered leader at
a fly shop, it is usually knotless. They
achieve the taper by running the nylon material through a machine. On the package, it will indicate the leader’s
overall length and its tippet size. So it
might indicate that it is a 9’ 5x leader.
In fine print, you can also see the exact diameters of the butt and
tippet as well as the pound test. It has
tippet built in and is ready to go right out of the package. So what’s with the spools of tippet?
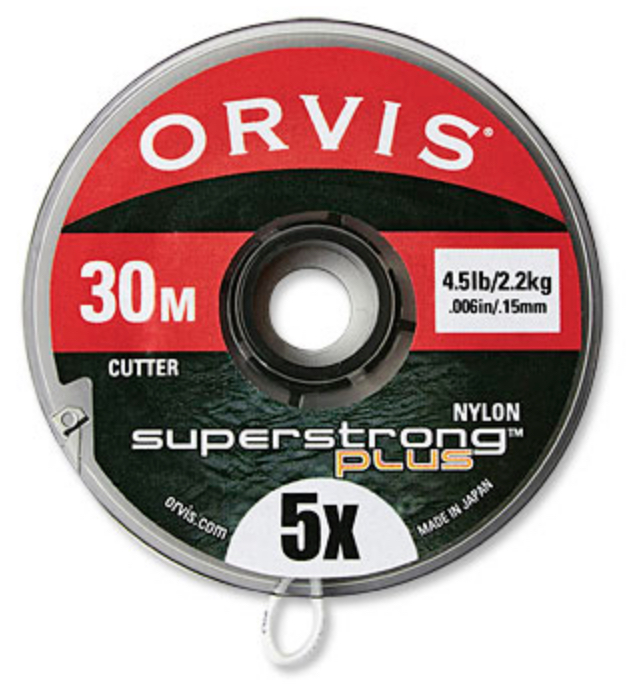
Spool of Tippet
Tippet material can also be purchased on a spool with a number designation as described earlier – 3x, 4x, 5x, etc. This is purely straight tippet with no taper and its primary purpose is to rebuild or alter your leader. When you wear out the tires on your car, you can replace them without having to replace the entire car, and it’s the same with a leader and tippet. Through the course of a day, the tippet on your leader will get gradually shorter as you change flies. Or it may quickly get dramatically shorter if you hang up in a tree or two. What started out as a 9’ 5x leader is no longer 9’ and no longer 5x.
Rather than going to the trouble and expense of changing the entire leader when this happens, you can simply pull an appropriate length of 5x tippet off the spool, tie it to the leader, and you’re back in business. Over time, you’ll cut back so far into the taper that you eventually have to change the leader, but by rebuilding with tippet, you can significantly extend the life of your leader.
As mentioned, you can also use tippet material to alter your leader. You may be using a 9’ 6x leader and want to add an additional few feet of 6x for a better drift, making it a 12’ 6x leader. Or you may be changing flies that vary dramatically in size and style. For example, you might be stripping a #6 Wooly Bugger on a 7 ½’ 3x leader when a hatch of #16 Sulfurs starts to come off. Instead of changing your entire leader, you can simply add a couple of feet of 6x tippet and you have a 9 ½’ 6x leader. Just be sure you’re adding the same size or smaller. Adding a bigger piece to a smaller piece will not only create a weak link above the final section of tippet, it will also create an undesired hinging effect in the leader.
I sometimes tie my leaders rather than buy them from a fly shop. This is done by knotting together different diameters of monofilament to achieve a taper. There are established formulas you can use for this, but through the experience of trial and error, I developed my own formulas that best suit my needs. While I have a lot of specialty leaders, my go-to, everyday trout leaders are all tied ahead of time in a length of 7 ½’ to a tippet size of 3x. Since I’m rarely fishing a tippet size bigger than 3x for trout, this allows me the flexibility to add the final piece of tippet on the stream to match the fly and situation. If I’m going to fish a #14 Parachute Adams, for example, I’ll add a 2’ section of 5x and I’m ready to go.
I first started tying my own leaders when I was on the limited budget of a college student because I realized I could pay $3.50 for a leader or I could make them for about 30 cents each. Over the years, I continued making my own because I prefer them and like being able to design them for my needs. For instance, I find the commercial trout leaders to have too big of a butt section and I don’t like the way they turn over or straighten out. By using a thinner diameter butt and a different type of monofilament for the butt and taper sections, I get a leader that turns over and lays out beautifully. I also like having a few knots throughout the leader as locations to place split shot and strike indicators without them sliding down the line.
I have a variety of other specialized leaders for specific situations. My bass leaders have thicker butt sections to turn over large flies. I have hatch leaders that are long and thin, designed to achieve perfect drifts over wary trout. And I have shorter, small stream leaders for punching flies under tree limbs in extra tight conditions. I also make short leaders designed to fish on sink tip lines when streamer fishing big water.
These are all things to take into
consideration when making your own leaders or even when you buy them at the fly
shop. Understanding the basics like
length and tippet size will inevitably make a difference in your success on the
stream. Better understanding how the
butt and taper figure into the equation will give you vital tools to begin
catching fish that other anglers can’t!
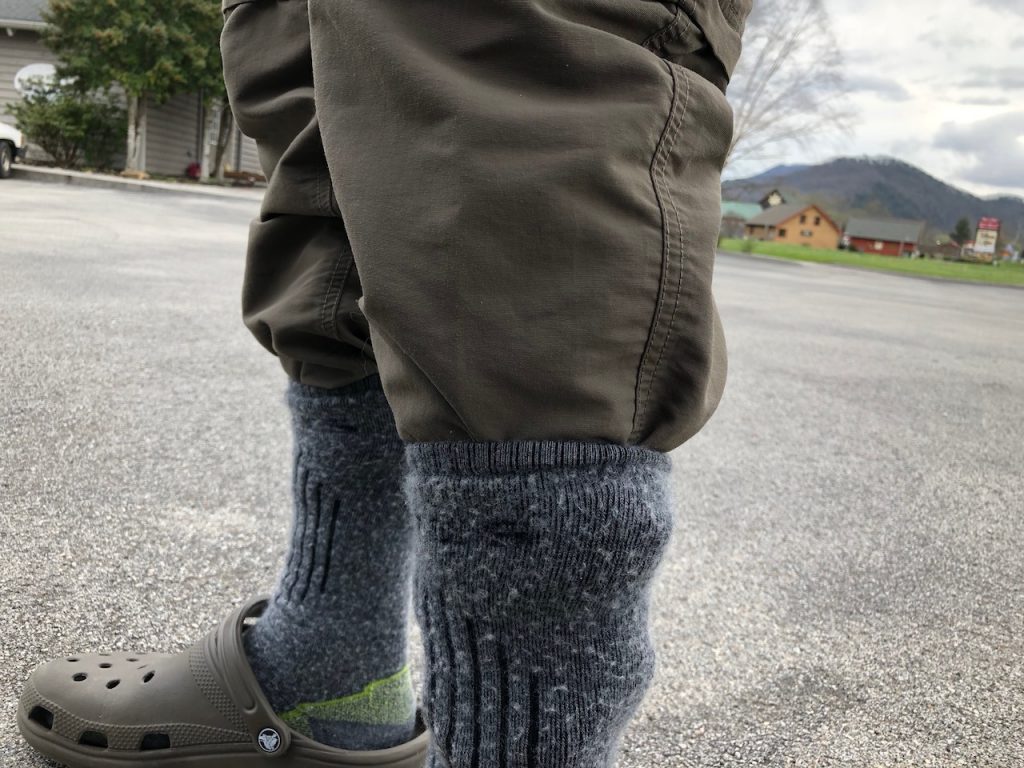
Putting on waders hardly sounds challenging enough to warrant advice. But there are a couple of things you can do that will make you more comfortable during the day. More important, there are things to do to protect and extend the life of your waders.
Prepare your boots and waders before putting them on. Walking around on the neoprene feet of your waders looking for boots and other gear is a good way to damage them. Have your boots ready to step into as soon as you slip on your waders and consider having a mat to stand on. Also, tucking your pant legs into your socks ahead of time will prevent them from “riding up” your legs when you put on your waders.
“On the Fly” is a feature in my monthly newsletter offering quick fly fishing tips to make your life on the water a little easier…
When I first started fly fishing, it was a different time. It was before everyone had access to the Internet. There were no message boards. Twitter didn’t exist and neither did Facebook. Many fisheries didn’t receive nearly as much pressure simply because not nearly as many people knew about them. And to the fishermen who did know about them, they were closely guarded secrets shared only with a handful of trusted friends.
I realized that early on and I respected it. I learned quickly that I not only needed to learn and develop a set of skills to be able to catch fish, but I also needed to conduct myself in an appropriate way to earn the trust and respect of fishermen who had been doing this a lot longer than me. Part of this simply meant knowing how to keep my mouth shut when someone did share a particular fishing spot. It also meant not behaving like an inconsiderate moron when you were on the stream.
The current trend of photographing and videoing every single fishing trip and sharing it, complete with GPS coordinates, on multiple social media outlets is probably the subject of an entirely different article. But regardless of how you feel about the trend, it has most certainly resulted in a lot more fishermen on more remote streams. And with easier access to this information, many of these “newer” fishermen have never been exposed to the idea of stream etiquette. Some folks are always going to be inconsiderate no matter what. Most violations of etiquette likely occur simply because someone doesn’t know better. Since it is just as important now as ever, if not more so, I thought this would be a good place to share a few basics.
Stream etiquette really just boils down to common courtesy and common sense. The first thing to keep in mind is that you are not entitled to any piece of water. If you have a favorite pool or stretch of water and someone is fishing it when you arrive, get over it. Move on, and fish it next time. Even if that someone is not in the pool but they are approaching it, don’t try to rush up and cut them off. Particularly in smaller mountain streams, fishermen don’t typically stay in one spot for long periods of time. Rather, they move up the stream covering stretches. The assumption is that the fisherman is working upstream and you should give him plenty of space to continue.
The appropriate amount of space to give another fisherman is always up for debate. On a crowded tailwater with limited walk-in access, that space might be 100 yards. If it’s a somewhat crowded roadside river in the mountains, that space may be a quarter of a mile. On a backcountry stream where there are very few fishermen, that space may be a half mile to a mile. You kind of have to get a feel for the traffic flow and act accordingly. I always think of it like a movie theater. If it’s opening night for ‘Star Wars’ and the theater is packed, you’ll likely be sitting right next to someone else. If there are only two other people in a movie theater and you sit right next one of them, you’re being an ass.
When in doubt, communication is always the best way to ensure everyone has a positive experience. “How far up are you planning to fish?” Most fishermen appreciate this and will typically extend the same courtesy… Typically. On one occasion when guiding a couple of fishermen on Little River, we found ourselves walking up the trail alongside two other fishermen. Since we were already a couple of miles up the trail and obviously heading in the same direction, I made conversation with them and asked how far up they were planning to go. In a gruff tone, one of them replied, “Farther than you!”
If I had been by myself I might have hiked all the way to the stream’s headwaters purely out of spite! Instead, I politely explained that I just didn’t want to get in each other’s way. By being so obtuse, he was sabotaging an easy way of accomplishing what we both wanted to accomplish. Most fly fishermen, particularly in the backcountry, are nice folks and they’re in the backcountry for the same reason you are: to get off by themselves. Usually, there is plenty of water for everyone. Being willing to communicate will help ensure that everyone gets what they want. Be nice!
And if you make a mistake, apologize and move on. There have been plenty of times when I inadvertently cut someone off in a stream because I didn’t see them. It happens to all of us. When this happens and you’re close enough, apologize and move on to another area. If you’re far away, wave and move on to another area. If someone inadvertently cuts you off and acknowledges it with a wave or an apology, cut them some slack. Mistakes happen. Be nice!
This trend is WAY out of hand
Finally, stream etiquette includes blending in with your environment. Don’t take away from someone else’s current experience by making a lot of commotion like shouting up and down the river. And don’t take away from someone’s future experience by altering the landscape. This most definitely means don’t leave any garbage behind. It also means don’t litter the landscape with “sculptures” made of sticks and stacked stones. This not only disturbs and damages sensitive ecosystems, it is an eyesore. People visit wild places to see mother nature’s artwork, not yours!
Again, as mentioned earlier, this all pretty much boils down to common sense and common courtesy. Unfortunately, both seem to be in short supply these days.
Visit Leave No Trace for more information on being a better outdoor citizen.
When many people think of fishing with flies, images of more familiar insects like houseflies and mosquitoes often come to mind. Many familiar terrestrial insects like ants, beetles, and hoppers are a source of food for trout. Those are especially important in the summer. But aquatic insects are most abundant to fish throughout the year. And most artificial flies imitate these water-born bugs.
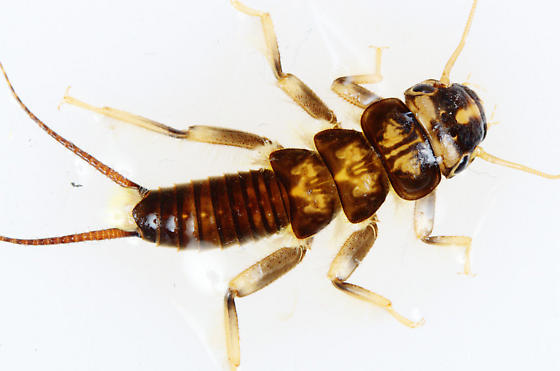
There are a number of aquatic insects in streams and rivers. Mayflies, caddisflies, stoneflies, and midges are the most common. They are defined as aquatic because most of their life is spent in various stages in or on the water. The four groups listed above vary respectively in their life cycles. But they are similar in that they begin in one form under the water. They all emerge and transform to another stage. And they all ultimately return to the water to lay eggs and start the process again. Let’s use a mayfly as an example.
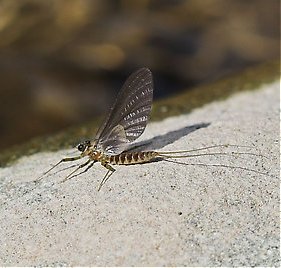
Mayfly Adult
First of all, the term mayfly is as general as the term flower. Just as there are many different flowers such as roses, daisies, and tulips, there are also many different mayflies such as Blue Wing Olives, Quill Gordons, and Sulfurs. And just as certain flowers bloom at specific, somewhat predictable times of the year, certain mayflies hatch at specific, somewhat predictable times of the year. Around here for example, you’ll usually see Quill Gordons in mid March, Sulfurs in May, etc.
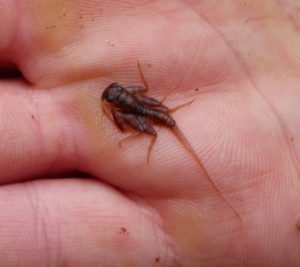
The mayfly hatch that you hear about is technically the second time they hatch. A mayfly will first hatch underwater from a tiny egg into a nymph. The nymph is the juvenile stage of a mayfly’s life and it takes place entirely underwater. As a nymph, the mayfly has a very flat, streamline profile and typically lives beneath rocks on the stream bottom where it feeds on algae and such.
Mayfly Nymph
A typical mayfly nymph will live for about a year in this stage until it reaches maturity. At that time, the nymph will emerge to the surface of the water, a shuck splits open, and an adult mayfly (often called a dun) crawls out. The adult will be on the surface anywhere from seconds to minutes while it dries its newly formed wings before flying off to nearby vegetation.
With no mouthparts in this stage, the adult will usually not live for much more than a day. Its sole purpose is to mate. After this occurs, females will return to the water to lay their eggs. Upon completion, they finally lay spent on the water. So a mayfly’s only role in nature seems to be to feed trout.
But it’s not just trout that eat aquatic insects. Birds will get the lion’s share and most aquatic insects are naturally camouflaged with this in mind. Understanding this can give you a leg up when it comes to fly selection, even when you don’t know what’s hatching.
In the very early and very late seasons when there is no foliage on stream side trees, aquatic insects need to blend in with the actual branches. Consequently, most everything that hatches during that timeframe will be dark in color (Gray, black, etc.). In the late spring and summer when foliage is full and vegetation is thick, most everything that hatches will be lighter in color (yellows, greens, etc.). And in the fall – you guessed it – most of the bugs that hatch will be drab, rusty colors.
Learn more about Smoky Mountain hatches and flies in my hatch guide.
I recently saw a post on Facebook from a gentleman who had broken two fly rods on one trip. Another person commented about “having the record” for taking the most broken rods back to his local fly shop. They proceeded to boastfully go back and forth about this as if it was some sort of badge of honor. Accidents happen and rods do break from time to time, but I had guided one of these gentlemen and it was no secret why he had broken so many.
When we first met, I cringed as he pulled his rod from the trunk of his car. It was not in a tube and there were a variety of items piled on top of it. I’ve seen a lot of rods break over the years, but I’ve never seen a single one break while it was in the tube. If you knew him, it would come as no surprise that he forgot to bring a reel for the rod, so he ended up using one of mine.
When he caught his first fish, he removed the hook and literally threw the rod on a rocky bank about ten feet away in preparation for a photo. I let it slide but when it happened again on the second fish, he got the “lecture.” Not only was he damaging the rod every time he did that but also the reel. Actually, he wasn’t doing the fly line any favors either!
Whether it’s cars, tools, fly fishing gear, or anything else, I was always taught that if you take care of your gear, your gear will take care of you. While taking care of your gear often means simply handling it responsibly in the field, simple maintenance out of the field can greatly extend the life of valuable fishing gear and insure that it’s ready to perform when you need it to. And what better time than winter for inspection and a little preventive maintenance?
Rods:
Fly rods don’t require a lot of maintenance. Basically, don’t heave them into rocks every time you catch a fish and keep them in a tube for storage and travel. However, be careful not to store them wet for an extended amount of time in an airtight tube. Simple off-season maintenance includes checking rod guides and wraps for any damage. If you notice a loose guide or a wrap beginning to fail, you can send it back to the manufacturer for a preventive repair, rather than waiting for the guide to come off while you’re fishing. When you are doing this, also check the ferrules (where the rod pieces join) for a good, snug fit. If any seem loose, apply a small coating of wax to the male end.
Reels:
Reel Lube
Fly reels are pretty low maintenance, too. First, check to make sure the reel is turning smoothly. If it’s not, first be sure that there’s not too much line on it. Assuming excessive line isn’t preventing it from turning smoothly, you likely have a bent frame or dented spool. If it’s minor, your local fly shop might be able to fix that. Otherwise, it will need to go back to the manufacturer.
Assuming the reel is turning properly, all it really needs is a cleaning and “tune-up.” Remove the spool and rinse it and the frame with water. Wipe away any excessive grime build-up and apply a small amount of reel lube around the gears. Allow the reel to dry before putting back into storage.
Fly Lines:
Fly lines probably require more maintenance than any other piece of equipment. You don’t have to completely remove it from the reel, but pull out at least the first forty feet of fly line. You can pull out the entire amount if you wish, but most people don’t use more than the first forty feet and it’s what will need the most attention.
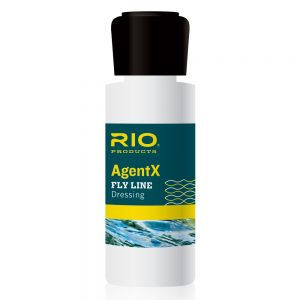
Fly Line Dressing
Spread it out someplace other than the ground, such as between a couple of trees in the back yard. Take a small container and fill it with water and a couple drops of dishwashing liquid. Dip a clean cloth or paper towel in the liquid and run the cloth back and forth over the fly line. You’ll likely see a dark, grimy stain on the cloth after you do. Repeat this process with a clean cloth until you no longer see a stain, then do it one more time with just water and no soap.
Now that your line is clean, you’ll want to treat it with something to keep it slick and prevent cracking. There are specific fly line treatments available at fly shops for this. Just rub into the line using the same method described above. Or something I like to use is ArmorAll. You buy the wipes and simply run the wipe up and down the line several times. Some fly line manufacturers claim that ArmorAll is not a good choice for line treatment. I have personally never had a problem with it.
These steps should keep your line floating better, allow it to shoot through the rod guides better, and simply make it last longer. It wouldn’t hurt to do this periodically throughout the year, but at least once a year. It depends on how much you fish and where you fish. Fly lines used on scummy lakes and ponds will need more frequent attention than lines used in clear mountain streams.
Waders:
Most wader care needs to happen throughout the season and that mostly involves being careful of thorns, etc. Probably the most damage occurs to waders when people are putting them on or taking them off at the truck. I regularly see fishermen put on their stockingfoot waders and then walk around looking for the boots or other items. This is just an invitation for gravel or other pointy objects to puncture the feet of the waders. The feet of my waders never touch the ground – boots are on the ground ready, foot goes into wader, wader goes into boot. If you’re not comfortable doing the “one leg hop,” keeping a mat to stand on is a great idea.
Also be sure not to store waders wet. Hang them to dry when you get home, preferably not in direct sunlight. Occasionally washing them through the year will help with their breathability and water repellency. Wash them on gentle cycle with a mild detergent. I recommend Ivory Snow, a detergent commonly used for baby clothing.
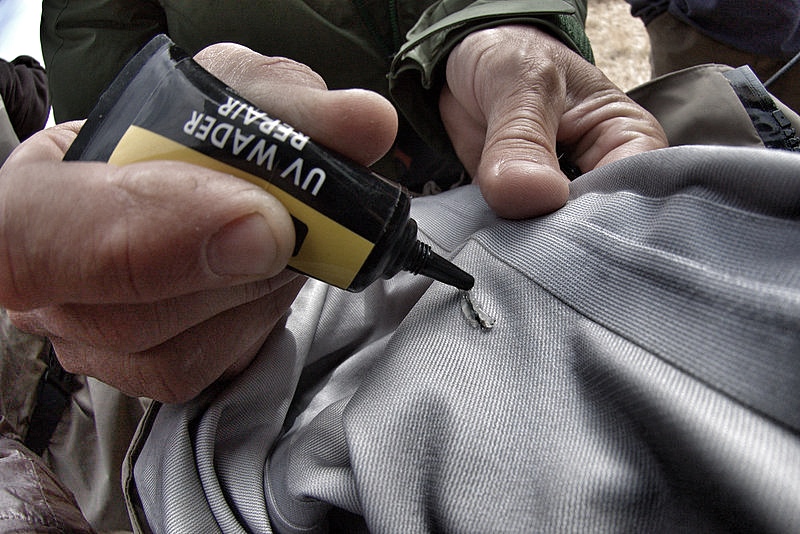
Winter is a great time to repair any leaks and/or treat with DWR. If you have major punctures or tears in your waders, you’re probably better off sending them to the manufacturer for repair or replacement. But most folks just encounter minor leakage caused by a pinhole or seam leak, and that’s pretty easy to fix yourself.
First, try to narrow down the location of the leak. For instance, if you’ve been getting damp on the inside of your right leg from the knee down, chances are pretty good that the leak is somewhere around the inside right knee. Sticking with that example, make sure the waders are completely dry, turn them inside out, and generously spray rubbing alcohol all around the suspected leak area. Still keeping the waders inside out, fill the right leg past the knee with water and look closely in the area where you sprayed the alcohol. You should see discoloration where the leak is. Mark that spot with a permanent marker.
Now that we know where the leak is, it’s time to repair. Again, allow the waders to dry completely. Where you made the mark with the marker, liberally smear Aquaseal on the area. Aquaseal is available at most fly shops and many camping/outdoor stores. Usually a small tube of it comes with your waders. Put the treated area of the waders in direct sunlight to cure. When the Aquaseal feels “solid,” the waders should be immediately ready to go. However, I’d move them inside to a dry place and wait 24 hours before using.
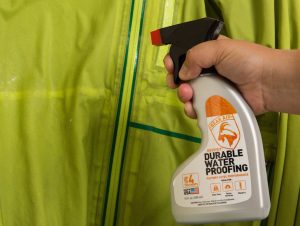
DWR water repellency
Treating your breathable waders with a DWR is a great winter project. As a matter of fact, if you have a breathable rain jacket, grab it and treat it at the same time. DWR (Durable Water Repellant) is basically going to allow the water to “bead” and roll off the fabric rather than absorb into it. I’ve had old waders and jackets that I never treated that, even though they were still waterproof, were absorbing so much water that they felt heavy and even clammy. DWR is good stuff. There are a few brands out there and can usually be found at camping/outdoor stores. I’ve personally had good luck with ReviveX Spray-on Repellant.
Treating fabric with DWR
Start by washing the waders and/or jacket with a mild detergent as described above. Hang the garment(s) and spray evenly and thoroughly with DWR while the garment is still wet. I usually apply a little heavier around seams and stress areas such as the knees and crotch area on waders. On jackets, I put a little more emphasis on the shoulder area. You can then simply allow it to air dry where it’s hanging or put it in the dryer on low/medium for about an hour.
That about covers the big stuff. I also like to use winter to go through fly boxes and remove rusty hooks. Those have a way of contaminating the entire box after a while. And it’s a great time to go through your first aid kit and make sure everything is up to date. You can also put new batteries in the flashlight, etc. Then, when spring rolls around, all you have to do is fish!
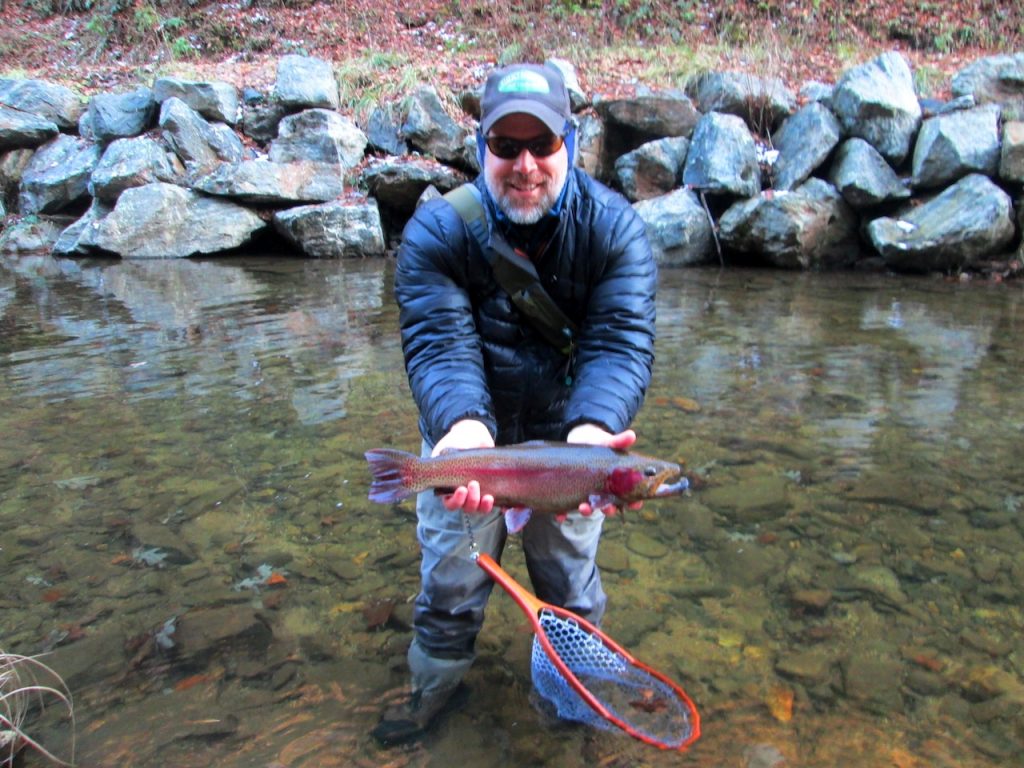
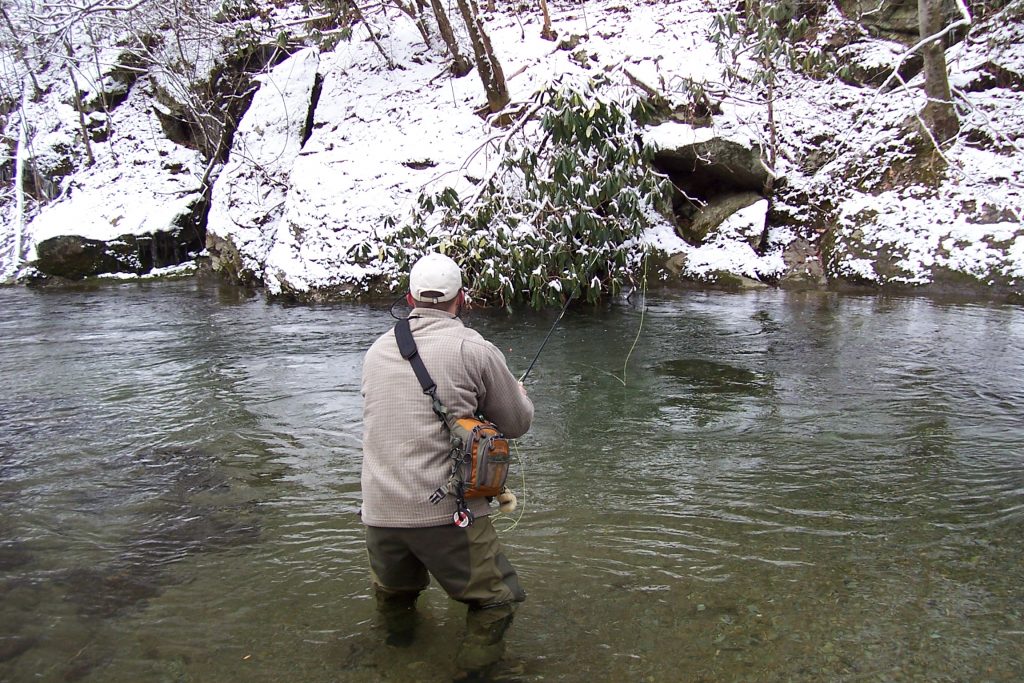
The arrival of November usually means cold weather is not too far off. But it doesn’t mean that you have to quit fishing. Certainly the fishing for wild, mountain trout can slow down significantly as water temperatures fall, but tailwater trout and really any stocked trout will continue to feed well, even in the coldest of temperatures. In recent years, winter guide trips to Delayed Harvest streams have become a favorite of many clients. This is probably because of the potential for really big trout!
In East Tennessee, the average winter day is not unbearably cold – at least not compared to many other places in the U.S. The coldest month of the year here is January where, in towns like Knoxville and Maryville, the average high is 46-degrees and the average low is 29-degrees. However, this is deceiving in a couple of ways.
When most folks view this forecast, they don’t take into consideration that you’re only going to experience that high temperature for a couple hours out of the day. Additionally, in the case of Delayed Harvest waters, we’re usually fishing mountainous areas where there’s a little more elevation and the sun spends a lot of the day low and behind the ridgeline. In other words, you can easily shave another 5-degrees off those highs and lows and when you throw in a little wind, you’ve got a pretty darn cold day on the water.
So, a typical full day trip in the winter will go from about 9 to 5. If the forecast is for a high of 46-degrees, that will be more like 40-degrees on the stream, and you’ll reach that high temperature probably around 3pm. That means for the majority of the day, you’ll be fishing in temperatures in the 30’s. Unless you grew up someplace like Alaska, North Dakota, or Maine, that’s cold! Don’t get me wrong, it can be a ton of fun and it never feels as cold when the fish are biting. But to better enjoy your day on the water, you better know how to dress. After all, there’s no such thing as bad weather, just bad clothing choices! Below are a few tips to prepare for a winter fly fishing trip.
Dress in Layers:
You hear this advice a lot from the weather person on your local news but I don’t think they usually understand the difference in dressing in layers and simply dressing warm. If I’m just going out in the cold for a while, I can just throw on a heavy coat and a hat and be set. However, when I’m going to spend the day outside in the cold, I’m likely to experience a variety of changing temperatures and conditions. Dressing in layers allows me the flexibility of adding or removing layers as conditions and activity levels change.
How to Layer:
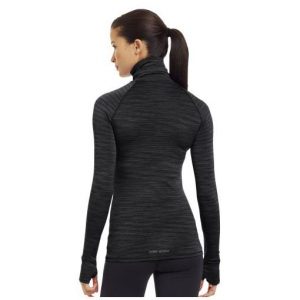
There are three basic layers to consider. The first are the
Long underwear with turtleneck top
garments closest to your body, and their main objective should be to wick moisture from your body. If your body gets wet, from perspiration or anything else, you’re going to be cold, no matter what you’re wearing as an outer layer. Consider wearing a thin, synthetic “liner sock” on your feet and synthetic long underwear for your legs, arms and torso. Long underwear with a turtleneck top is a bonus as it gives an added layer on your neck.
The next layer is the insulating layer that is designed to keep you warm. Depending on how cold it is, this could actually consist of multiple layers. For the feet, a thick, heavy wool or fleece sock should be sufficient. The 3mm neoprene foot on the wader is also going to serve as insulation. For the legs, a fleece pant designed for cold wading is great and I also like traditional fleece lined pants. Up top, I typically wear a mid-weight fleece pullover followed by a heavier fleece pullover or jacket. As the day warms, I might remove the heavier fleece. Again, it’s a bonus if one or both of these upper layers covers the neck.
The third and final layer is the shell. Its purpose is to protect from wind and moisture. For your lower half, the waders serve as your shell. Up top, I just add a light to mid-weight rain jacket. The hood will act as a shell layer for your head.
The Extremities:
By extremities, I’m mostly talking about your head and your hands. These can be the most challenging and most important to protect. The challenge with the head is to keep it warm without interfering too much with necessary senses like sight and sound. For that reason, I HATE wearing a hood, though sometimes it’s necessary on rainy days.
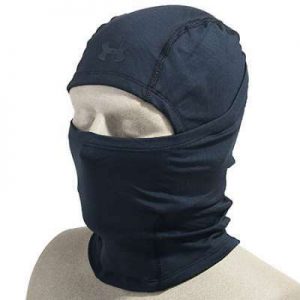
Under Armour Infrared Hood
I layer my head with a product from Under Armour called an infrared hood. It’s the same thin-layered garment you see football quarterbacks wearing under their helmets in cold weather games. It covers the entire head, including the ears, but doesn’t interfere with hearing like earmuffs do. It also has a piece that can be pulled up to cover the face on particularly cold, windy days. Because it is relatively thin, I can wear a traditional ball cap over it on milder days or a warm stocking cap on colder days. This is one of the best pieces of cold weather fishing gear I’ve found!
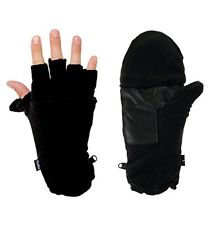
Fold-back Fingerless Mittens
The hands and fingers are the toughest part. Trying to keep warm while maintaining the necessary finger dexterity for fly fishing is one that I haven’t totally figured out. While there are fleece gloves and mitts with fold-back hand and finger pieces, they still leave your fingers exposed while fishing and the fold-back piece is just one more thing for your fly line to hang on. I prefer just standard wool or fleece fingerless gloves. They keep my hands warm and if the fingers start getting too cold, I take a break and put my hands in my pockets.
Adjusting Layers:
Most of this is common sense. If you’re cold, add a layer. But it’s important to pay attention to your activity level because you don’t want to be too insulated while active and start to perspire. Perspiration during cold weather can create a cold that’s hard to come back from once you become less active. It’s also a common cause of hypothermia when not addressed.
One of the biggest mistakes I see people make is overdressing for the car ride to the stream. Wearing too much in the car can cause you to perspire and you’re going to be cold all day. Wear the bare minimum of layers in the car and add the additional layers when you reach the stream. Pay particular attention to your feet!
Fabrics:
You may have noticed repeated references to fleece or synthetic fabrics. That’s a really important piece of the puzzle for staying warm, dry, and comfortable. Synthetic materials like fleece are not only more breathable, but offer insulating properties even when wet. Wool does the same thing though it is often heavier. This is important with all of your clothing in case you take a dunk in the stream. It is particularly important with your gloves, as your hands will constantly be exposed to water while fishing.
We’ve talked a lot about water temperature in many of these articles and for good reason. Things like approach, presentation, and fly selection can determine whether or not a fish will take your offering. Water temperature can determine whether or not a fish will take any offering! You can read in more detail about water temperature in A Matter of Degrees. To keep it simple here, wild trout in the Smokies just don’t do a lot of feeding when the water temperature is in the 30’s and low 40’s.
Tailwaters are different because the water comes from the deep, insulated layer of a lake. The water temperature remains relatively constant, regardless of air temperature. Stocked trout in a freestone stream are different because, well, they just don’t know any better. They were raised in hatcheries and were fed the same amount of food every day, regardless of temperature. But wild trout in freestone streams have never had that luxury. In order to survive, their metabolism changes and they become nearly dormant. This doesn’t mean that they won’t feed at all but if you’re going to fish the Smokies in the winter, come prepared with a great deal of patience.
I spend more time looking this time of year than I do actually fishing. Blind fishing a run in the spring can be very productive because all or most of the fish should be feeding. They’ll often move up and down and side to side for food. In the winter they typically won’t move much for food and you need to put the fly right on their nose. To do this most effectively, you really need to see the fish. Take your time and watch the water. Pay particular attention to the slower currents on the edges and lower parts of a run. Ideally, you want to locate fish that are up in the water column rather than hugging the bottom. Fish that are up a little in the column are more likely to be feeding.
If you can’t actually see the fish, look for flashes on the bottom. Any fish that is feeding will likely be picking nymphs off the bottom. When a trout eats a nymph off the bottom, they usually tilt their bodies sideways. When they do, you’ll see the flash of their lighter colored bellies. You may have to scope out several pools or runs before you see fish or fish activity. Experience will teach you the kind of water to focus on. But deeper, slower runs will usually produce better than fast riffles and pocket water this time of year. And try to pick the warmest part of the day, probably late morning to late afternoon.
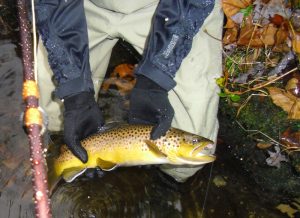
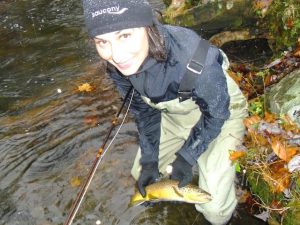
Cold weather brown
Once you think you’ve located feeding fish, it’s time to think about fly selection. On warmer winter days, you may actually see some insects hatching. If you do, they’re likely to be small and dark: Blue Wing Olive mayflies, small black stoneflies or caddis, dark olive or black midges… Rarely anything bigger than a #18. On rare occasions, you may see fish feeding on the surface during one of these hatches. Small Parachute Adams or Griffith’s Gnats are a pretty good bet in those instances. Mostly though, they’re going to feed more on the nymphs, so black Zebra Midges, small Pheasant Tails, and small black or olive Hare’s Ears will be pretty good bets.
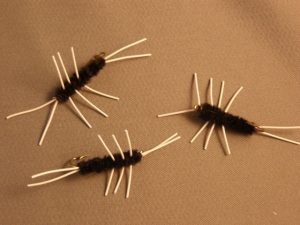
If I don’t see any kind of hatch, I may still try one of the above mentioned nymphs, but more likely I’m going with something big, like a stonefly nymph. It may be more psychological, but I feel like I’m more likely get that lethargic fish to eat if I show him a bigger mouthful. Girdle Bugs, black Wooly Buggers, Yuk Bugs, and Bitch Creek Nymphs in sizes #10 – # 4 are personal favorites.
Girdle Bugs
Regardless of your nymph selection, you’re going to want it to drift as slowly and as near the bottom as possible. I like to use heavy flies and I like to use split shot. Take your time and adjust your weight regularly as you move to areas with different depths and current speeds. If you’re not hanging up on the bottom from time to time, you’re not deep enough. If you’re hanging the bottom every time, you’re too deep. Take the time to get it right. That fly needs to be right in their nose!
Adjusting your strike indicator (if you’re using one) can help too, but usually the answer is more weight. Most fishermen just don’t have their nymphs deep enough in the winter. A great way to learn about the effects of different current speeds vs. the amount of weight on your line is to spend some time fishing a fly you can see under water. For instance, tie on a bright pink egg and watch how deep it sinks, how fast it sinks, and how it drifts with no weight, then 1 spit shot, then 2 split shot, etc. Try it with a strike indicator and without to learn how the indicator can impact the drift, too. This is just a great way in general to better understand nymphing, and sometimes you’ll even catch a fish on that trashy pink egg!
Again, don’t expect near the number of strikes that you might in spring. But if you’re just itching to get out of the house and are willing to be patient, you might just be surprised what you find.
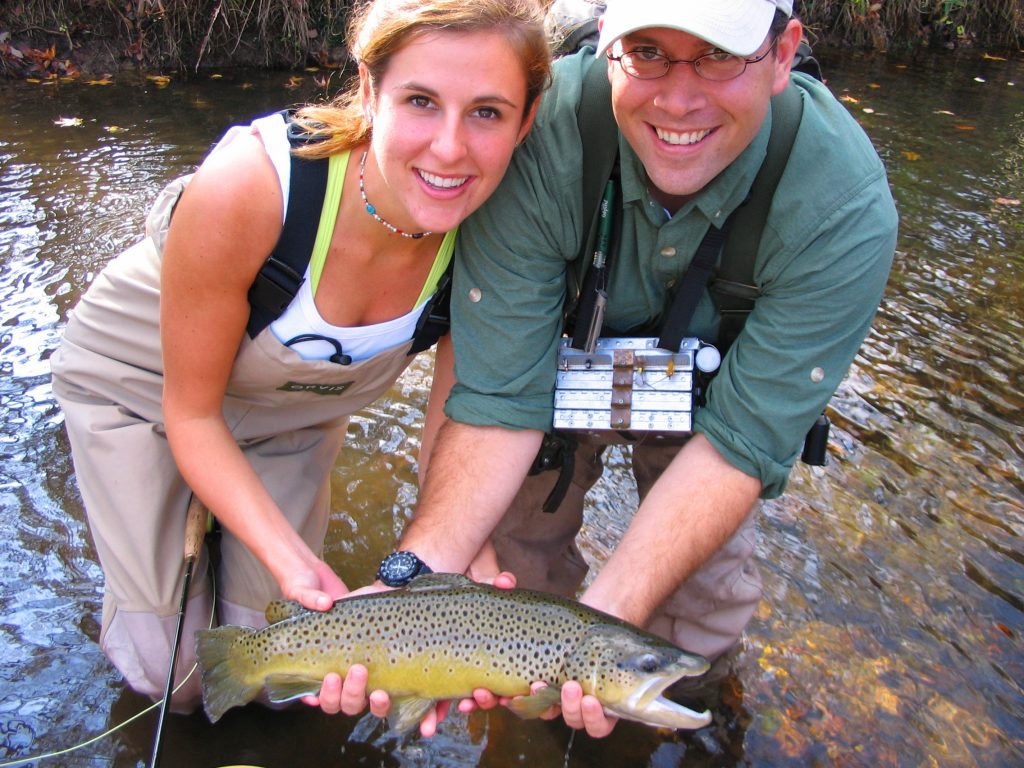
It’s the time of year when certain folks seem to be whispering more at the fly shop. They huddle in corners and peek over their shoulders before saying too much. They’re talking about brown trout. Big ones. Somebody mentioned seeing a decent one around Metcalf Bottoms – about 18-inches. A younger guy innocently asked, “Since when did we start referring to 18-inch browns as just ‘decent’?” The older guy replied with a grin, “October.”
Many anglers purely think of the Smokies as a place where you catch wild trout in a pretty place. But as a whole, you don’t expect to catch particularly big trout. After all, rainbows rarely exceed 15-inches and brook trout rarely get any bigger than 10-inches in the Smokies. They’re both almost exclusively bug eaters, and after 3-5 years, they simply can’t support their weight with the bugs available, and they die. But when brown trout reach about 8 or 9-inches, they begin eating minnows, and crayfish, and mice, and birds, and small rainbows. They live 10-15 years and reach lengths of 30-inches in the Smokies!
Late fall brown trout
Fish that size don’t get caught often. Brown trout only live in a handful of rivers in the Smokies to begin with. They’re extremely cagey and for much of the year, they do most of their feeding at night – it’s illegal to fish the park at night. So, outside of the occasional big brown caught at dusk, or dawn, or after a good rain, we don’t get a lot of good shots at these guys. Until late fall.
Brown trout tend to make their spawning runs after the fall foliage has turned colors but before the last leaves have fallen. In the Smokies, that’s usually late October or early November. They typically move to shallower, more visible areas of the stream and are spotted by far more fishermen then. When they’re actually on the nest (or redd), we leave them alone. Not only is it just bad ethics, but they have other things on their mind than food at that time. But in the weeks leading up to the spawn and in the weeks to follow, their appetites are enormous!
In the weeks leading up to the spawn, they’re on the move searching for suitable nesting areas, often. This is when many fishermen are hoping to get their shot at a trophy. A number of folks have booked me during this time, thinking a seasoned fly fishing guide will be their ticket to success. While I can certainly help locate the fish, there is a whole lot that has to go right to catch him. It’s not just having the right fly at some secret honey hole!
Little River brown trout
Most people aren’t willing to put in the time it takes to catch one of these fish. Unless you’re just going to depend on luck, you have to trade fishing time for looking time. You may not spot one at the first place, or second or third… And once you do spot one, you’re not done looking. You have to watch him for a while to figure out his pattern: how he’s feeding, where he’s feeding, when he’s feeding, IF he’s feeding. You then may have to spend a pain-staking amount of time sneaking into a position where you can cast to him without spooking him.
Assuming everything has gone your way up to this point, you may only have one shot at him. A bad cast will kill the deal. And if he does eat and you do hook him, you’re problems have just begun. Now you have to fight a 25-inch trout in the fast, rocky waters of the Smokies! But it’s all worth it when it does come together and you become one of the lucky few. It’s the stuff legends are made of.


 Putting on waders hardly sounds challenging enough to warrant advice. But there are a couple of things you can do that will make you more comfortable during the day. More important, there are things to do to protect and extend the life of your waders.
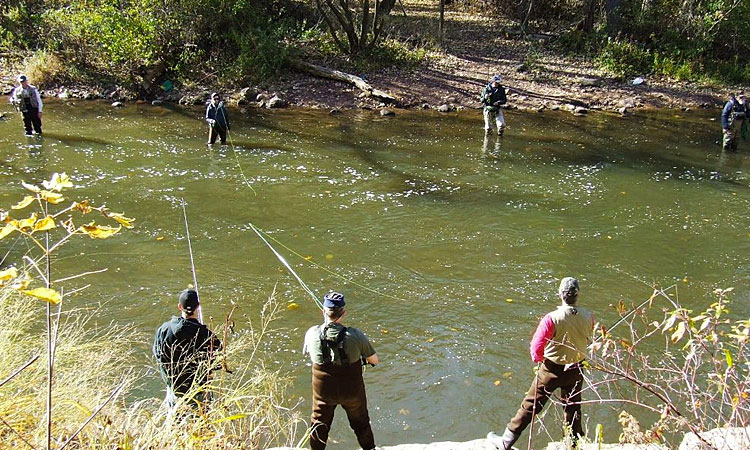

 When we first met, I cringed as he pulled his rod from the trunk of his car. It was not in a tube and there were a variety of items piled on top of it. I’ve seen a lot of rods break over the years, but I’ve never seen a single one break while it was in the tube. If you knew him, it would come as no surprise that he forgot to bring a reel for the rod, so he ended up using one of mine.
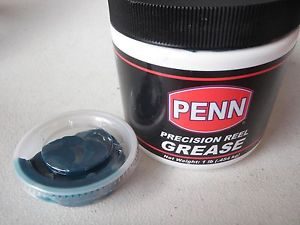

 It’s the time of year when certain folks seem to be whispering more at the fly shop. They huddle in corners and peek over their shoulders before saying too much. They’re talking about brown trout. Big ones. Somebody mentioned seeing a decent one around Metcalf Bottoms – about 18-inches. A younger guy innocently asked, “Since when did we start referring to 18-inch browns as just ‘decent’?” The older guy replied with a grin, “October.”