Balancing a Fly Rod

Every year, it seems every fly rod company comes out with a new rod that is not only supposed to cast itself, but is substantially lighter than its predecessor. As a matter of fact, the average graphite rod today is probably about 1/3 the weight of the average graphite rod of 30 years ago. And that difference is far more substantial when you start comparing the weight of today’s graphite rods to the bamboo and fiberglass rods that your father or grandfather may have used. But none of this matters if your rod is not properly balanced by your reel.

It’s a phenomenon called “levered weight.” If you carry two 20lb. buckets of water, one in each hand, it will feel more comfortable than carrying just one 20lb. bucket of water in one hand. One side balances out the other. The same concept applies if you have the lightest fly rod on the market but have a reel on it that is too heavy. It will feel heavier in your hand than a heavier rod that is properly balanced by its reel.

Pretty well balanced rod

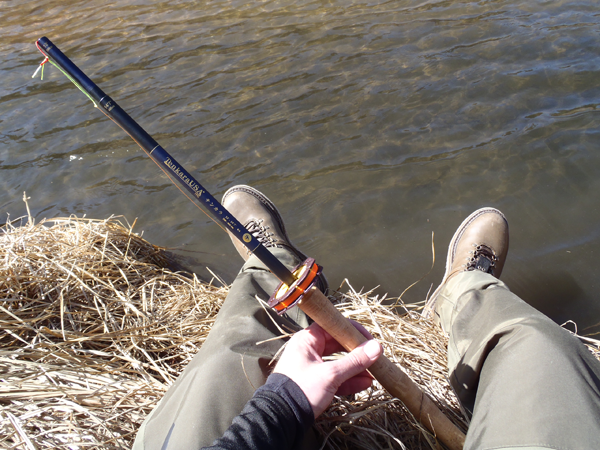
When it comes to trout fishing and really, most freshwater in general, your reel does not play a very significant role. Unless, you just have to have “the best,” it is not necessary to sink a lot of money into a reel. However, just because it may not be the most important piece of equipment, doesn’t mean you shouldn’t put some consideration into things like its size. It needs to be big enough to comfortably hold the fly line and appropriate amount of backing, and it needs to balance the rod. In most cases, a rod and reel are balanced if it will self-balance when you set it on one finger positioned near the tip of the cork grip.

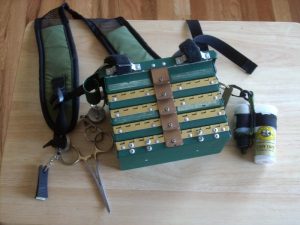
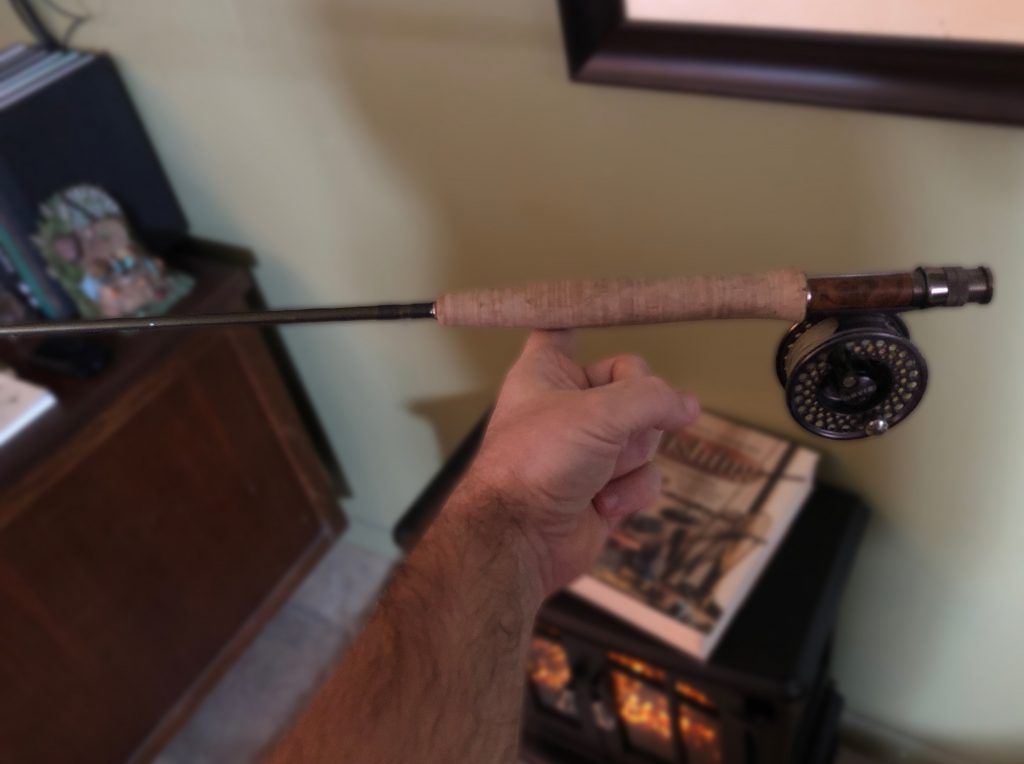
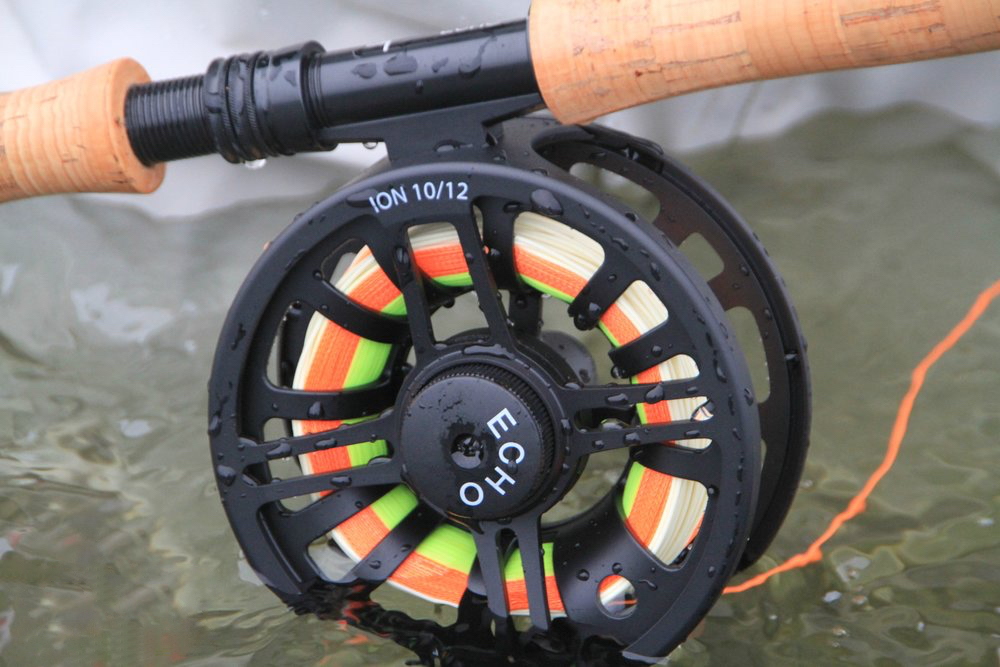
In the picture above, the reel is just a little too heavy for the rod. I prefer the balance point to be just a little closer to the tip of the cork. But it’s close enough to not feel uncomfortable.

Most companies will designate specific reel sizes for specific line and rod sizes. If a reel is for 4 – 6 weight lines, it not only means it has the capacity to store those line sizes, but it should balance most 4 – 6 weight rods. Of course, things like the material from which the rod is made and the length of the rod can determine if it actually falls in the “balance range” of that particular reel. If your rod is a short, super light 4-weight, you may want to bump down to the next smaller size. On the other hand, if your rod is a 6-weight bamboo, you may want to bump up to the next larger reel size.

The design of the reel seat on the rod will also be a factor. Almost all modern graphite rods have an uplocking reel seat, which positions the reel just behind the cork grip. Some bamboo rods may have a downlocking reel seat, which puts the reel almost right at the butt of the rod. The latter can help when trying to balance a heavier rod.

As reels become lighter and lighter, it has become far more difficult to find appropriate size reels to balance bamboo rods. However, one reel manufacturer, Ursus, has designed a reel that has removable brass plates on the interior. The weight of the brass plates help to balance heavier bamboo rods. When using the reel on a lighter graphite rod, the plates can be removed. Pretty cool.

In any case, no matter what rod you fish with, keep this in mind when selecting your reel. It will greatly reduce casting fatigue and result in much more enjoyable days on the water!

Poppers

Fly Fishing Popper
Hard Body Popper

A popper, or popping bug, is a type of topwater fly commonly used for warmwater species like bass and bream. Unlike the often delicate and diminutive dry flies used in trout fishing, poppers are typically bright and robust. While topwater trout flies are commonly designed to discreetly drift down a feeding lane, popping bugs are designed to make commotion.

Deer Hair Popper
Deer Hair Popper

Poppers are most often made with a hard, cork body but more and more frequently are being constructed of foam. Softer variations are also made by spinning deer hair on a hook. The hair is tightly packed and trimmed to shape. Using different colors of deer hair allows for some pretty cool color and design variations. However, color and design variations can also be achieved on cork and foam poppers with paint and markers.

What they all have in common is a flat or cupped “face” and a body that usually tapers slightly, getting smaller toward the rear of the hook. When fishing with them, the idea is to pull your line with a short, quick motion that jerks the fly abruptly. As a result, the flat or cupped face of the fly will make a “pop” on the water.  A popper could certainly resemble some sort of insect, but most often it is designed to suggest a struggling baitfish.

Sneaky Pete Slider
Hard Body Slider

A diver or slider is frequently lumped into the popper category. However, while made with similar materials, these have more of a bullet shaped face. The body tapers in the opposite direction of a popper. You use similar fishing methods with this style of fly but when the line is pulled toward you, the bullet head causes the fly to dive or erratically slide through the water.

Fly Line Backing

Orvis Dacron Fly Line Backing
Dacron Backing

There are many fly anglers that don’t even know that they have fly line backing on their reel. Many more are aware that it’s there, but have no idea why. It’s just something the kid at the fly shop added when he strung up the reel and fly line you bought. If you’re a freshwater trout fisherman, it’s of no obvious value because you likely never see it. If you’re a saltwater fisherman, you’ve seen it plenty of times… and it made you nervous! Whether you’re accustomed to seeing your backing or not, it has value to you as a fly fisherman.

But what is it? For starters, backing is a thin, synthetic line that connects your fly line to your reel. It is most often made of Dacron, a strong synthetic material that will not dry rot and will likely never need to be replaced. So, even though you may need to replace your fly line every few years or so, you’ll likely just attach it to the same backing that was originally put on your reel. It has two primary purposes: to fill up space on the reel and to act as an “insurance policy.”

Let’s first talk about its role as insurance policy. The average fly line is 90–100 feet in length. So, if you make a 40’ cast and hook a large fish that runs 50’ or more, you’re in big trouble! But with an additional length of backing on the reel, you are able to deal with longer runs made by big fish. So, why not just use longer fly lines?

Fly lines are expensive. A 90’ fly line will commonly cost $50-$100. However, you can get 100 yards of backing for about $5-$10. Some fly shops even give you the backing for free when you buy a reel and line from them. And again, you’ll likely never have to replace it. What’s that, you say? You only fish small streams and there is little to no chance of a fish running out 100 feet of line?

As mentioned above, the other purpose of backing is to fill space on the reel. Fly line has a significant amount of “memory,” and if you wind it directly on the small spindle of a trout reel, it will create small tight coils in the fly line. It will also require more turns of the reel to pick up line. However, by filling the reel with an appropriate amount of backing, you create a larger arbor for the fly line to rest on. As a result, you’ll have larger, more manageable coils in the fly line and more efficient line retrieval.  

The average trout reel will have a capacity to hold the fly line and probably 50–100 yards of backing. Larger saltwater reels will hold significantly more – anywhere from 200–600 yards. How much backing a reel holds depends on the size of the reel, the size fly line on the reel, and the type of backing used.

Dacron backing typically comes in sizes 12–30 pound test, with the heavier strength taking up more space. Gel-spun polyethylene backing is also available. It is more expensive but has a significantly greater strength to diameter ratio. For that reason, gel-spun backing is often the choice for saltwater fishermen.

Multi-colored Fly Line Backing

Finally, backing has become a bit of a fashion statement for many fly anglers in recent years. While it has traditionally come in white, there are now multiple colors of backing available, providing brighter color schemes on the reel.

How Stuff Works: Fluorocarbon

Orvis Mirage Tippet Spool
Fluorocarbon Tippet

In the general population of humans, you regularly find two extreme views when those humans are contemplating two similar items that are priced significantly different. One perspective reasons that the two items are so similar that there is no way the more expensive item could be that much better. The other perspective assumes that because an item is more expensive, it must be better. When it comes to choosing fluorocarbon or nylon fishing line, you can bet both of those assumptions are regularly made. And both of those assumptions are very wrong.

Fluorocarbon began gaining popularity as a material for fishing line in the early 2000’s. It was billed as invisible and came with a cost nearly three times that of its nylon counterpart. That pricing disparity is still present today. For example, a 30-meter spool of Orvis nylon tippet costs $4.95. A 30-meter spool of Orvis fluorocarbon tippet costs $14.95. That’s a pretty big difference! But is fluorocarbon that much better?

First, it’s important to understand that the higher price of fluorocarbon is more a result of its manufacturing process than it is its fishing value. With that said, it does have some significant advantages over nylon, but it has a few disadvantages too.  Where you’re fishing, what you’re fishing with and what you’re trying to accomplish should ultimately determine which material will best suit your needs.  Below is a categorical contrast between fluorocarbon and nylon to help you decide.

Strength:

When you compare nylon and fluorocarbon of the same diameter, it will vary a little from brand to brand, but fluorocarbon nearly always has a higher breaking strength. And fluorocarbon is a harder material so it is significantly more abrasion resistant.

Visibility:

The light refractive index of fluorocarbon is very similar to that of fresh water. For this reason, it is far less visible in the water than nylon. Do you want to see for yourself? Take a piece of 5X nylon tippet and a piece of 5X fluorocarbon tippet and dip them in a glass of water.

Density:

Fluorocarbon is denser than water, which means it sinks. That’s a good thing if you’re trying to drift a nymph near the bottom. It’s not a good thing if you’re trying to drift a dry fly on the surface. Nylon suspends on the water, making it a far better choice when fishing dry flies.

Knotability:

Nylon is far suppler than fluorocarbon, giving it a big edge when it comes to knots. Because fluorocarbon is stiffer, the knot often doesn’t seat properly. Since the knot is always the weakest link in your set-up, this can sometimes offset the superior breaking strength of fluorocarbon. When tying knots with fluorocarbon, take your time and use extra care to ensure that your knots seat well.

Summary:

I personally use both of these materials, depending mostly on where I’m fishing. In the Smokies, I fish a lot of dry flies. And even when I’m nymph fishing, it’s usually in fast, broken water where line visibility is just not an issue. For those reasons, I almost exclusively use nylon. Fluorocarbon just doesn’t seem to provide any real advantage.

However, on many tailwaters like the Clinch, most of the runs are very clear, unbroken and slow moving. Therefore, line visibility can be a major factor. Additionally, I am fishing with nymphs probably 90% of the time on rivers like the Clinch. Other than the handful of times I’m using a dry fly, you can bet I have fluorocarbon tippet tied to my fly on the tailwaters.

What I do not use, however, are fluorocarbon leaders. Even when I’m nymphing, I still need to control the depth of the fly and I don’t want the entire leader to sink. On the Clinch, I’m usually only fishing a couple of feet deep. So, I prefer to use a traditional nylon leader with the appropriate amount of fluorocarbon tippet attached to the end. 

Another situation when I routinely use fluorocarbon is when I’m sight fishing for carp on mud flats. The water on these flats is usually slightly stained so tippet visibility is not a great concern. But I’m hooking a commonly 5 to 20-pound fish in about a foot of water. That fish is inevitably going to run me over rocks and chunks of wood while I fight him and I like having the superior abrasion resistance of fluorocarbon to get him landed.

In conclusion, don’t let price dictate your choice one way or another. Think about the place you’re going to be fishing. Consider the methods you’ll be using. Weigh these things in your mind and choose the best tool for the job!

The Effect of Severe Weather on Trout

In the wake of our recent heat wave and drought conditions in East Tennessee, I’ve been hearing the same question that always surfaces after a severe weather event…. the same questions that came up after out flooding in February 2019. What does this do to the trout? It depends. It depends on the fishery and it depends on the fish.

First, let me clarify that what I’m going to talk about here is severe conditions. For instance, a few hot days and a little bit of low water does not constitute drought. Those conditions have to persist over a longer period of time. Similarly, a few days of high water doesn’t equal severe flooding. What we’ve had this February (2019) is severe flooding.

Bald River Falls, TN
Bald River Falls after last week’s floods

In general, when you get severe conditions as described above, you’re going to lose some fish. A major drought is harmful to all trout but tends to impact the bigger fish. Low, hot water depletes oxygen and bigger fish require more oxygen. A major flooding event will have the greatest impact on younger, smaller trout because they don’t know where to go. Stocked trout are also very vulnerable to high water events for the same reason young wild trout are. They just don’t know what to do.

Nearly 20 years ago, we had a major flood and were catching large brown trout around the picnic tables at Metcalf Bottoms. However, I should point out that it wasn’t a guide trip. Rather, it was a group of very experienced Smoky Mountain trout fishermen who all knew the area VERY well. In other words, don’t try this at home! But the point is, the bigger, older wild fish knew where to go to get out of the heavy currents. In that case, it was under a normally dry picnic table!

Flooded Little River, TN
Little River in the trees

So, you are absolutely going to lose some fish, maybe a lot, when these sorts of things happen. For some fisheries, it can be devastating. In a small, stocked stream, you may have some really crappy fishing until they stock again. For the Smokies, it tends to be a good thing in the long run.

As I’ve discussed before, the streams in the Smokies are very healthy as far as fish populations, but they are nutrient poor. Nutrient poor streams have a far less dense population of aquatic insects. When you have trout streams with very healthy fish populations but an inadequate food supply, you end up with a lot of small fish. So, when you get a major drought or flooding event that “thins the herd,” there is more food for the survivors and they get bigger.  In the Smokies, this is especially true for the rainbows and brook trout.

Years ago, we had a major drought in the Smokies. Prior to the drought, we averaged 4000 fish per mile. Following the drought, the number dropped to an average of 2000 fish per mile. Half of the fish were gone! Local fishermen learned about this and started pulling their hair out thinking fishing in the Smokies was going to be terrible.

Instead, in the year or two after the drought, they found that they still caught about the same number of fish they always did, but the fish averaged an inch or two bigger. After all, you’re only going to catch so many in a pool before you spook it. So, you may only catch six fish out of a pool whether it has fifty fish in it or one hundred.

Abrams Creek Rainbow
A really nice park rainbow

The impact drought has on fish size is not usually apparent for a year or two. But the impact that floods have on fish size are often more immediate. You tend to find noticeable differences that same year and significant differences the following year.

In other words, if you fish the Smokies this year and next year, don’t be surprised if the rainbows you catch aren’t a little bigger! 

Adjusting Weight When Nymphing

Split Shot

Warning! This article contains terrible illustrations!

Several years ago, I was fishing a stream in the Smokies that I probably know better than any other. It was an early spring day and the water temperature was marginal at around 50-degrees, and the water level was a little high because of recent rainfall. I’d been fishing for two hours and hadn’t even had a strike. I knew it wasn’t a dry fly kind of day. Therefore, I continued to switch nymph patterns, trying to find something that would fool one trout.

Eventually, I decided to stick with one fly pattern, a Pick Pocket, that I had a lot of faith in and to begin altering the way I fished it. Since it was an un-weighted wet fly, I already had one split shot about 8” above it. I began swinging the fly a little more, but the result was the same. Next, I added a second split shot and fished with a mix of swing and dead drift techniques. Nothing. Finally, I added a third split shot and hooked a fish on my second cast. I proceeded to catch another 30 fish or so over the next couple of hours.

I should have known better but we all seem to get too caught up in fly patterns and lose sight of other important factors like drift and depth. Well, I had been fishing good drifts all day, but these fish were hugging the bottom. My fly was not getting, or at least staying, down in their feeding zone.

Split Shot Assortment

Do you use split shot when you’re nymphing? There are definitely times when you need to. One of the best nymph fishermen I have ever fished with is Joe Humphreys. It is excruciating to watch him fish because every time he moves to a different spot, he adjusts the amount of weight on his line! But he often catches fish that others don’t because of those adjustments!

Being willing to add or remove split shot to your line is the first step. Knowing where and how to place those weights is the next. For instance, if you put three split shot right next to an already heavily weighted fly, you may have a hard time keeping it off the bottom. So, you have to figure a lot of things, like how heavy your fly is, how deep the water is and how fast the water is. Just the weight of the fly may be all you need to get the nymph near the bottom in slow water, but faster currents may move that fly all over the place. Extra weight can be used not only to get the fly deeper, but also to slow the drift and keep things where they should be.

Shot placement is tricky in places like the Smokies where depth and current speed can vary significantly, even in the same run or pocket. Short casts and good line control can significantly help combat this. Strategic split shot placement can also make a big difference.

Split Shot Placement
Split shot placed at the fly

The closer you put the additional weight to the fly, the more you’re going to put the fly on the bottom. As a result, you’ll probably hang up more. But if you put a concentrated amount of weight on a section of leader above the fly, that portion of leader will be what drifts deepest, and the fly will ride above it. The farther the split shot is above the fly, the farther off the bottom the fly will drift.

Of course, there are variables like how heavy the fly is and how much split shot you use. Sometimes you just have to play with it a little bit. When you get as good as Joe Humphreys, you can make those calculations in your head and adjust perfectly for each new spot you fish. Here are a few examples of how you might want to adjust your setup. 

Split Shot Placement
Split shot placed above the fly

The Clinch River often has long, slow slicks that maintain fairly consistent depths. Consequently, the weight of the fly alone should be sufficient to get and keep the fly where I want it. In a 6’ deep plunge pool in the Smokies, I’m going to need a lot of weight to get my fly deep and keep it there because of the water depth and turbulence. I’ll likely use a heavily weighted fly plus a few pieces of split shot placed near the fly. But fishing pocket water in the Smokies, the depth in one pocket probably varies from 12-24”, with a lot of fast currents. Here, I would probably use a lightly weighted (or un-weighted) nymph with one or two split shot placed 6-8” above the fly. This will keep everything down but allow the fly to drift just off the bottom where it won’t hang up as much.

Split Shot Placement
Split shot placed below the fly

There is another method that some anglers use where a separate piece of tippet is added to the leader or to the back of the fly. The desired number of split shot are then added to that piece of tippet, allowing the fly to remain above the weight. It works, but I find that split shot hanging on a loose, vertical line like that have a greater tendency to get hung up and pulled off on rocks. As with most things, you sometimes have to play with a few methods and figure out what works best for you.

There are, of course, different sizes of split shot and what size you use can certainly determine how many you need to use. I typically use small to medium size shot because it gives me more flexibility and versatility to add or remove as needed.

In any case, if you are only nymphing with a weighted fly under a strike indicator, you are just scratching the surface of nymphing. I encourage you to experiment with different amounts of weight and different weight placements. You’ll probably start catching a few more fish… and maybe a few bigger ones, too!

How Stuff Works: Fly Categories

Box of Wet Flies

If you’re new to the sport, sometimes it is difficult to navigate all of the terminology. There is probably no facet of fly fishing where that is more complicated than in the world of flies. I’m not even talking about specific names of flies. That water can definitely get over your head in a hurry. Before you can even begin to make sense of those fly pattern names, you have to get a handle on the more general categories under which they fall. And that’s what we’re going to tackle here.

Let’s start with the term flies. I frequently hear it misused as its own separate category. For instance, someone might ask me if we’re going to be using flies or nymphs. That’s kind of like asking if you have a poodle or a dog. Of course, a poodle is a type of dog. And a nymph is a type of fly. Regardless of what it is supposed to imitate, any lure that we fish with a fly rod is generically referred to as a fly. Flies are then broken into more specific categories.

Dry Flies

Popping Bug
Popping Bug

While it can certainly be broken down to more specific sub-categories, the main category of Dry Flies refers to any fly that is designed to float and be fished on the surface. This would include something like a Parachute Adams that might represent some sort of adult mayfly. It would include a Dave’s Hopper that imitates a land-based grasshopper that has ended up in the water. Or it could even be a large, hard-bodied popping bug used for bass fishing.

One might fall under the sub-category of Trout Flies, another under Terrestrials, and another under Bass Bugs.  But they are all flies because they are fished on a fly rod and they are all dry flies because they float on the surface.

Nymphs

Hare's Ear Nymph
Hare’s Ear Nymph

Nymphs are a category of flies that you typically fish under the surface and more specifically; they imitate the juvenile stage of an aquatic insect. A Tellico Nymph, for instance, represents the juvenile stage of a stonefly. A Pheasant Tail Nymph imitates, most often, the juvenile stage of a mayfly. Most nymphs drift helplessly in the current and we use tactics that allow our imitations to do the same.

To confuse things a little, some flies that don’t imitate juvenile stages of aquatic insects get lumped into the nymph category because they are fished like nymphs. For instance, a Green Weenie is a representation of an inchworm that has fallen into the water. Though an inchworm is obviously not a juvenile stage of an aquatic insect, when it falls in the water, it sinks and drifts helplessly with the current. So, you fish its imitation like a nymph. Sowbugs and scuds are other good examples of this. They are actually crustaceans that will never hatch into an adult that flies from the water. But their imitations are most often fished like other nymphs, so they fall into the nymph category.

Wet Flies

Early Wet Fly
Typical Wet Fly

The category of Wet Flies is a little confusing and could probably be more of a sub-category of Nymphs – or vice versa. Wet flies are usually not tied with materials that allow them to float. They are also not really designed to sink. Rather, they often have a soft hackle that provides a lot of motion and you commonly fish them on a swing rather than a drift. So, you mostly fish them in, or just under, the surface film. A wet fly could imitate a variety of things. Mostly they are suggesting a mayfly or caddisfly as it is emerging to hatch.

Streamers

Clouser Minnow
Streamer: Clouser Minnow

Streamers are also flies that sink but more specifically, imitate things that swim. Again, anything you fish on a fly rod is generically referred to as a fly, but these flies represent things like minnows, crayfish and leeches. So unlike nymphs that you usually fish on a dead drift, or wet flies that you usually fish on a swing, you typically strip and actively retrieve streamers through the water.

Naturals and Attractors

So you can take all of the flies that are out there and lump them into four categories: Dry Flies, Nymphs, Wet Flies and Streamers. Now, you can take all of those and split them into another two broad categories: Naturals and Attractors.

A Natural is a fly that specifically imitates something that exists in nature. A Blue Wing Olive dry fly specifically imitates a Blue Wing Olive mayfly adult. The Hot Flash Minnow Shad is a streamer that specifically imitates a threadfin shad. A Green Weenie imitates an inchworm. They’re all fly patterns intended to represent something specific.

Hot Flash Minnow Shad

You most often fish naturals when fish are keyed in on a specific food source and you know what it is. If there is a big hatch of Blue Wing Olives, trout may not eat anything that doesn’t look like a Blue Wing Olive. Or because stripers are working a school of threadfin shad, they may not consider anything that doesn’t look like a threadfin shad.

Attractors are flies that don’t look like anything in particular. They are also sometimes called Generals or Prospecting Flies. They might just be something very generic that looks like a lot of things. Or they might be something that doesn’t look like anything at all. They may just have a certain color or other trigger that generates a feeding response from a fish.

Most of the time, you are fishing with attractors, especially in places like the Smokies where fish are more opportunistic. There are rarely big enough hatches in the Smokies to allow a fish to efficiently key on one particular bug. You fish things like a Parachute Adams because it resembles a lot of things fish might see on the surface. Or you fish a Prince Nymph because it has characteristics that trigger a feeding response from a fish.

Wooly Bugger
Wooly Bugger

If you’re fishing for smallmouth and you’re not sure what they’re feeding on, you might tie on a Wooly Bugger. Depending on its color scheme and how you fish it, it could pass for a minnow, leech or even a crayfish. Essentially, it just looks like something to eat.

Yes, flies and the vocabulary that describes them can be confusing. Hopefully this article has helped a little. Don’t get frustrated. Embrace and enjoy the chaos. It’s all part of the fun!

How Stuff Works – Tenkara

Tenkara Fishing Smoky Mountains
Fishing with tenkara

Many of you have already entered the world of tenkara. Others have probably at least heard a little bit about of it. Many fly fishers think its the greatest thing that’s ever happened, and just as many more think it’s just plain stupid. Regardless of what you may think, what many thought was a passing trend appears to be here to stay. So let’s learn a little something about it.

The Big Picture

By definition, tenkara is an old, simplistic form of fly fishing that comes from Japan. The reason many think of it as simplistic is that there are very few moving parts. There is no reel and no extra line. There is just a single length of line that is attached to the tip of the rod.

The rods are on the longer side, typically 10 – 12′, but there are shorter and longer versions. This method of fishing often involves a single cast and the length of the rod is used to reach and keep much of the line off the water. So, it’s a long rod with a single length of line attached to the end? Isn’t that just cane pole fishing? Yes.

Anyone who tries to tell you differently is lying to you or themselves. It has been marketed as this revolutionary style of fly fishing, but it really is no different than fishing with a cane pole. But there’s nothing wrong with that. Old timers in the Smokies fished this way for decades and caught A LOT of fish.

Tenkara USA Rod
Typical tenkara set-up

The only thing that makes it different is the use of more modern materials. Rods used for tenkara are made from carbon fiber and are very light weight. They are also telescopic, so that 12′ rod travels at about 18″. The tips are very fine so they have an incredible amount of feel. Old cane poles were long and heavy.

The lightweight and packability is a big reason they are so popular. They are just really easy to throw in a backpack. But many seem to think their simplicity equates to less stuff to carry, and I just haven’t found that to be true. You may not need to have a reel, but you still need wading gear, flies, tippet, snips, water, etc. Sure you can just take the rod and some flies, but you could do that with a conventional fly rod. You’ll just have a reel on the end. The simplicity is more with the technique.

The Technique

We have a tendency to complicate things. I can use a conventional fly rod and use the same techniques as you would with tenkara. I’ve done it for years. But when you add a reel full of line, many people want to cast farther than they need to, and consequently end up with too much line on too many currents, resulting in a poor presentation. When you remove the extra line from the equation – when you can only use a fixed amount – you are forced to read water and properly position yourself. And the longer rod allows more reach to do those things.

There are times when you need to make longer casts. In long, slow pools, you often can’t get close to the fish without spooking them. Tenkara can put you at a significant disadvantage in these situations. I can’t think of too many places on the Clinch River, with its long slicks, where tenkara would be very practical. But in the Smokies, where we have a lot of pocket water and riffles, it’s deadly.

The Gear

Tenkara Lillian
Lillian

Again, a tenkara rod is just a long, telescopic rod with no place for a reel. Since there is no extra moving line, there are no guides on the rod. At the tip of the rod is a permanently affixed piece of cord, called the lillian. You attach your line here.

There are a few types of line used for tenkara. Some prefer a braided line with a length of tippet on the end. Others use a long, single piece of heavy, often colored, piece of mono with a length of tippet on the end. I build a specific line when I fish tenkara. I build a taper with different diameters of colored mono and attach the appropriate size tippet to the end.

Tenkara Line Tender
Wheel style line tender

There are also a number of different line tenders you can use when you want to break down the rod but keep the line and fly attached. Some of these devices are actually on the butt of the rod and you wrap the line around them. Others are a separate wheel that you wrap the line around and slide the wheel on the rod. The more popular this becomes, the more gadgets appear.

You can also find specific tenkara flies. They always seem to be tied with an unusual inverted hackle. I’m sure they catch fish but I never bought into this. I choose flies based on fish, stream, season and conditions – not what type of rod I’m fishing.

Learn More

This is very much an overview. A quick Google search of tenkara will provide a lot more details. Tenkara USA is one of the better companies selling this gear and they have a number of instructional videos on their website to help with everything from rigging to technique. Of course, I am always happy to help with any of this on a guide trip, as well. Bring your own rod or use mine if you’re just wanting to get a taste.

How Stuff Works: Sink Tip Fly Lines

Rio Sink Tip Fly Line
Sink tip fly line

Floating fly lines are by far the most common, and for most trout fishing situations, they are all you need. When nymphing below the surface, weight in the fly or on the leader (split shot) is enough to get the fly and leader down where it needs to be. Doing this while the fly line is still floating can be advantageous as it allows the line to be mended when necessary and provides for quicker pick up when setting the hook on a dead drift.  Even when fishing with streamers, a floating line is often adequate when stripping a weighted streamer through shallow trout streams.

But what if you want to get a streamer down and keep it down when retrieving it through deeper, swifter water? Such scenarios might include a mountain trout stream that’s running high from recent rain, or a tailwater fishery during generation. Both of these scenarios have produced some of the largest trout I’ve ever caught. Or what if you’re wanting to fish a streamer 12’ deep in a lake for stripers?

Performing the above tasks with a floating fly line would require a very heavy fly with a long leader. And the result would be extremely difficult casting and very limited “contact” with the fly. When fishing streamers, shorter leaders allow you to better control the motion of the fly when retrieving it, and give you much quicker feedback when the fish takes it.  Additionally, because of the floating fly line, the fly would rise with every strip of the line rather than staying deep in the target area.

Breakdown of a Typical Sink Tip Line
Breakdown of a typical sink tip line

A sink tip fly line solves these problems by allowing the front portion of the fly line to sink. Weightless flies that are easier to cast and sometimes have better “action” can be used and so can shorter leaders. And with the fly line submerged, the fly will stay down and retrieve more in a straight line rather than upward toward the surface. Full sinking lines can also be used for this task but can be clumsy to cast and nearly impossible to mend. A sink tip line more or less gives you the best of both worlds.

Sink tip fly lines have a number of variations. First, they will often have different lengths of sinking heads. In other words, the entire fly line will float except for the front 6’ or 15’ or whatever the case may be. In general, a shorter head will be easier to cast. A longer head will keep more of the line, and consequently the fly, down deeper. They will also come in different sink rates. Some manufacturers may provide a measurement in grains but most will be designated in a class – like a class 5. A Class 5, for instance, will typically sink at a rate of approximately 5” per second. A Class 2 will sink at approximately 2” per second. They commonly range from Class 1 (often described as an intermediate line) to Class 6.

Sink Tip Fly Line Sink Rates

Very often, the weight classes will correspond specifically with the actual line size. For instance, you may find a 10-weight sink tip line that is a Class 5, or a 6-weight sink tip line that is a Class 3, but there may not be an option for a Class 5 6-weight.

Sinking Poly Leaders
Sinking “leaders”

You can also find separate add-on sink tips to convert any floating line into a sink tip. This is convenient if you don’t want to carry an extra spool or if you don’t plan to fish sink tip lines frequently and don’t want the expense of an extra spool and line. However, my experience with these is that they hinge at the connection with the floating line and cast terribly.

As with nearly everything in fly fishing, you need to figure out what’s best for your task at hand. Where are you going to be fishing? What are you trying to do? What size rod will you be using?

Hopefully, this sheds a little bit of light on sink tip lines. They can be terribly confusing, mainly because every manufacturer seems to have their own way of describing them. You really need to read through the fine print in the description of the lines to figure out what’s what. Your best bet is to talk to someone at a local fly shop. They can really break down the differences for you.

How Stuff Works: Packs and Vests

Guided Fly Fishing in the Smoky Mountains
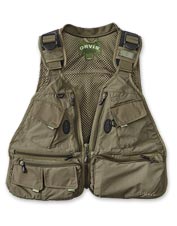
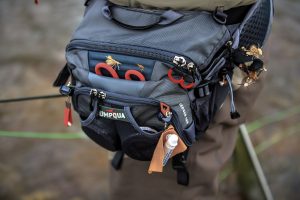
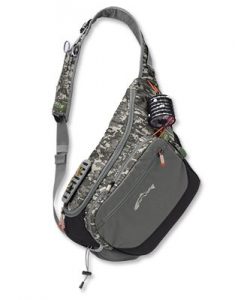
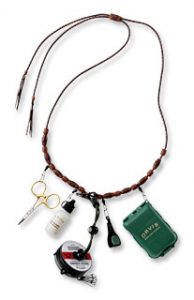
As with most things in fly fishing, fishing packs and vests have come a long way over the years.  The great thing about that is you now have a seemingly endless array of ways to carry and organize your on-stream tools and accessories.  The bad thing is those seemingly endless choices can be a bit overwhelming.

There is certainly no right or wrong pack or vest.  The best option for you will boil down to how much stuff you plan to carry. Where you plan to carry it (backcountry or more roadside) is another factor. And how do you want to organize things? As with fly rods, the more diverse your fishing adventures are, the more likely you’ll need multiple options. What might work well for backcountry trout fishing may not work very well wading saltwater flats.  But for most folks, you should be able to find one system that works for all of your fishing needs.

Again, what works best for me may not suit you at all. I’m not going to try to tell you the best product.  However, I have had the opportunity over the last 30 years to use most every style of vest/pack.  I’ll share below what I believe are pros and cons of each.

Orvis Fly Fishing Vest
Fly fishing vest

Vests: For decades, this has been the standard for carrying fly boxes, tools, etc. on the stream. While there have been some changes over the years, the basic concept is still the same. This is still the choice for many anglers.  One of the greatest benefits of a vest is that with individual pockets for nearly everything, it’s really easy to keep things separated and organized.  And the design of the vest is such that you can keep most of those items quickly and easily accessible.  Most vests will also have larger compartments on the back for items that you may not need to access as frequently, like a rain jacket or lunch. D-rings on the back of a vest also make a great place to attach a net where its out of the way but easily accessible with the addition of a magnetic or clip attachment.

While there have been numerous improvements over the years, the biggest complaint with vests is that they feel heavy. You carry most of the weight on your neck and shoulders.  Another downside is they do not wear well with a backpack.  If you like to do a lot of backcountry fishing, you may want to carry more safety and comfort provisions. That often necessitates a backpack in addition to your fishing gear.  It can be difficult to comfortably and practically wear a backpack when the straps are going over full, bulky pockets on a vest.

Umpqua Hip Pack
Hip pack

Hip Packs: You wear these around the waist on the rear when not fishing. Rotate to the hip to access items in the pack. Probably their greatest advantage is that they stay out of your way when fishing. This offers total freedom of movement when casting, etc. You can also add accessories (built in to some packs) to a net.

The biggest downside to a hip pack is that it doesn’t keep items as organized and it can be more difficult to access those items.  Additionally, the hip pack, by itself, usually does not have the capacity to carry larger items like a rain jacket or lunch.  However, a hip pack does wear comfortably with an additional backpack. Many will use the hip pack alone when fishing closer to the car and add a backpack when fishing in the backcountry. Finally, these are not the best option for someone who does a lot of deep wading.  Although, there are a lot of waterproof options now.

Fishpond chest pack
Small chest pack

Chest Packs: These, as the name implies, are designed to be worn on the chest. They come in a number of sizes and they organize things in much the same way a hip pack does. But items are far more accessible on your chest and high out of the water.  Many will have a D-ring on the rear of the neck strap for carrying a net. I would include a chest fly box (like I use) in the same category as a chest pack, except that there is no need for separate fly boxes.

Richardson Chest Fly Box
Chest Fly Box

Some don’t like having a cumbersome item on their chest and some of the larger chest packs can be quite cumbersome.  Smaller chest packs are very comfortable but don’t carry as much stuff.  In either case, you won’t have enough capacity to carry large items but like a hip pack, you can easily wear a backpack with your chest pack to carry more things when traveling far from the car.  Some companies even make “fishing backpacks” designed in such a way that a compatible chest pack can clip to the front of it.

Orvis Sling Pack
Sling pack

Sling Packs: These are the latest trend in fishing packs. They’re designed to be more accessible than a hip pack and more out of the way than a chest pack.  They’re worn diagonally across your body so that they can be easily “slung” around to your front when you need to get to it.  It can then be “slung” around and secured out of the way on your back when you’re fishing.  They come in small and large sizes depending on how much you need to carry.

These packs are well designed and very comfortable but even the big ones don’t have enough capacity to carry everything you might want to take on a trip deep into the backcountry. On such a trip, I typically carry a rain jacket, lunch, first-aid kit and plenty of water.  I also regularly carry my wading boots in on long hikes. You need a backpack to carry those items. A sling bag just can’t be worn and utilized with a backpack.  The other downside to a sling bag is there just doesn’t seem to be a good place to carry a net (if needed) without it getting in the way.

Orvis Fly Fishing Lanyard
Fly fishing lanyard

Lanyard: A fishing lanyard is basically a necklace for carrying your essentials around your neck.  Most will comfortably carry and organize nippers, forceps, tippet, floatant and small fly box.  By itself, this is for the absolute minimalist.  For others, it may be a way to keep essential, frequently used items immediately accessible while carrying other less frequently used items in a hip pack or backpack.

The downside is fairly obvious with a lanyard.  It has almost zero capacity.  There is no place for rain jacket, lunch, water, camera, leaders, multiple fly boxes, etc.  In my opinion, the only reasonable use for a lanyard would be in a boat or in conjunction with another pack as mentioned above.