Finding the Perfect Mountain Fly Rod

The Forgotten 4-weight
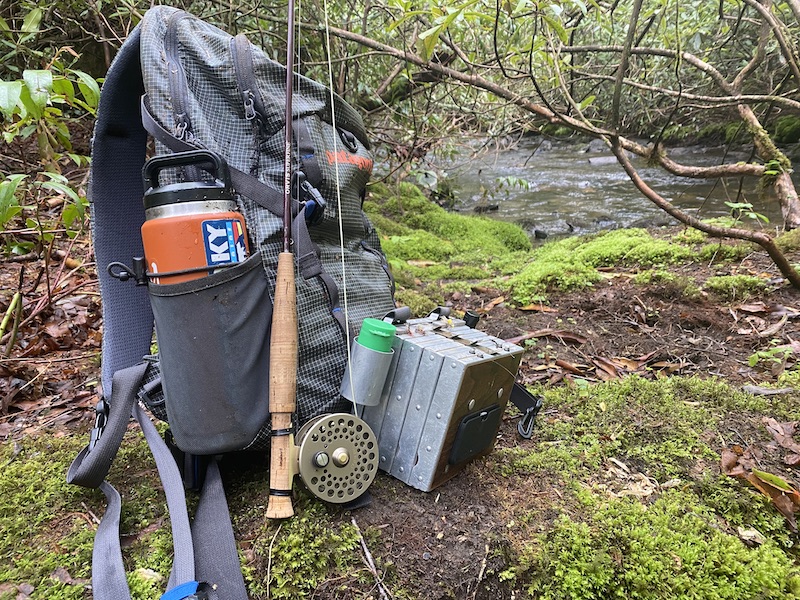
Orvis Superfine fly rod, Patagonia pack and Richardson chest fly box

Everyone is always looking for the one easy answer to a question and the one simple solution to a problem. In fly fishing, maybe it’s the dry fly that won’t sink, the nymph that won’t hang the bottom, the wading boot that won’t slip or the perfect size mountain fly rod. Well, I can tell you if you’re still hoping to find any of those things, you will be sorely disappointed. But with the latter, the perfect size mountain fly rod, I believe you can come close!

A few years ago, I was guiding a couple of guys on what I would classify as a mid-size stream in the Smoky Mountains. They were both fishing 12’ tenkara rods and absolutely clobbering fish. They wanted to fish at the same time, so I had them spread out in different sections of the stream, and I repeatedly walked the trail back and forth between them to help and advise as needed.

During my travels up and down the trail, I ran into two other fishermen on three different occasions. They were friendly and chatted with me about the fishing each time. As usual in those situations, I was pleasant but tried to be brief. By the way, if you ever engage a working guide on the stream or trail and he or she seems short with you, don’t take it personally. They’re working.

But in my brief interactions with them, they were quick to tell me that they were not catching fish, and were asking for advice, mainly regarding fly patterns. The third time I saw them, they told me that they still weren’t catching fish but had figured out that the problem was their rods were too long. Each of them had a 7 ½’ rod. I didn’t have the heart to tell them that my clients were catching fish left and right with 12’ rods, but I did mention the benefits of longer rods and offered a little advice on how to fish the stream.

So, obviously you need a 12’ tenkara rod to catch a lot of fish in the Smokies, right? Wrong. I’ve seen plenty of fish caught on 7’ fly rods, too! Many anglers fall into the trap of blaming or crediting all of their success or failure on the gear, whether rods or flies. All of these things are just tools. And in the hands of someone who knows how to use them, all of these tools can be effective. A good carpenter will build a fine deck whether he uses a handsaw or a power saw. And a bad carpenter will build a crappy deck regardless of the tool he uses.

Of course, when it comes to choosing the right tool for the job, it often comes down to the task at hand. But it just as often comes down to the style, preference and philosophy of the person using the tool. It’s why I often give such cryptic replies to people who ask me what rod they should use in a specific location.

When it comes to mountain rods, or really, just trout rods in general, I immediately eliminate anything bigger than a 6-weight. Yes, you can catch a trout on an 8-weight, but unless you’re big river fishing with oversized streamers for huge trout, it just doesn’t make much sense. 3, 4 and 5-weight lines are really your bread and butter trout weights, particularly in the mountains. They’re heavy enough to cast most anything you’d need to cast, and still light enough to achieve delicate presentations and offer less drag on the water. 1 and 2-weight rods fall more into the specialty category. They are a lot of fun but a little too light to qualify as a legitimate all-purpose rod.

It’s similar when we talk about rod length. It used to be that everybody thought you needed a really short rod, like a 6 or 7-footer, to fish in the tighter streams found in the mountains. I think they envisioned making these really long casts and thought the shorter rod would help with that. However, for most folks who know what they’re doing on a mountain stream, the casts are very short, and a longer rod gives you more reach to keep the line off varying currents. Recently, we’ve gone the total opposite direction with folks wanting to use a long rod like the 12’ tenkara mentioned earlier, or an 11’ fly rod popular with what people like to call “Euro-nymphing,”
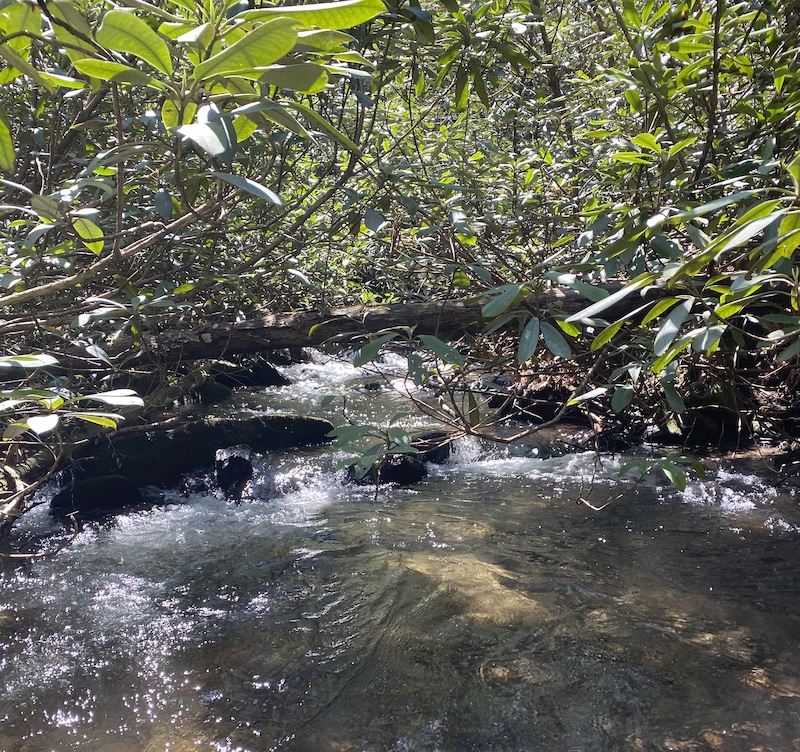
Small Mountain Stream
Tough place for an 11′ fly rod

I am regularly asked by guide clients which rod they should bring for a particular stream, the 7’ 3-weight or the 11’ 2-weight. Most of the time, the answer is “either.” Which one do you enjoy fishing with? Because most of the time, neither one is ideal. They’re both specialty rods in my book. The 7’ rod will give you a decided advantage on very small streams and in tighter areas of a bigger stream, but the lack of reach will put you at a significant disadvantage in open pocket water. The 11’ rod puts you at a distinct advantage in larger rivers or open pocket water areas of smaller streams, but it will be a major hindrance in tight spots.

And that’s fine. Which one do you enjoy fishing with? The short rod? Just know that you’ll be sacrificing reach and make it work. The long rod? Just skip past the tight stuff. But if you’re looking for versatility on streams that vary in characteristics, you may want to shift more toward the middle.

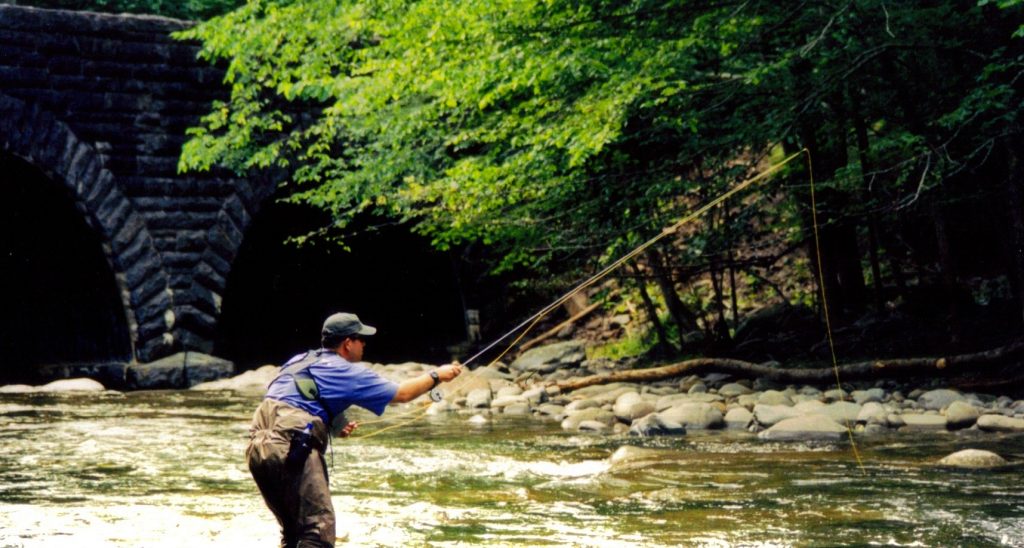
I said it 20 years ago and I still say it today. The perfect fly rod for fishing someplace like the Smoky Mountains is a 4-weight in a length between 8’ – 8 ½.’ Is it the absolute perfect rod for every situation? Of course not. But it’s the most versatile. It’s long enough to provide adequate reach when using high-sticking techniques in open water and it’s short enough to be able to maneuver in all but the tightest of streams. If I could only have one rod for the mountains, that’s what it would be.

Hopefully, if you don’t already, you will one day have the desire, passion and means to possess more than one rod for mountain fishing. But even then, I think you’re really pigeon-holing yourself by only getting rods at either extreme. I would start in the middle, with something like an 8 ½’ 4-weight, and add specialty rods from there.

As fly fishermen, we often love to jump on every latest trend, usually in an attempt to improve or simplify. However, in these perpetual attempts to improve and simply, we often end up over complicating things. Because most of the time, the best fly to imitate that nymph is a Pheasant Tail, and the best rod to fish that stream is an 8 ½’ 4-weight.


Wet Flies and Soft Hackles

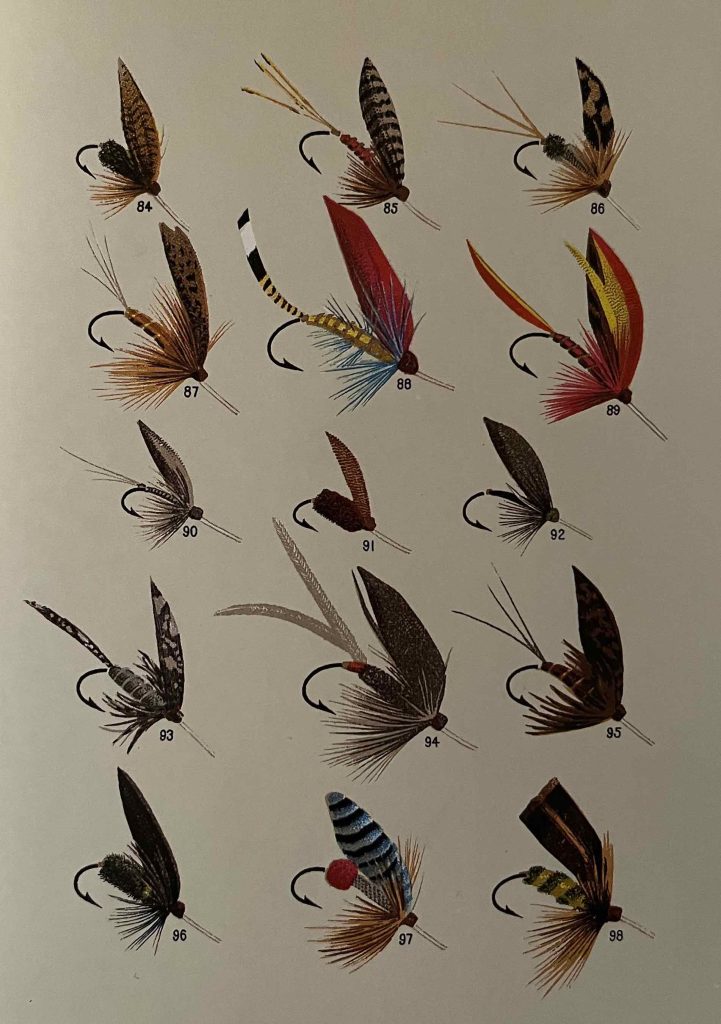
Late 1800’s Wet Flies

On numerous occasions I have been asked at the beginning of the day whether we’re going to be fishing dry flies or wets. But what the person usually means by “wets” is nymphs. Actual wet flies are a very specific style of fly that differ in many ways from a nymph. It’s a simple mistake that is of little consequence when chatting with your fly fishing guide. But making the same mistake when fishing on your own might be the difference in catching fish or getting skunked.

Let’s say you had the good fortune to run into another angler on the stream who tells you he clobbered them swinging a yellow wet fly. This is obviously a valuable piece of information. But if you tie on a yellow nymph and swing it through the currents, you’re likely not going to have much success. It’s kind of like assembling something and the instructions indicate that all you need is a Phillips screwdriver and you try to use a Flat Head.

Fly fishing terminology can be a bit confusing and sometimes overwhelming. However, learning this terminology will not only give you a better understanding of the sport, but will also help you better communicate with other anglers. One of the greatest sources of confusion for many is the topic of sinking flies. We’re going to ultimately focus more on wet flies, but let’s get started by listing different categories of sinking flies and what differentiates them.

Streamers

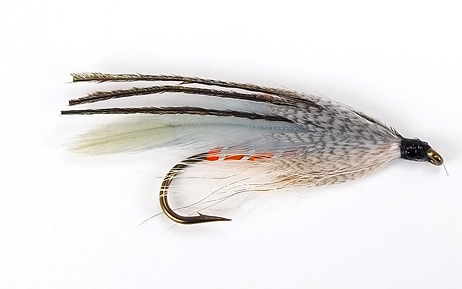
This is probably the easiest category to define so we’ll start here. Any imitation you fish with a fly rod is just generically called a fly. However, streamers are flies that sink and imitate something that swims. Flies that imitate things like minnows, crayfish and leeches are all types of streamers.

Streamer

These flies often have a long profile. They are frequently weighted with tin wire wrapped around the hook shank or a bead or cone on the head. However, some streamers are tied unweighted to be fished near the surface or to allow freedom of movement when fished on a sink tip line.

While there are always exceptions, streamers are typically fished with movement. The fly is often cast beyond a target zone and pulled through that zone by actively stripping the fly line.  

Nymphs

Nymphs are usually designed to imitate the juvenile stage of an aquatic insect. However, some fly patterns get lumped into the nymph category simply because they are fished like a nymph. For instance, a Green Weenie is thought by most to imitate an inchworm that has fallen in the water, not a juvenile aquatic insect. But since it is often fished subsurface on a dead drift, it is sometimes qualified as a nymph.

Beadhead Nymph

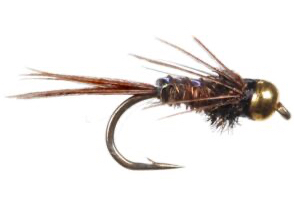
Compared to streamers, nymphs usually have a shorter, streamline profile that often tapers from a fuller thorax down to a slenderer abdomen. Many imitations, especially mayflies and stoneflies will include a tail and legs. Nymph patterns are commonly weighted by a brass or tungsten bead at the head or tin wire wrapped around the hook shank. For a variety of reasons, some nymphs may be tied unweighted, but this is not common.

As with anything, there are plenty of exceptions, but nymphs are most often fished on a dead drift near the stream bottom. This can be accomplished by suspending the nymph under a strike indicator or at close range, without an indicator using straight line nymphing tactics.

Wet Flies and Soft Hackles

This is where things get a little cloudy. Wet flies and soft hackles are technically different but are so similar we’re going to group them together. There are a rare few who will make a really big deal about you referring to a wet fly as a soft hackle or vice versa. These are typically the same people who start many of their sentences with “actually” and who will call you out in public if you end a sentence in a preposition. You know the ones.

If you spend any time at all researching the difference in wet flies and soft hackles you’re going to find a number of passionate arguments that all seem to lead you back to the same question: Now WHAT exactly is the difference? Right or wrong, I routinely use the two terms interchangeably. For the sake of simplicity, I’m going to use the term wet fly for now. Later, we can split hairs about what makes a soft hackle different.   

What’s Hackle?

Let’s start by defining hackle. Hackle is a feather that is wrapped around the hook when constructing a fly. When the feather is wrapped around the hook, the individual fibers of the feather splay out. Different types of feathers and different wrapping techniques will result in different fly looks and behaviors.

Many dry fly patterns use a hackle feather from the neck of a rooster. The fibers on this feather are relatively stiff and uniform, and they don’t cling together. These features help create a buoyant fly that will float well on the water. Body feathers from many game birds like a grouse or partridge are short and soft. They cling together more and when submerged, undulate in a lively manner.

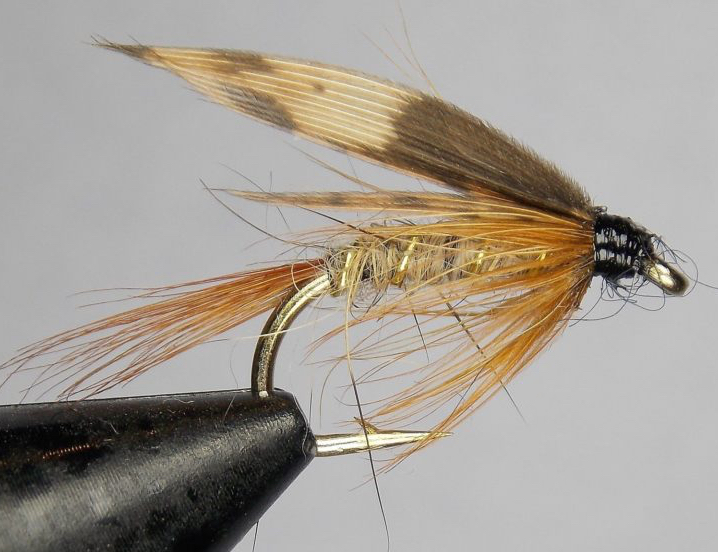
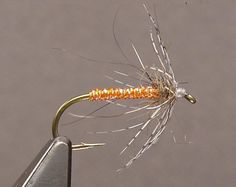
As you may have guessed, those “soft hackles” are used to construct wet flies. There is often a tail on these patterns but not always. There is a slender body constructed of floss, dubbing or a number of other materials. Sometimes there is a wing that is usually angled rearward. The soft hackle is tied in near the head, wrapped around the hook a few times and swept rearward.

Wet Fly

Classic wet fly patterns have no weight added. They were designed to imitate that ‘middle ground” in an aquatic insect’s life. Fished more upstream, the fly will ride in or just under the surface, suggesting a drowned adult or maybe a bug struggling to hatch. Or fished down and across, the fly will swing in a current allowing those soft hackle fibers to undulate in an enticing manner. In this situation, the fly most likely suggests an actively hatching insect.

The Difference in Wet Flies and Soft Hackles

Again, I tend to interchange the terms and don’t think much about it but for those keeping score, there are some who try to differentiate the two. And many of the people that argue there’s a difference, don’t even know what the difference is.

One writer said that the difference is how you retrieve them and went on to describe in confusing and excruciating detail the nuances of fly retrieval. That explanation just seemed like a lot of BS to me. Another person told me that the difference is wet flies have wings and soft hackles don’t. But there are some fly patterns classified as wingless wets. So that argument just raises more questions.

Soft Hackle

The best description I have been able to find contrasting the two is how the flies are hackled. Both styles use a soft hackle of some sort. If the fly is hackled over approximately the front quarter of the hook and it has a wing, it’s a wet fly. If it is hackled in that manner but does not have a wing, it’s a wingless wet. However, a soft hackle has no wing and a hackle sparsely wrapped just behind the eye. There is typically a “wall” of material, usually dubbing, behind the hackle that makes it stand straight up at a near 90-degree angle, rather than sweeping rearward.  

Benefits of Different Hackling Styles

In theory, the strength of the wet fly style is its profile. It has a more realistic silhouette with the wing and the hackle fibers wrapped farther back on the hook look more like legs. But the denser hackle clings to itself and the hook more, allowing less movement. The strength of the soft hackle is its movement. The lack of wing and slender body serve as merely a backdrop to the hackle. By tying the hackle sparsely and at more of a 90-degree angle, the fibers have nothing to cling to and dance freely in the water.

Much of this could be considered trivial or just semantics. I completely believe in the logic behind the two different hackling styles but don’t personally find them unique enough to warrant their own fly pattern classification. I hackle some dry flies more heavily for fast water and some more sparsely for slow water, but I don’t call one a dry fly and the other a dense hackle. They’re both just called dry flies.  

Again, I think it’s going to be the very rare (and probably annoying) person who is going to passionately differentiate between the two. Most of the industry, like me, will use the two terms interchangeably. For example, there is a common fly pattern called a Soft Hackle Pheasant Tail. It is not a Pheasant Tail with a hackle tied sparsely at a 90-degree angle behind the eye. It’s just a Pheasant Tail Nymph with a soft hackle.

Implementing Wet Flies

Unless you’re just into obscure trivia, the real takeaway from this article shouldn’t be the subtle difference between wet flies and soft hackles. The more important contrast is between wet flies and nymphs. Most people have a pretty good understanding of dead drifting a beadhead nymph under a strike indicator but implementing wet flies into your arsenal can make real differences on the stream.

For instance, Quill Gordon mayflies are one of the first good hatches of the year in the Smokies but they are notorious for getting off the water quickly, especially on sunny days. In other words, even though there’s a big hatch, fish aren’t getting a very good look at those adults and will often focus on the emergers. A Quill Gordon wet fly can be extremely productive during that hatch.  

Fishing wet flies in pocket water when there’s no hatch can also be productive. While classic techniques like the down and across swing can work, don’t get locked into one method. Play around with different things. I frequently fish soft hackles the same way I would a nymph with a straight line method, but at the end of the drift I’ll allow the fly to swing. I catch a lot of fish on the drift and a lot on the swing. Sometimes I’ll “pump” the rod a little during the drift, causing the fly to twitch.

Are wet flies the secret weapon that will instantly and magically catch you more fish? Not necessarily, but it’s one more arrow in your quiver. Wet flies were some of the earliest flies ever devised but like many things, kind of fell out of fashion over the years. They’ve lost out to everything from dry fly purists to euronymphers. But you know what? The fish still like them.

Climate Change and Trout

Climate Change is arguably the biggest existential threat we face as a human race. There is very little, if anything, that will not be impacted significantly by a warming planet and our trout fisheries are no exception. We’ve already begun to see changes in the Smokies and it’s just the tip of the iceberg.

My friend, Steve Haigh, has put together an excellent podcast episode on the subject where he interviews two scientists from Trout Unlimited. Sure there’s some doom and gloom. It’s a gloomy topic! But there is also some hope offered and information on some very real things you can do to make a difference. Give it a listen!

Finding Feeding Trout

You can have the best gear and be a great caster, but it won’t mean a thing if you don’t know where to find feeding fish. We’ve covered a lot of these things separately in other articles, but here is a quick breakdown of the four things you really want to look for before you make that first cast.

Water temperature

A wild trout’s water temperature range for feeding is typically between 50 – 67 degrees. Ideal temperature is upper 50’s to low 60’s. There are plenty of exceptions that you can read about in Understanding Water Temperature, but this is a pretty good rule of thumb and should be your first consideration when trying to locate feeding trout.

Check that water temperature

If you’re not already familiar with a particular stream’s seasonal variations and trends, a stream thermometer will be your most useful tool. Submerge it for a minute in water that’s about 1-2 feet deep. If, for instance, it’s July and you get a reading of 68-degrees, you should, at the very least, seek out shadier parts of the stream. Ideally, you should try to get to a higher elevation where it’s a little cooler. If it’s March and you get a reading of 47-degrees, seek out sunnier places and, if possible, move to a lower elevation.

Part of this may require a little research on your part as well. If you’re fishing in a low elevation stream where the water temperature stays above 70-degrees for much of the year, there likely won’t be trout in there at all, even during colder months. Again, this is for wild trout. Some streams that might be too warm to support wild trout year round, could be stocked with trout during the colder months.

Depth

Once you have located an area with a suitable water temperature, you need to look for deeper water. We’re not talking about water that has to be over your head, but something at least a foot or two deep. In times when food is incredibly abundant like a heavy hatch, trout will sometimes feed in shallower water. But in general, they will choose water with a little more depth for more protection from predators.

Current

Even if you have ideal water temperature and adequate depth, trout don’t do a lot of feeding in still pools. And even when they do, they can be very difficult to locate and catch because they’re often cruising and feeding sporadically. A defined current is essentially a conveyor belt of food. Most feeding trout will be near currents, watching and waiting for food to come to them.

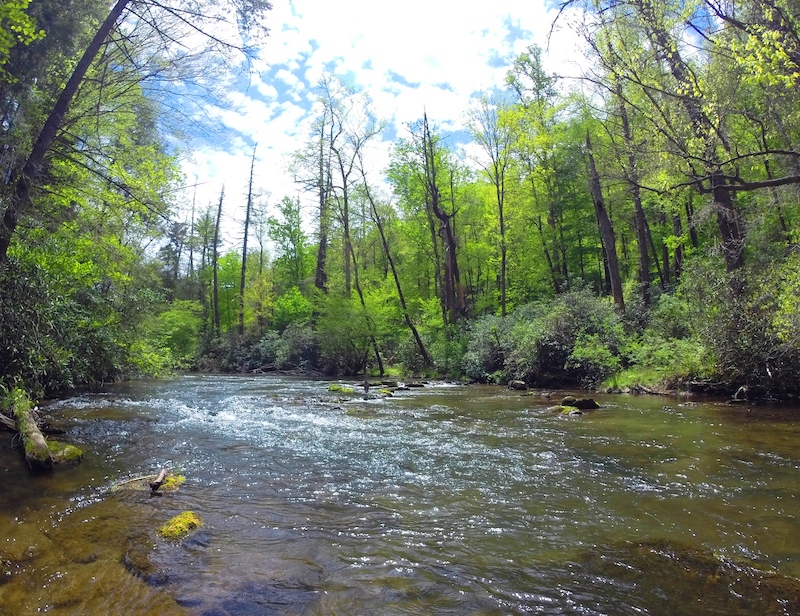
Abrams Creek Smoky Mountains
Currents can vary significantly in a single run

In currents with a slow to medium speed, trout will likely hold right in the middle of the current and on the edges. Hard currents with a lot of speed are a little different.  A trout won’t hold in the middle of a hard current because it requires too much energy. Instead, the trout will be on the edges of these currents or between currents in seams and pockets.

Structure

A trout often has a few places in an area where he likes to hang out. He may have a favorite spot to feed and a spot under a rock where he likes to hide when he senses danger. Sometimes, you’ll find a place that looks perfect as far as depth and current speed go, but the stream bottom may be nothing but flat bedrock. These areas usually don’t hold many fish because there are few, if any, safe places. Try to look for a bottom with a lot of rocks where fish can hide.

Significant structure like fallen trees or large boulders often attracts the bigger fish, particularly if that spot meets all of the other criteria mentioned above. If you find any of the characteristics mentioned above, you’re apt to find a few feeding trout. When you locate a spot with ALL of these characteristics, you’ll likely find the most and/or the biggest trout.

Understanding Rise Rings

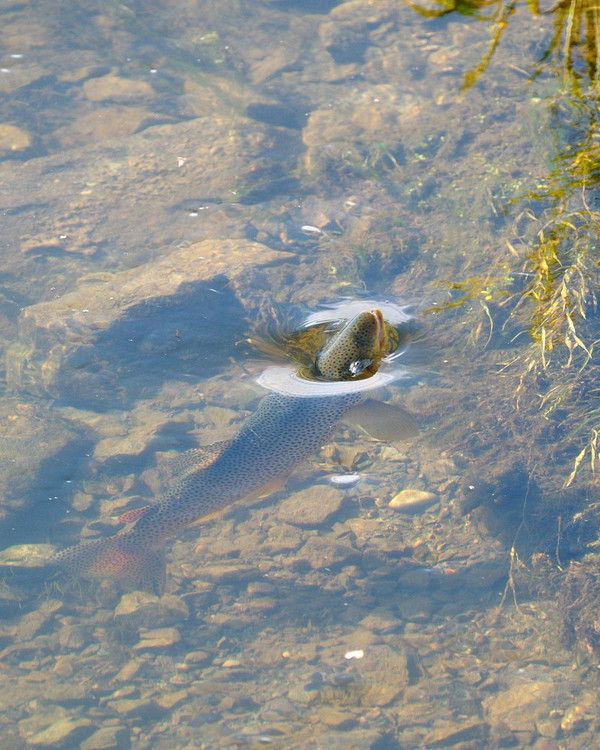
When a trout feeds on or near the surface, it creates a ring in the water that can appear as a violent splash or a mere dimple. Recognizing certain characteristics of this rise ring can tell you a lot about where the fish is positioned, where his feeding lane is, his size and possibly what he’s feeding on.

Lengthy chapters of vast and detailed information on this topic can be found in a number of well known fly fishing books. I recommend reading them. This article will attempt to condense that information into a useful overview. As always, these are general rules to which there are always exceptions!

Rise Ring
Dimple Rise

Common or Simple Rise

A common rise is characterized by a quick view of the trout’s head, dorsal fin, and often “wagging” tail, followed by a boil of water. It indicates that the trout is positioned near the surface and feeding on insects on the surface or near the surface film. The insects are probably medium to large in size. Because of the increased exposure to predators, trout rarely position themselves near the surface unless there is a lot of food available. So, if you see this kind of rise, keep watching. Chances are you will see the same fish repeatedly feeding.

Surface Swirl

The surface swirl is similar to the common rise but without the appearance of the head, fin or tail. You only see the water boil. In this case, the fish is probably positioned within a foot or two of the surface and is feeding on insects at least two inches below the surface. You can spend hours casting dry flies to these kind of rises without a take, but an unweighted nymph or wet fly fished just below the surface can be deadly.

Poking or Dimple Rise

As the name implies, this rise form appears as just a dimple on the surface and if you look carefully, you can often see just the nose of the trout penetrate the surface. This rise form also suggests the trout is positioned near the surface but likely feeding on small insects on or just below the surface. This type of rise is most often seen in slower pools and runs, slow edges of currents and eddies.

Splashy Rise

When a rise ring is more of a splash, it can mean a few things. Usually, it just indicates that the trout is positioned deeper in the water. By traveling farther up the column for food, the trout’s momentum often results in more of a splash on the surface. If the trout is positioned deeper, this was likely an opportunistic rise from a fish not necessarily focused on the surface. You may never see him come up again.

Similarly, trout feeding on insects that emerge and get off the water quickly can display a splashier rise. Caddis flies fit this description, so many anglers assume (sometimes incorrectly) that a splashy rise means trout are feeding on caddis. And sometimes a splashy rise can simply be the result of a smaller, eager trout rising recklessly.

Gulping Rise

A gulping rise is like a greatly exaggerated common rise. The trout’s mouth is wide open and his entire backside breaks the surface, followed by an often audible “gulp.” You’re likely to see this type of rise during very heavy hatches when there are frequently multiple bugs very close together on the surface. The trout may eat as many as six bugs in one rise. If you’re seeing this, you’re at the right place at the right time. Try to match what you see on the water and don’t get your leader in a big tangle!

Jumping Rise

A jumping rise is when the trout completely clears the water, sometimes by a few feet! This could mean the fish is feeding on bugs in the air just above the surface, or possibly something large like a mouse or even baitfish. In any case, a jumping rise suggests a brief moment of opportunity and not a steadily feeding trout. I don’t recall ever standing in a pool and seeing dozens of trout routinely jumping out of the water. Most experienced anglers recognize the jumping rise as fool’s gold, shake their heads and move on.

Where is the trout?

As mentioned above, certain types of rise rings can suggest how deep the trout may be. However, there are other things to consider when determining where in the stream that trout is positioned.

Trout Rise
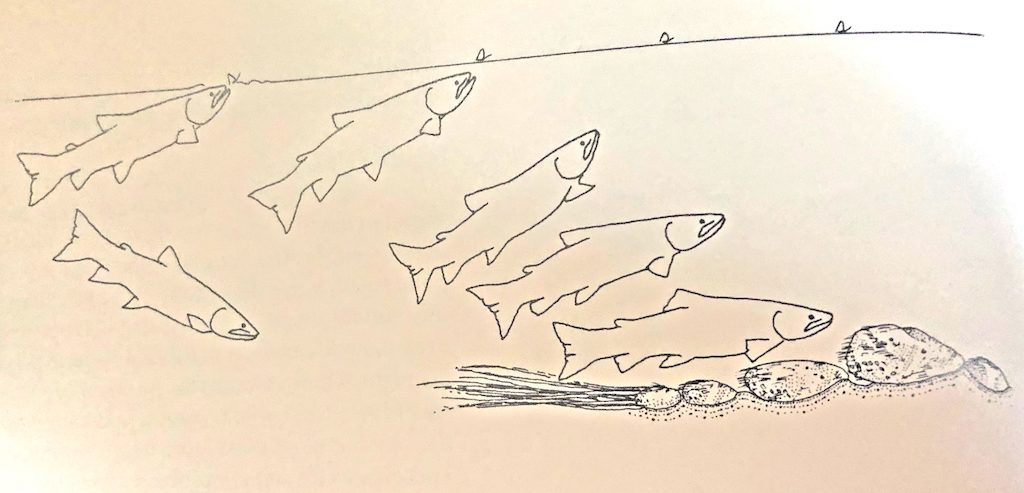
Trout Position vs. Rise Location – Illustration by Jason Borger

First and foremost, when a trout rises in a stream, he is going to drift back during the process, then return to his original position. So the trout is actually positioned upstream of where you saw him rise. If he is holding near the surface, his position may only be a few inches upstream of the rise. If he’s holding in deeper water, his position may be several feet upstream of the rise.

When a trout rises, you’re also going to see a “push” of water, like a little wave. That wave usually pushes upstream. But if the wave pushes to one side or another, it indicates that the trout came over to feed. So, he may be holding in one lane and feeding in another.

There’s a lot to this, I know. The best advice I can offer is when you see a trout rise, don’t immediately cast a dry fly to that spot. Think about what the rise looked like and stop and look for others. Identifying rise rings may not give you all the answers, but it will give you a great place to start!

Pond Fishing

People are telling me all the time that they don’t fly fish very often because they don’t have anyplace to go. I know as well as anyone that there are an endless number of things that keep us from fishing as often as we’d like, but not having a place to go should never be one. While you may not have a world-class trout stream in your backyard, or even in your state, there are plenty of other alternatives. You may just have to get a little creative.

bluegill
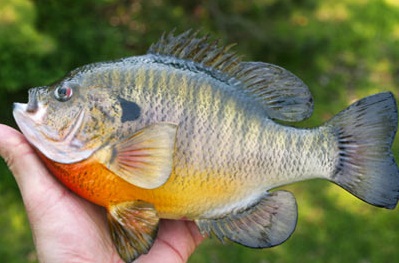
Bluegill

For instance, almost every city has some sort of park or green space with a pond. These can be productive little fisheries, typically containing bass, carp, catfish and some sort of variation(s) of sunfish. They are a lot of fun to fish and at the very least, they will keep your casting skills and fishing instincts sharp between fly fishing vacations.

If you’re really lucky, you’ll find a friend who has a farm pond. These provide all of the same benefits as those city ponds but without all of the people. I had access to one when I lived in Kentucky that I fished three or four times a week. Sunfish like bluegill will readily take a fly and fight as hard as any fish I know. And a big bass boiling on your surface bug at dusk is a tough thing to beat.

sneaky pete
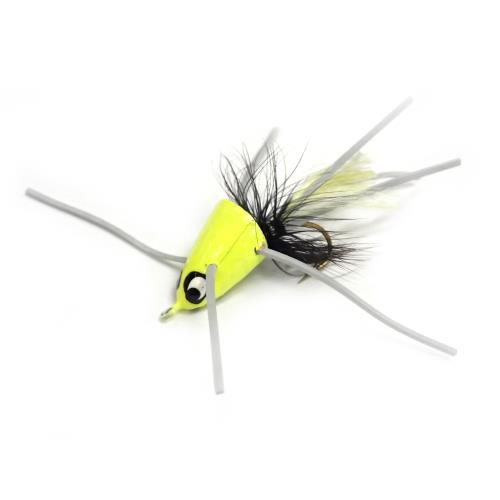
Sneaky Pete

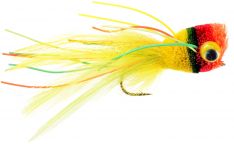
It helps to know what fish are in the pond when deciding what gear to use. You can effectively fish for bluegill with the same outfit you use for trout. A number of small to medium topwater terrestrials will work well. Small popping bugs are a good choice, too. They’ll eat trout flies but they’ll tear them up in a hurry. Therefore, I’d recommend more durable foam or hard-body flies.

As exciting as it is to catch those bluegill up top, I often catch the biggest ones below the surface. Wooly Buggers are productive, as are a large variety of rubber-leg nymphs. However, if you want to get a little more specific about imitating their food source, try crayfish patterns and damsel and dragonfly nymphs. They tend to be attracted to brighter colors. An old fashion Green Weenie has been one of my favorite subsurface flies for bluegill. As a matter of fact, fishing a Green Weenie as a dropper off a popping bug can be very productive.

whitlocks fruit cocktail
Whitlock’s Fruit Cocktail

Bass will eat many of the same flies as mentioned above, but big bass are often looking for a little more of a mouthful. A variety of streamer patterns can take bass in ponds and are always a good choice. But I love getting them on the surface when I can. Large hard-body poppers and sliders and spun deer hair bugs are a blast to fish with. However, these larger flies are very difficult to cast with a light trout outfit. If you do much of this type of fly fishing, I’d recommend picking up an 8-weight.

When fishing ponds, look for structure like rock piles and tree stumps. Also, these fish like the edges of things. Cast to shadow edges and the edges of shallow and deep water. In addition, during summer months, expect better fishing early and late in the day.

Follow the Leader

Orvis Leader Package
Leader Package

For beginners, the leader and tippet represent one of the most misunderstood, or unrealized, components of critical fly fishing gear.  Many don’t understand the relationship between the tippet and leader or tippet and fly, while others simply don’t understand what the difference is between the leader and tippet.  And while intermediate anglers may have a working knowledge of how the tippet relates to the fly, few take the time to contemplate how the right overall leader design can contribute to their success on the water. 

To better understand leader design, let’s start from the beginning and define what the leader is.  In simple terms, the leader is the monofilament connection between the heavier plastic fly line and the fly.  While it varies in length, the leader typically measures between 7 1/2′ and 9’ and has two primary purposes: To allow for a less visible connection from fly to line and to transfer energy during the fly cast.  It tapers from a thick butt section that attaches to the fly line, down to a very fine section that attaches to the fly.  The finest section that attaches to the fly is referred to as the tippet. 

So, the tippet is the piece attached to the fly and its appropriate size is determined by what size fly you’re fishing and how you’re fishing that fly.  At least those are the primary reasons.  Other factors such as water level, water speed, and clarity can also contribute to that decision.  Smaller tippet sizes are not only less visible to the fish, they offer less resistance in the water, allowing for such benefits as less drag and/or faster sink rates.  Of course, smaller tippets are not as strong, but when dead-drifting dry flies or nymphs, the fish is typically “sipping” the passing fly, not ambushing it, so it is not often an aggressive strike that will snap the line.  Rather, you are lifting the rod and tightening the line somewhat smoothly, and then all of the shock absorbing properties of your rod come into play to, when used properly, help protect that fine tippet and keep it from breaking. 

However, when fishing a streamer fly, you are usually stripping the fly to suggest the movement of a wounded or fleeing baitfish, crayfish, etc.  This will most often provoke a more violent strike from the fish, and too light a tippet will often snap under such a jolt.  Since you are imparting movement on these flies anyway and a dead drift is not desired, a heavier tippet will better move the fly and better withstand the more aggressive strike. 

Tippet Sizing Chart
Tippet Sizing Chart

In essence, you want the tippet to balance with the fly for a more efficient cast and drift.  For this reason, tippets are sized primarily by their diameter, but also have pound test ratings like spin fishermen may be more accustomed.  Those details are all given in the fine print on a tippet spool or leader package but the most obvious marking is a single number followed by an “x” – 4x, 1x, 6x, etc. 

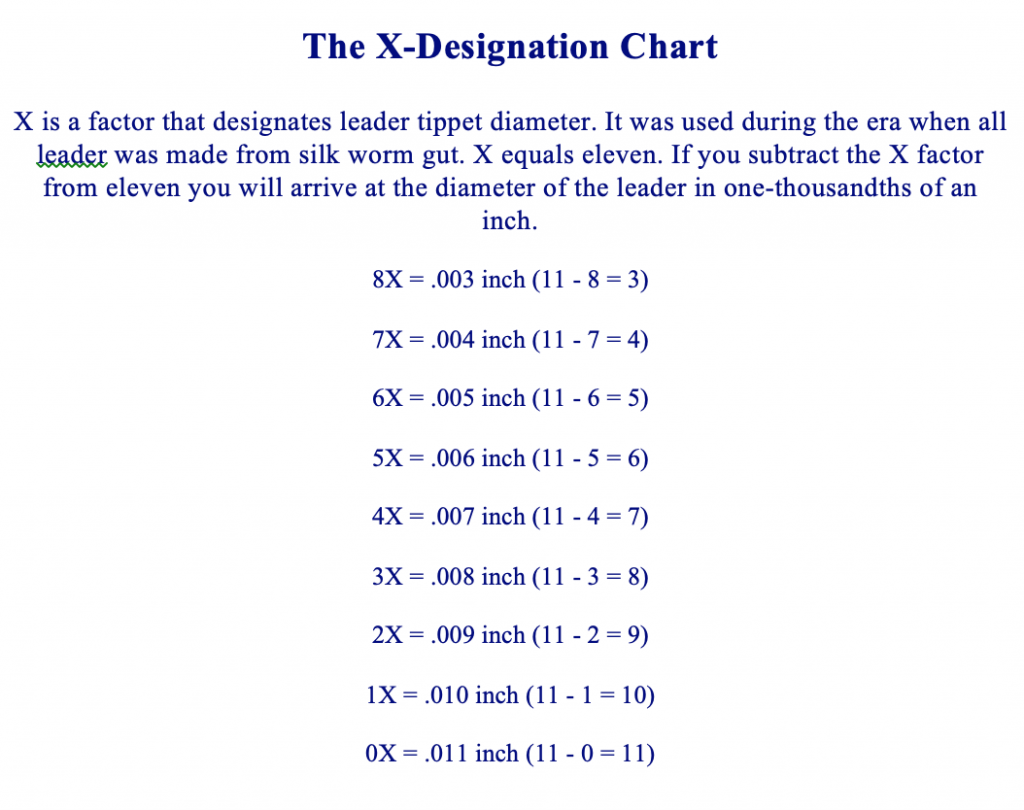
It’s a strange system that can be confusing at first, but it relates directly to the diameter of the tippet, so 6x does not mean 6 pound test.  Rather it all corresponds to the base measurement of 0x tippet, which is .011”.  If I subtract the diameter of my tippet from this base of .011” I get the appropriate “x” designation and vice versa.  In other words, if I have tippet that is .005”, 11 – 5 = 6, or 6x.  On the other hand if I subtract the “x” number from .011”, it gives me the actual diameter.  For 3x, 11 – 3 = 7, or .007”.  I know.  Wouldn’t you think there’d be a simpler system?

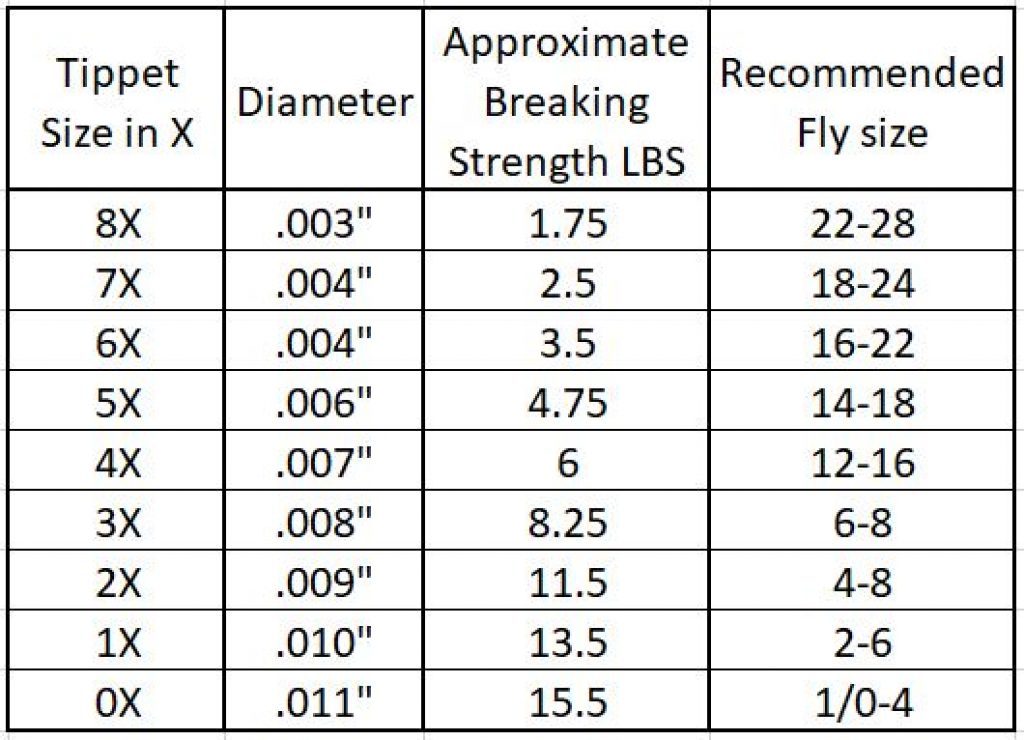
What you should notice is that the bigger the number, the smaller the tippet.  So, 6x is smaller than 3x.  Fly (hook) sizes work the same way.  A size #18 fly is considerably smaller than a #4 fly.  But if you know the size of your fly, there is a pretty simple formula to determine the perfect tippet size to match it.  Take the size of the fly and divide by 3.  As example, for a size #12 fly, the perfect tippet size is a 4x.  Who knew there would be so much math in fly fishing? 

Tippet to Fly Sizing Chart

It doesn’t need to be this scientific, but using this formula will give you a good baseline in determining a tippet size that will balance with your fly size.  You can always fudge up and down as needed.  Just keep in mind that when using the above formula, the more you stray to the small side of ideal, the more difficult it will be to turn the fly over with a cast and there’s a better chance of snapping the fly off.  The more you stray to big the big side of ideal, the more visible your tippet will be and the more it will negatively impact natural drift. 

Without trying to complicate matters too much, the length of the tippet will also impact things like how freely the fly drifts.  For example, if you’re trying to dead-drift a size #14 dry fly, you will likely be able to better achieve a drag-free drift with a 5x tippet that is 20” long than with a 6x tippet that is 10” long.  Conversely, if you are trying to impart movement on a streamer, a 4x tippet that is 10” long will provide much more control and immediate movement than a 3x tippet that is 20” long. 

All of this is a piece to a bigger part which is the leader, and a lot of people don’t understand the difference in the two.  Tippet is just a part of what makes up a leader just like tires are part of what makes up a car.  If you merely tied 9’ of straight tippet to the fly line, you would certainly be able to execute good drifts but you would have an extremely difficult time casting the fly where you wanted to and would regularly experience the fly and tippet landing in a pile, just inches from the fly line. 

Therefore, the leader is tapered and consists of three parts: The butt, the taper, and the tippet.  We already know what the tippet does.  The thicker butt section turns the leader over with the rest of the cast, which helps eliminate piling.  The taper section essentially dampens the energy of the fly cast, allowing the fly and tippet to land softly on the water. 

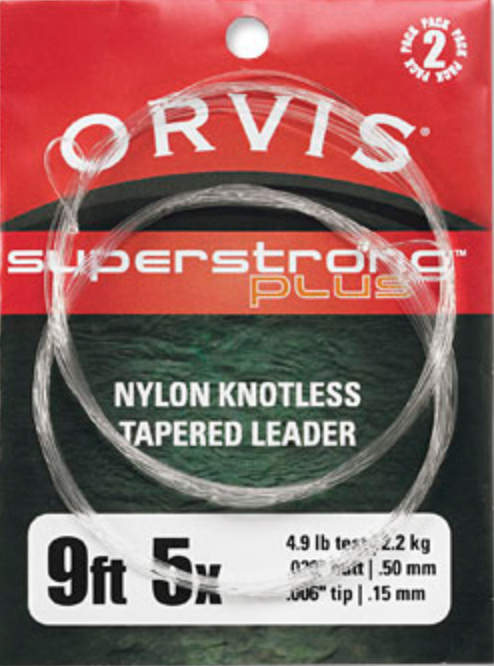
When you buy a tapered leader at a fly shop, it is usually knotless.  They achieve the taper by running the nylon material through a machine.  On the package, it will indicate the leader’s overall length and its tippet size.  So it might indicate that it is a 9’ 5x leader.  In fine print, you can also see the exact diameters of the butt and tippet as well as the pound test.  It has tippet built in and is ready to go right out of the package.  So what’s with the spools of tippet?

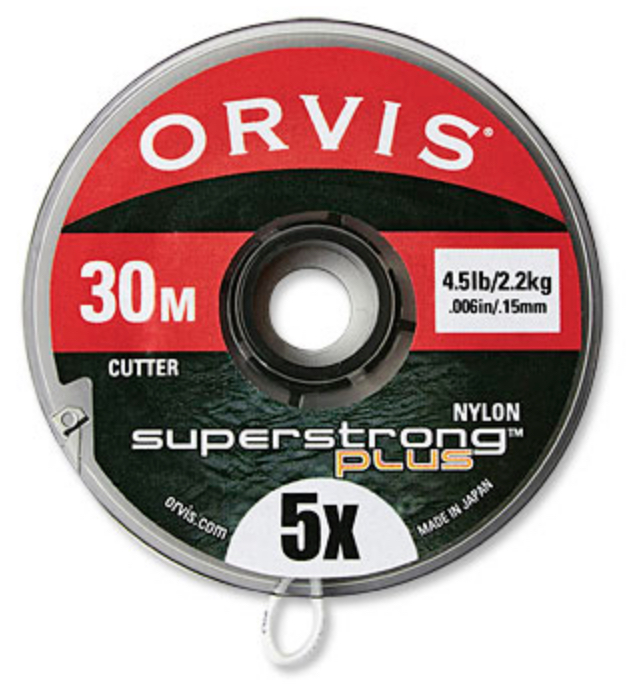
Orvis Tippet Spool
Spool of Tippet

Tippet material can also be purchased on a spool with a number designation as described earlier – 3x, 4x, 5x, etc.  This is purely straight tippet with no taper and its primary purpose is to rebuild or alter your leader.  When you wear out the tires on your car, you can replace them without having to replace the entire car, and it’s the same with a leader and tippet.  Through the course of a day, the tippet on your leader will get gradually shorter as you change flies.  Or it may quickly get dramatically shorter if you hang up in a tree or two.  What started out as a 9’ 5x leader is no longer 9’ and no longer 5x. 

Rather than going to the trouble and expense of changing the entire leader when this happens, you can simply pull an appropriate length of 5x tippet off the spool, tie it to the leader, and you’re back in business.  Over time, you’ll cut back so far into the taper that you eventually have to change the leader, but by rebuilding with tippet, you can significantly extend the life of your leader.

As mentioned, you can also use tippet material to alter your leader.  You may be using a 9’ 6x leader and want to add an additional few feet of 6x for a better drift, making it a 12’ 6x leader.  Or you may be changing flies that vary dramatically in size and style.  For example, you might be stripping a #6 Wooly Bugger on a 7 ½’ 3x leader when a hatch of #16 Sulfurs starts to come off.  Instead of changing your entire leader, you can simply add a couple of feet of 6x tippet and you have a 9 ½’ 6x leader.  Just be sure you’re adding the same size or smaller.  Adding a bigger piece to a smaller piece will not only create a weak link above the final section of tippet, it will also create an undesired hinging effect in the leader. 

I sometimes tie my leaders rather than buy them from a fly shop.  This is done by knotting together different diameters of monofilament to achieve a taper.  There are established formulas you can use for this, but through the experience of trial and error, I developed my own formulas that best suit my needs.  While I have a lot of specialty leaders, my go-to, everyday trout leaders are all tied ahead of time in a length of 7 ½’ to a tippet size of 3x.  Since I’m rarely fishing a tippet size bigger than 3x for trout, this allows me the flexibility to add the final piece of tippet on the stream to match the fly and situation.  If I’m going to fish a #14 Parachute Adams, for example, I’ll add a 2’ section of 5x and I’m ready to go. 

I first started tying my own leaders when I was on the limited budget of a college student because I realized I could pay $3.50 for a leader or I could make them for about 30 cents each.  Over the years, I continued making my own because I prefer them and like being able to design them for my needs.  For instance, I find the commercial trout leaders to have too big of a butt section and I don’t like the way they turn over or straighten out.  By using a thinner diameter butt and a different type of monofilament for the butt and taper sections, I get a leader that turns over and lays out beautifully.  I also like having a few knots throughout the leader as locations to place split shot and strike indicators without them sliding down the line. 

I have a variety of other specialized leaders for specific situations.  My bass leaders have thicker butt sections to turn over large flies.  I have hatch leaders that are long and thin, designed to achieve perfect drifts over wary trout.  And I have shorter, small stream leaders for punching flies under tree limbs in extra tight conditions.  I also make short leaders designed to fish on sink tip lines when streamer fishing big water. 

These are all things to take into consideration when making your own leaders or even when you buy them at the fly shop.  Understanding the basics like length and tippet size will inevitably make a difference in your success on the stream.  Better understanding how the butt and taper figure into the equation will give you vital tools to begin catching fish that other anglers can’t! 

How Stuff Works: Fluorocarbon

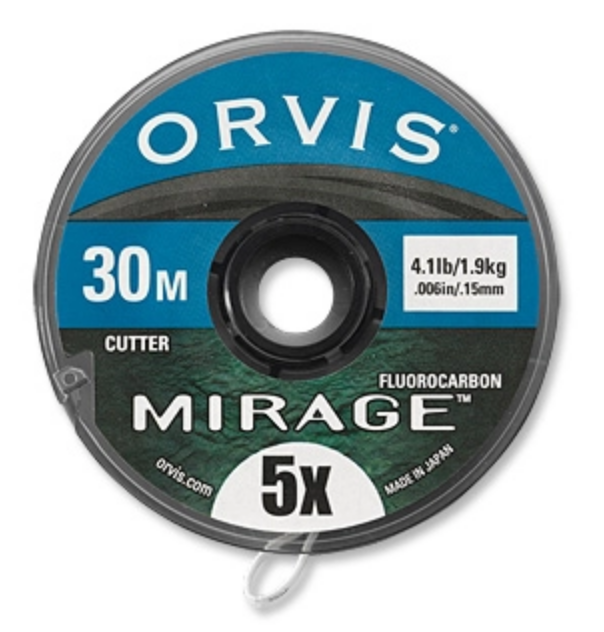
Orvis Mirage Tippet Spool
Fluorocarbon Tippet

In the general population of humans, you regularly find two extreme views when those humans are contemplating two similar items that are priced significantly different. One perspective reasons that the two items are so similar that there is no way the more expensive item could be that much better. The other perspective assumes that because an item is more expensive, it must be better. When it comes to choosing fluorocarbon or nylon fishing line, you can bet both of those assumptions are regularly made. And both of those assumptions are very wrong.

Fluorocarbon began gaining popularity as a material for fishing line in the early 2000’s. It was billed as invisible and came with a cost nearly three times that of its nylon counterpart. That pricing disparity is still present today. For example, a 30-meter spool of Orvis nylon tippet costs $4.95. A 30-meter spool of Orvis fluorocarbon tippet costs $14.95. That’s a pretty big difference! But is fluorocarbon that much better?

First, it’s important to understand that the higher price of fluorocarbon is more a result of its manufacturing process than it is its fishing value. With that said, it does have some significant advantages over nylon, but it has a few disadvantages too.  Where you’re fishing, what you’re fishing with and what you’re trying to accomplish should ultimately determine which material will best suit your needs.  Below is a categorical contrast between fluorocarbon and nylon to help you decide.

Strength:

When you compare nylon and fluorocarbon of the same diameter, it will vary a little from brand to brand, but fluorocarbon nearly always has a higher breaking strength. And fluorocarbon is a harder material so it is significantly more abrasion resistant.

Visibility:

The light refractive index of fluorocarbon is very similar to that of fresh water. For this reason, it is far less visible in the water than nylon. Do you want to see for yourself? Take a piece of 5X nylon tippet and a piece of 5X fluorocarbon tippet and dip them in a glass of water.

Density:

Fluorocarbon is denser than water, which means it sinks. That’s a good thing if you’re trying to drift a nymph near the bottom. It’s not a good thing if you’re trying to drift a dry fly on the surface. Nylon suspends on the water, making it a far better choice when fishing dry flies.

Knotability:

Nylon is far suppler than fluorocarbon, giving it a big edge when it comes to knots. Because fluorocarbon is stiffer, the knot often doesn’t seat properly. Since the knot is always the weakest link in your set-up, this can sometimes offset the superior breaking strength of fluorocarbon. When tying knots with fluorocarbon, take your time and use extra care to ensure that your knots seat well.

Summary:

I personally use both of these materials, depending mostly on where I’m fishing. In the Smokies, I fish a lot of dry flies. And even when I’m nymph fishing, it’s usually in fast, broken water where line visibility is just not an issue. For those reasons, I almost exclusively use nylon. Fluorocarbon just doesn’t seem to provide any real advantage.

However, on many tailwaters like the Clinch, most of the runs are very clear, unbroken and slow moving. Therefore, line visibility can be a major factor. Additionally, I am fishing with nymphs probably 90% of the time on rivers like the Clinch. Other than the handful of times I’m using a dry fly, you can bet I have fluorocarbon tippet tied to my fly on the tailwaters.

What I do not use, however, are fluorocarbon leaders. Even when I’m nymphing, I still need to control the depth of the fly and I don’t want the entire leader to sink. On the Clinch, I’m usually only fishing a couple of feet deep. So, I prefer to use a traditional nylon leader with the appropriate amount of fluorocarbon tippet attached to the end. 

Another situation when I routinely use fluorocarbon is when I’m sight fishing for carp on mud flats. The water on these flats is usually slightly stained so tippet visibility is not a great concern. But I’m hooking a commonly 5 to 20-pound fish in about a foot of water. That fish is inevitably going to run me over rocks and chunks of wood while I fight him and I like having the superior abrasion resistance of fluorocarbon to get him landed.

In conclusion, don’t let price dictate your choice one way or another. Think about the place you’re going to be fishing. Consider the methods you’ll be using. Weigh these things in your mind and choose the best tool for the job!

Mending Line

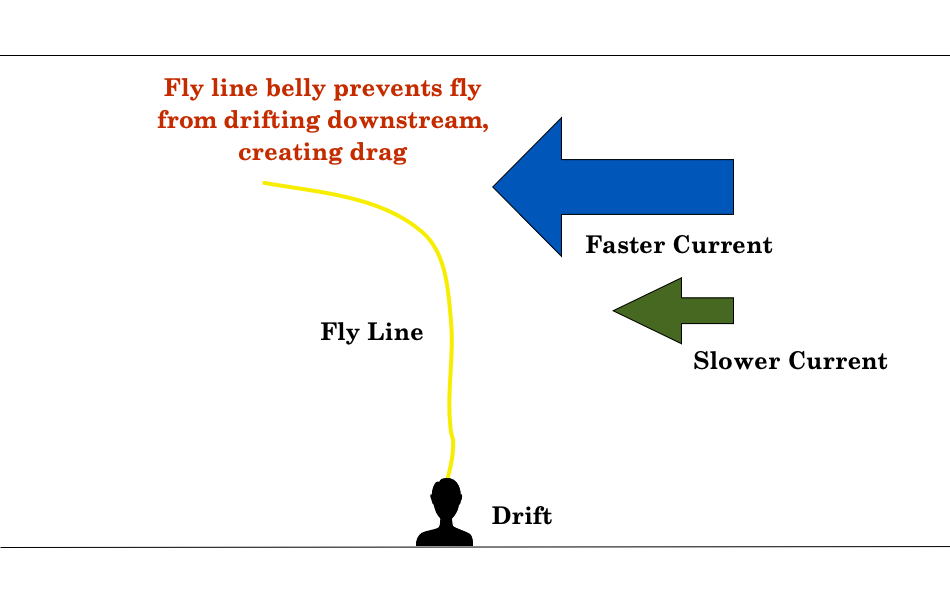
Most of the time when trout fishing with dry flies or nymphs, you try to achieve a drag-free drift. This is also known as a dead drift. Essentially, what this means is you try to make your fly drift at the same speed as the current. That would be simple if the fly was drifting independently down the river. But it’s not. It’s attached to your line. Consequently, line management is a vital skill when it comes to fly fishing success and mending line is a big part of that skill set.

If your leader, or especially your fly line, is in a different current speed than the fly, it will pull or stop the fly when the line tightens. The term we use for this is drag. If your fly is dragging, you won’t catch many trout because it doesn’t look natural. Not only will the trout typically refuse to eat your fly when it has drag, they will often spook. This is especially true when you repeatedly drag a fly over a fish.

When you’re fishing small creeks and/or pocket water, you can often get closer to the fish because the broken currents help conceal you. In those instances, you can usually prevent drag by just keeping most of the line off the water. The less line on the water, the less there is to pull the fly.

But in slower pools or in bigger, deeper water, you may not be able to get as close to the fish. This forces you to make longer casts. As a result, you’ll have more line on the water. The more line you have on the water, the more currents you’ll have pulling it at different speeds.

Fly Casting Upstream
Casting Upstream

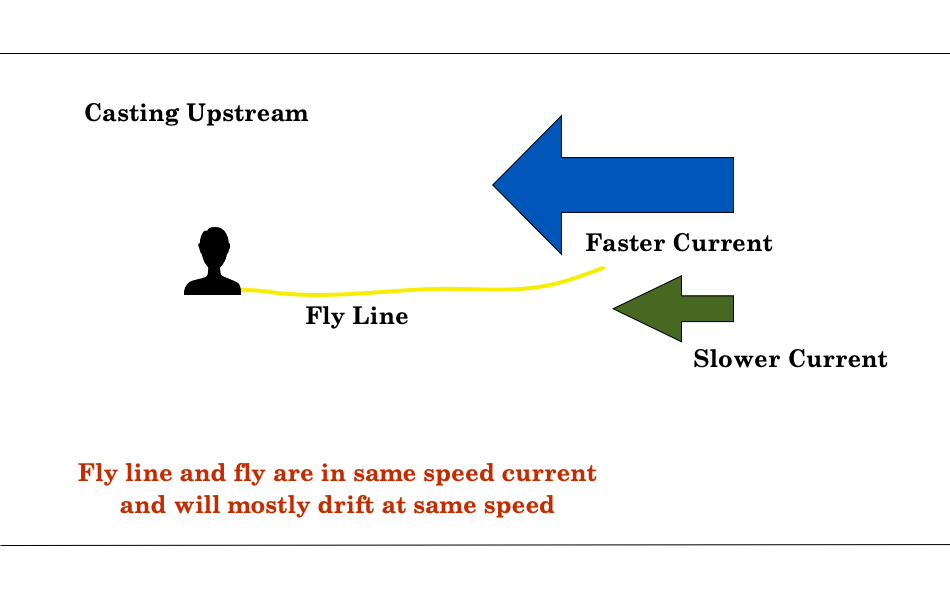
When possible, I like to cast mostly upstream when I’m fishing bigger water. This allows me to stay behind the fish and it puts my fly and line more in the same speed of current. When the fly and line are in the same current speed, line management is much simpler. You mainly just have to strip the slack in as it drift back to you.

However, sometimes a particular run won’t allow for a practical upstream cast. It could be that the depth of the water won’t allow you to get in the proper position. Or maybe it’s a slick with really spooky fish and you’re concerned about casting your line across them. You may decide to get above them and cast downstream.

Fly Casting Downstream
Casting Downstream

You have to be careful with this approach because you’re moving into their direct line of sight, and anything you stir up while wading will drift down to them. Excessive debris or a big mud cloud will send them running. The other challenge casting downstream is the drift.

Using S-curves for a Downstream Drift
Downstream Presentation

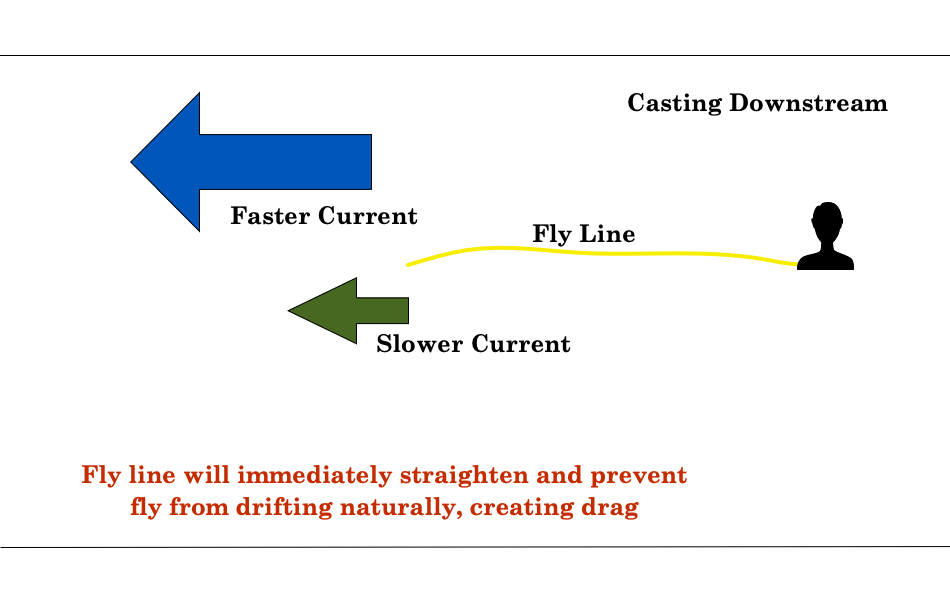
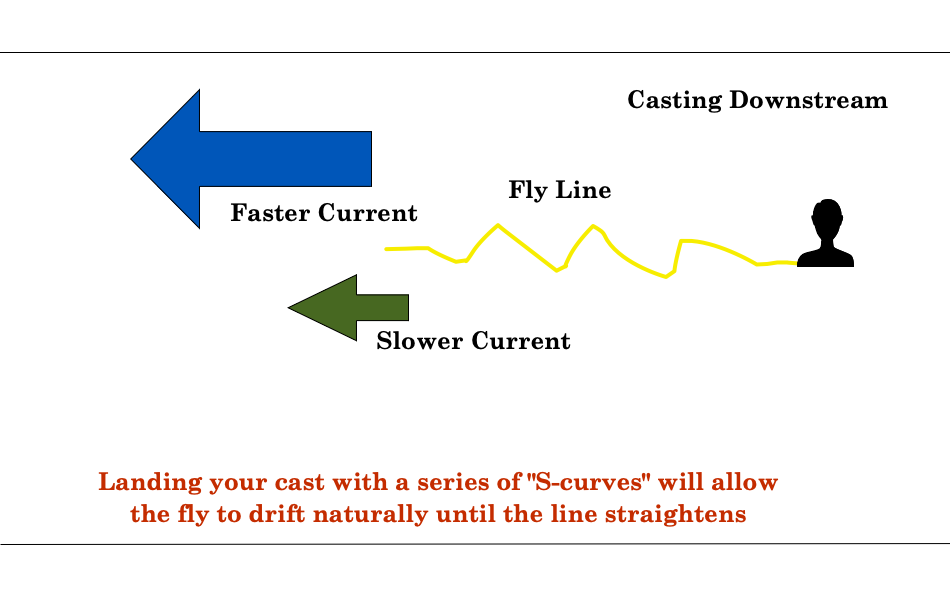
If you make a straight, fully extended cast downstream, your fly will start to drag almost immediately because the tight line will prevent the fly from going anywhere. It just drags in the water. I see a lot of people try to feed line at this point. But if the line is tight from the start, you’re just feeding a dragging fly. The trick is to land your cast with slack in the line. Using something like a pile cast will allow the line to land with little s-curves in it. You’ll be able to achieve a good dead drift while the s-curves straighten out. And if you want it to drift farther, feed line while you have those s-curves to get a nice, long drag-free drift.

The big challenge is when you have to make a longer cast across the river. It’s something I avoid if I can, but often, especially on large rivers, you have no choice. Casting across the river will almost always put your line and fly in different current speeds. And the longer the cast, the more different current speeds your likely to find.

Fly Fishing Mending
Initial Cast Across River

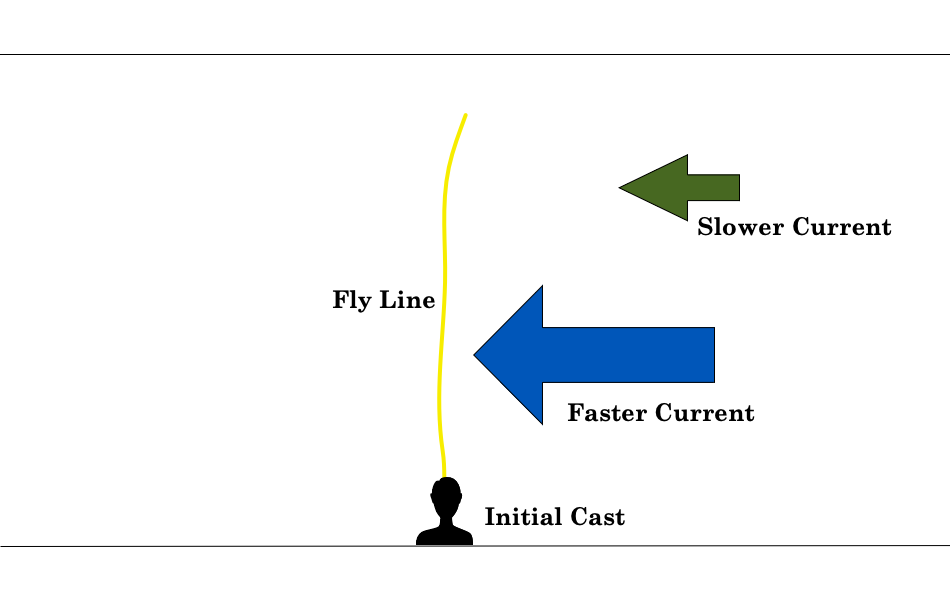
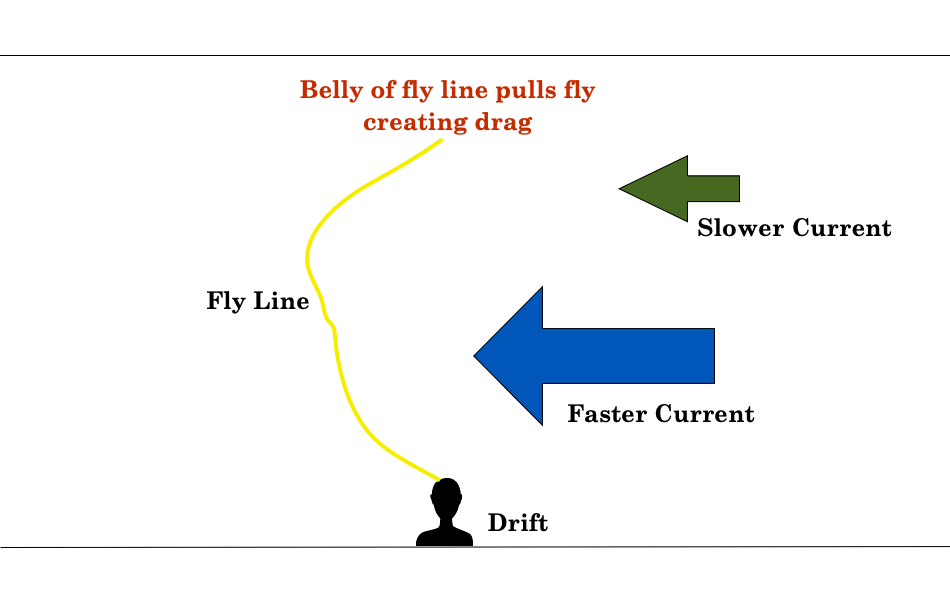
So, let’s say you have a nice, slow current on the other side of a wide run. There’s a fast current between you and the slow current. When you cast your fly into the slow current, your line will lay across the fast the current. Consequently, the fast current pulls the line, the line pulls the fly and you have drag. This is a scenario when you need to mend line.

Fly Fishing Mending
Drag Setting In

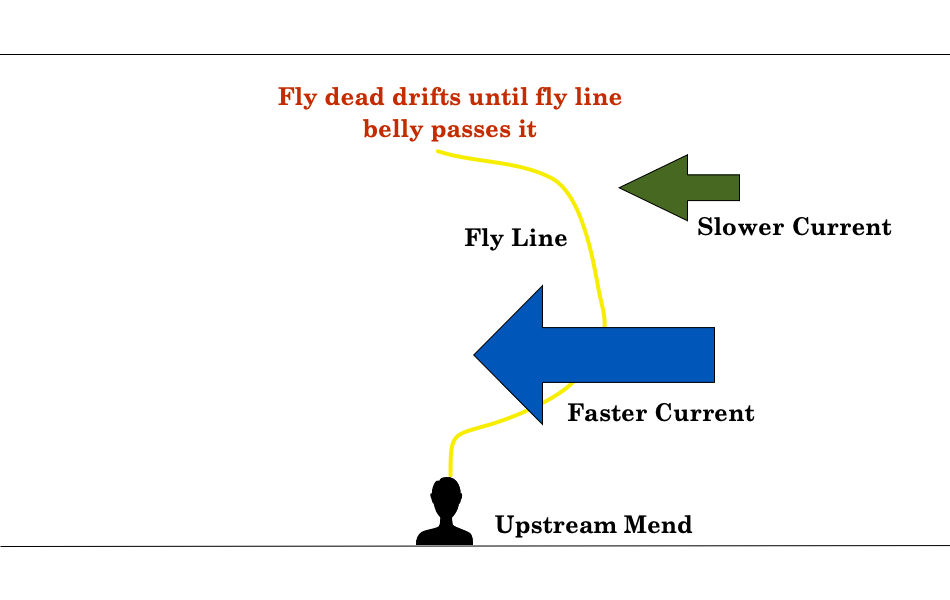
Mending line means that I am going to manipulate the line in such a way that I put it upstream of the fly. By the time the faster current moves the line past the fly, the fly has had an opportunity to naturally drift through the target area. You can make this mend during the cast with what’s called a reach cast. This is known as an aerial mend. Or you can make the mend after the cast has landed by using the rod to flip the belly of the line upstream. Sometimes, longer casts or longer drifts may require you to do both. Longer drifts may also require you to make multiple mends.

Fly Fishing Mending
Drift After Upstream Mend

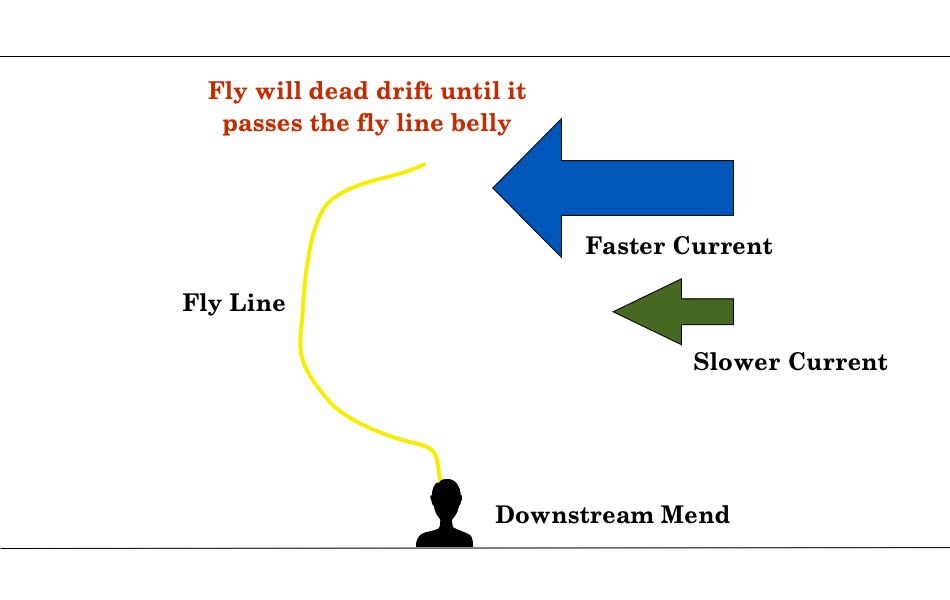
Let’s pose a similar scenario, but this time you’re casting across a slower current and the fly is landing in a faster current. Consequently, the fly will move ahead of the line, tighten and swing (drag) out of the drift lane.  In this situation, you want the line downstream of the fly to give the fly time to drift before it overtakes the line. You would use a downstream mend. Like before, this could be achieved with a reach cast and/or by flipping the line downstream after it’s on the water. 

Fly Fishing Mending
Drag Setting In
Fly Fishing Mending
Drift After Downstream Mend

Mending is not easy and requires some practice because a lot of it has to do with anticipation and timing. If you wait until the fly starts to drag before you mend, you’ll move the fly out of the drift lane. You need to anticipate that the fly will drag and make your mend before, while you still have slack. This will disrupt the fly’s drift very little, if at all. Again, it will just take some practice.

Fly Fishing Mending
Side to Side Mending Motion

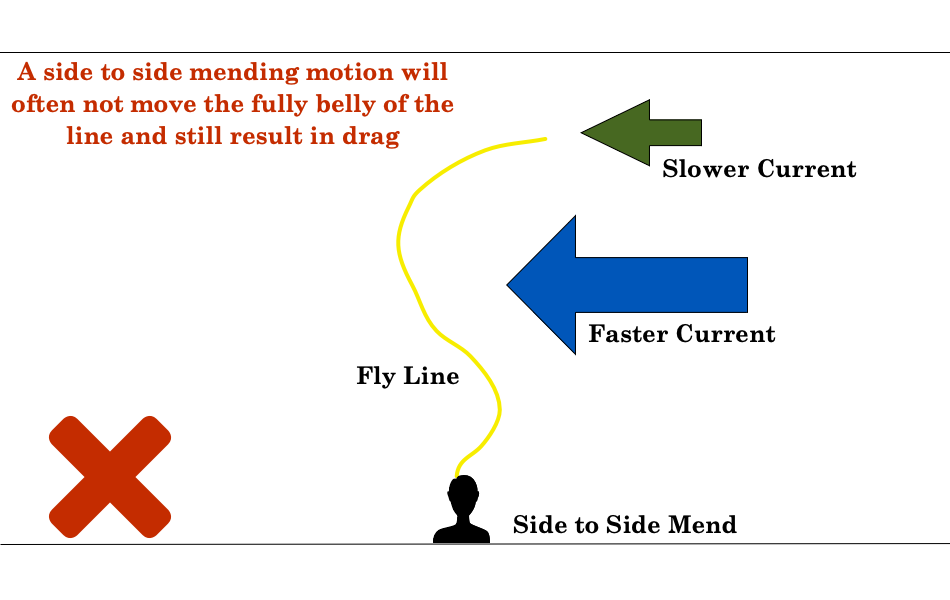
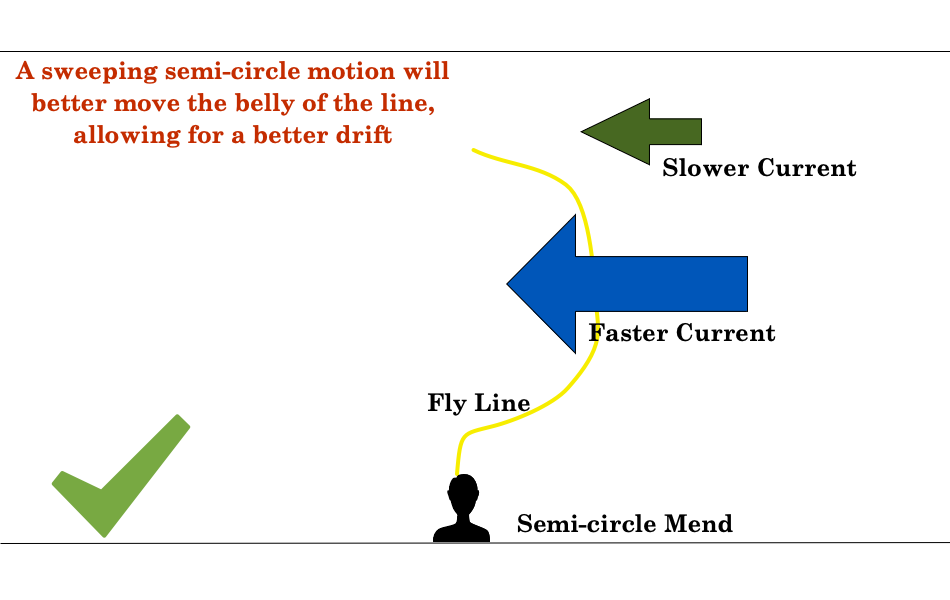
The other big key is how you mend the line. I see a lot of people keep the rod on a level plane and make a side-to-side motion to mend the line. As a result, the line pulls through the water and drags the fly. Instead, point your rod down and toward the line you want to move and make a sweeping, semi-circle motion to move the line. The idea is to essentially pick the line up and place it in a different position… without moving the fly.

Fly Fishing Mending
Semi-circle Mending Motion

How much line you have to move will determine how big of a semi-circle you make. For instance, a big mend with a short line will likely pick the line and the fly up off the water. You don’t want that. A small mend with a long line likely won’t pick up the entire line belly, and you’ll still have drag.

As I mentioned before, it will take some practice. But it is an essential skill when drifting dry flies or nymphs to trout, especially on bigger water. Keep messing with it and before you know it, it will be second nature.