With thousands of patterns available, choosing the perfect fly can prove to be a daunting task for any angler, particularly the beginner. However, unless you’re in a situation where trout are selectively feeding on a specific insect that is abundantly hatching, an assortment of well presented attractor patterns will be all you need to catch fish. Every fisherman has a list of favorite flies and over time you will find particular ones with which you are very confident. And that’s really the bottom line. If you have confidence in a fly, you will fish it better and ultimately have more success.
Below is a compilation of flies that seem to work everywhere and are on most fly angler’s list of favorites – a perfect place start your fly selection! Whether you call a fly shop in Tennessee, Montana, or New Zealand and ask for recommended flies for the area, somewhere on that list you will likely find most if not all of these patterns. These flies are also available as a packaged selection in the Fightmaster Fly Fishing online store.
Dry Flies
1) Parachute Adams: This is an absolute favorite trout fly. It doesn’t look exactly like anything but looks a lot like a lot of things! Carry them in sizes #12-#18 with the smaller versions being ideal for slow water and more finicky trout and the larger being best suited for choppier water where visibility is more important. The traditional grey body is preferred, but a yellow body also does well in the Smokies.
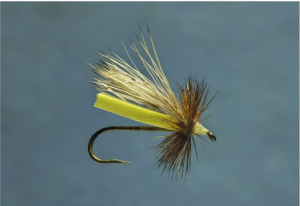
2) Elk Caddis: Another great dry fly, carry this one in sizes #12-#18 and with body colors of olive, tan, and yellow. The down wing on this pattern gives it a little different profile than the Adams and the combination of elk hair and hackle make this fly float like a cork.
3) Griffith’s Gnat: This is a great general purpose small fly. Fished most often in sizes #16-#20, it is a great imitation for adult midges, small mayflies or caddis, and even ants. Many of the most finicky, rising trout I catch are on a Griffith’s Gnat.
Nymphs
4) Pheasant Tail: An incredibly universal pattern that looks like almost every nymph you’ll find under a submerged rock. You’ll probably fish the bead head version the most. But, the traditional version provides a more realistic pattern that can more easily be fished in different levels of the water column. Carry both varieties in sizes #12-#18.
5) Hare’s Ear: For the same reasons as the Pheasant Tail, carry bead head and traditional versions of this fly, and in the same sizes. The big difference in the two nymphs is the Hare’s Ear provides an option for a lighter colored nymph and it is a little “buggier” than the Pheasant Tail, providing more movement. Most tend to favor the traditional tan body color but an olive body is also very effective and versatile.
6) Prince Nymph: This fly gives you that all important peacock herl factor which trout seem to dig. The white colored goose biots on the back also seems to grab the attention of fish. I’m not sure if anyone knows exactly what it’s supposed to imitate but the bottom line is it works! A Zug Bug is a close cousin to the Prince and would likely make many anglers’ favorite fly list. The two are similar and you can’t go wrong with either. Carry them in sizes #8-#16.
7) Zebra Midge: This fly will cover most of your small nymph needs. It is a simple pattern but extremely effective. Best fished in tailwaters and slow pools in mountain streams, carry it in sizes #18-#22. Most tend to prefer the tungsten bead head versions with black, red, or olive bodies.
Streamers
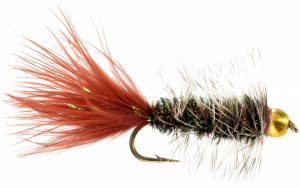
8) Wooly Bugger: While there are numerous great streamers out there, only one made this list as a must have, probably because of its incredible versatility. The Wooly Bugger, carried in a variety of colors, can facilitate almost any streamer need. Carry them in black, olive, tan, and white in sizes #4-#10 and you have an effective imitation for small baitfish, leeches, and crayfish. In a pinch, you can even dead drift a Wooly Bugger as a pretty effective imitation for a stonefly nymph or hellgramite. Whether you choose bead or no bead, flash or no flash, you have a fly capable of catching most any kind of fish in any kind of water.
Learn more about Smoky Mountain hatches and flies in my hatch guide.
If you ask any fly fisherman with any experience at all to name his top ten, “must have” flies, I guarantee that 9 out of 10, at least, will include a Wooly Bugger. And the handful who don’t mention it are likely just contrarians. But why? Why is this such a popular fly that is a staple in nearly every angler’s fly box?
I suppose everyone might have their own answer to that question, but for me, the short answer is versatility. The Wooly Bugger was one of the first flies I ever learned about and with it, over my many years of fly fishing, I’ve caught rainbow trout, brown trout, brook trout, largemouth bass, smallmouth bass, white bass, rock bass, mooneye, carp, catfish, crappie, bluegill, striper, gar, walleye, and salmon. And I’ve caught fish with it in lakes, ponds, deep rivers, shallow mountain streams, and tailwaters. I suspect the only reason I’ve never caught fish on it in saltwater is because I’ve never tried.
This one could easily pass for a crayfish
What’s it supposed to be? That’s the beauty of it. Depending on how you tie it and how you fish it, it can represent a number of food items. For instance, in black and retrieved slowly, it probably represents a leech. In lighter colors and stripped more quickly and erratically, it looks like a baitfish. With a combination of olive and/or rusty colors, it resembles a crayfish. In darker colors and fished on a dead drift, it could imitate a stonefly or hellgrammite nymph. In bright colors, maybe with an egg on the front, you have a fly for salmon, steelhead, or many stocked trout.
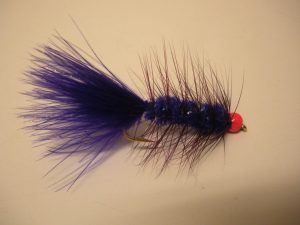
Try this purple and pink Bugger for winter stockers
Because of its versatility, it is a recommended fly for any month of the year, but I selected it for November for a couple of reasons. One, there are just not many hatches or any unusual flies to single out in November. Two, this is one of the big months to fish for large browns in the park. Post spawn brown trout are hungry and winter is coming soon, so while you can certainly catch them on smaller flies, why not show them a little bigger meal? Wooly Buggers are big fish flies. Because it looks like a big meal is probably the main reason it’s such a successful fly.
Next time you’re not sure what the fish are biting on, tie on a Bugger. Dead drift it in a riffle or strip it through a deep flat. Slowly creep it along the bottom or quickly skim it across the surface. Play with it. What you find may surprise you!
April is one of the busiest months of the year for hatches and provides a smorgasbord of bugs for our finned friends. It’s also when we begin to see the change in color schemes on adult aquatic insects.
Aquatic insect adults are not only great sources of food for fish but also for birds. As a matter of fact, when you begin to see large numbers of swallows gather above the water and swooping down to the surface, get ready. The hatch is beginning. Once the bugs have safely made it off the water, nature helps take care of them with appropriate camouflage to blend in with streamside trees and vegetation.
In the winter and early spring, most of your aquatic insect adults are black, grey, or some other dark color. They can better blend in with the dark, bare branches around the water. As we get later into spring and things begin to bloom, you begin to see more light- colored insects, such as tan and yellow. By the time summer rolls around, almost all of the adult insects are brighter yellows and greens to blend in with the abundant vegetation. And in the fall, you see more bugs with reds and oranges. There are of course plenty of exceptions to this but it’s a good guideline to follow with fly selection if you don’t know exactly what’s hatching.
So, April is a transitional month for color. Early in the month, we’re seeing the tail end of some of the darker bugs like Quill Gordons and Blue Quills, and by the end of the month we’re starting to see yellow bugs like Sulphurs and Little Yellow Sallies.
Egg Laying Imitation
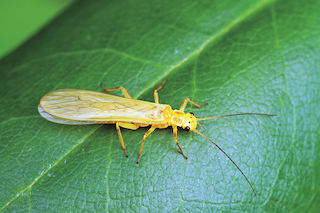
Most of the hatches in the early part of the month are sparse and can be covered with generic flies like a Parachute Adams. The first hatch of significance in April is the Little Yellow Sally stonefly. It is one of the most prolific hatches in the Southern Appalachian Mountains, beginning usually around the third week of April and lasting well into July.
Unlike mayflies and caddisflies, stoneflies do not hatch in the water. Rather, the nymph will crawl out of the water onto a rock before hatching. Pay attention when you are on the water, and you’ll probably notice empty stonefly cases on exposed stream rocks. This means that the adult stonefly is not nearly as important to the fly fisherman. The adults aren’t as available to the trout. You should focus more on imitating stonefly nymphs. For dry flies, focus more on the stage when it returns to the stream to lay eggs. You’ll notice that many of the adult Sally imitations are tied with a red butt for that very reason. It imitates the egg laying stage.
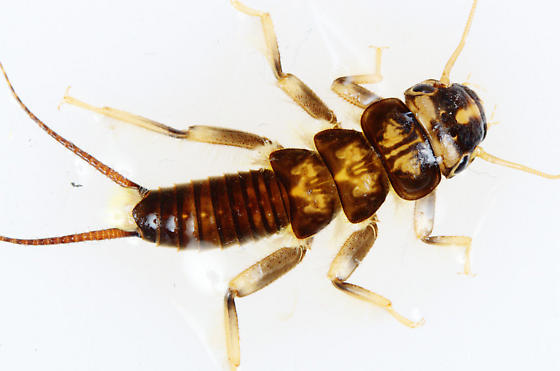
Little Yellow Sally Nymph
Stoneflies are often large bugs but that isn’t the case with the Little Yellow Sally, as suggested by the name. These are commonly found in size #16 and are typically a very bright yellow, and sometimes chartreuse. They tend to hatch sporadically through the day and return to the water in the evening to lay eggs. Typically, the later in the hatch it is, the later in the day they will return to the water. In April, you may see them dive bombing the water to lay eggs in the early evening. In late June, that’s probably not going to happen until almost dark.
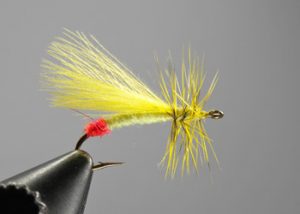
Neversink Caddis
There are a number of good imitations for the adult Yellow Sally. A yellow Neversink Caddis is one of my favorite “searching patterns.” For the nymph, you’ll want something tan to yellow in color. A small Tellico nymph or even a Hare’s Ear nymph should do the trick. And again, if you’re fishing when they’re laying eggs, something with a red butt can be very effective. Just plan to stay out late!
Learn more about Smoky Mountain hatches and flies in my hatch guide.
I could write thousands of tortured words on how to nymph fish. There are countless methods and variables. And they can be determined by anything from water conditions to the type of nymph you’re trying to imitate. Needless to say, it’s a little more than we can chew in a newsletter article. But consider this an introduction to what I like to call active nymphing.
I differentiate it with the word “active” because mostly, we are taught to fish our nymph(s) on a dead drift. In other words, we try to get our nymph to drift at the same speed as the current. This is usually with strike indicator, with no motion or “action” at all. In many situations, this is a highly effective method for catching trout and one that definitely shouldn’t be abandoned. But there are some situations when putting a little movement in the fly, “little” being the key word, may produce a few more fish.
If you’ve spent much time fishing nymphs, this has probably happened to you at some point. You dead-drift your nymph(s) under a strike indicator multiple times through a great run with no results. When you quit paying attention to do something else (probably change flies), the line and nymph(s) straightens downstream, dragging in the current, and a fish hits it.
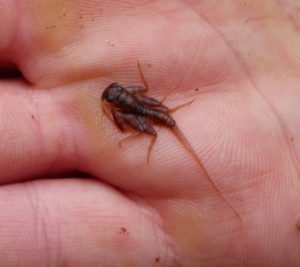
Nymphs will sometimes deliberately “drift” to other parts of the stream in a sort of migration. Other times, nymphs may unintentionally become dislodged from a rock and find themselves drifting down the stream. In either case, they are most often not particularly good swimmers, and are basically at the mercy of the current. Your dead-drift nymphing technique replicates common scenarios like this. However, some nymphs, like the Isonychias mentioned in the other article in this newsletter, ARE good swimmers. They don’t drift helplessly with the current. Caddis especially tend to be good swimmers.
Soft Hackle Pheasant Tail
And at certain times, such as when it’s time to hatch, even poor swimming nymphs will uses gases to “propel” themselves through the water column to reach the surface. These nymphs are often referred to as emergers. During these times, that upward, emerging motion of the nymph is often what triggers the fish to strike. So, that fish you caught “by accident” when you let your line get tight and drag behind you may not have been such a fluke. When your drift ended and the line straightened, your nymph “swung” from the stream bottom to the surface, likely resembling an emerging nymph. The trick now, is to replicate that how and when you want to, rather than by accident when you’re not paying attention.
The best way to start with this technique is to find a good stretch of pocket water. Or a nice riffle with some deeper seams and cuts will do. With faster current, you’ll be able to get closer to the fish and employ a high-sticking method. Use a longer rod, probably 8-9’, and use a leader approximately the same length as the rod. Tie on a generic, all-purpose soft-hackle pattern, like a soft-hackle Pheasant Tail or Hares Ear, and put a small split shot about 8” above it. Forget the strike indicator.
In a smaller pocket, keep just a couple of feet of fly line out past the rod tip, and make a short cast up and across to the top of the pocket. You should be slightly more than a rod length away from your target, preferably with a faster current between you and the target (this will help to conceal you from the fish). Keep your rod tip up and out by extending your arm, and try to maintain an approximately 90-degree angle between the line and rod. By keeping your rod tip up, you can keep most of the leader off the water. If you want the nymph to go a little deeper, drop your rod a little lower. It depends on the depth of the water.
Move the rod with the drift at the pace of the current to maintain the 90-degree angle, and allow the drift to continue in front of and slightly below you. You may get a strike during this portion of the drift. If so, you’ll probably feel it since you have most of the slack out of your line, but keep a close eye on your leader. It will tighten if a fish strikes and be another cue for you to set the hook. When you reach the end of the drift (bottom of the pocket), quit moving the rod with the drift. This will force the fly to swing from the bottom to the surface. If the fish hits during this portion of the drift, you will likely feel a very hard tug.
The same method can be used when fishing a bigger pocket or a longer seam in a riffle. You may just be using slightly more line and have a little longer drift. You may also choose to try one more technique on these longer drifts. Start by doing everything as described above. When the fly and line are passing in front of you, give your wrist 3 or 4 intermittent, slight upward twitches. This will allow the fly to “jump” or “pulse” in the current. Keep in mind that you want those wrist twitches to be very slight. Quickly and aggressively “pulling” the fly from the bottom to top will not look natural.
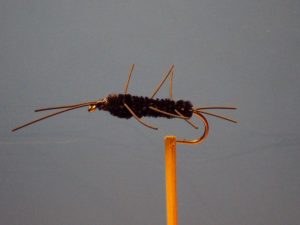
Girdle Bug
I suggested using a soft-hackle fly for this technique, mainly because the design of the fly lends itself well to the motion-based presentation. But I fish a variety of nymphs in this fashion. Definitely give it a try with your favorite caddis nymphs and emergers. And try it next time that water is a little high and stained from rain. Use a dark Wooly Bugger or a dark, rubber-legged nymph like a Girdle Bug. What you find may surprise you!
More visible leaders with colored butt and mid sections can make this method of fishing much easier. They help a little with strike detection but mostly, they help you see and track the leader and better gauge the depth of the fly. I make leaders specifically for these short-line techniques and they are available for purchase here.
When many people think of fishing with flies, images of more familiar insects like houseflies and mosquitoes often come to mind. Many familiar terrestrial insects like ants, beetles, and hoppers are a source of food for trout. Those are especially important in the summer. But aquatic insects are most abundant to fish throughout the year. And most artificial flies imitate these water-born bugs.
There are a number of aquatic insects in streams and rivers. Mayflies, caddisflies, stoneflies, and midges are the most common. They are defined as aquatic because most of their life is spent in various stages in or on the water. The four groups listed above vary respectively in their life cycles. But they are similar in that they begin in one form under the water. They all emerge and transform to another stage. And they all ultimately return to the water to lay eggs and start the process again. Let’s use a mayfly as an example.
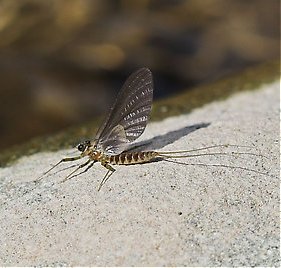
Mayfly Adult
First of all, the term mayfly is as general as the term flower. Just as there are many different flowers such as roses, daisies, and tulips, there are also many different mayflies such as Blue Wing Olives, Quill Gordons, and Sulfurs. And just as certain flowers bloom at specific, somewhat predictable times of the year, certain mayflies hatch at specific, somewhat predictable times of the year. Around here for example, you’ll usually see Quill Gordons in mid March, Sulfurs in May, etc.
The mayfly hatch that you hear about is technically the second time they hatch. A mayfly will first hatch underwater from a tiny egg into a nymph. The nymph is the juvenile stage of a mayfly’s life and it takes place entirely underwater. As a nymph, the mayfly has a very flat, streamline profile and typically lives beneath rocks on the stream bottom where it feeds on algae and such.
Mayfly Nymph
A typical mayfly nymph will live for about a year in this stage until it reaches maturity. At that time, the nymph will emerge to the surface of the water, a shuck splits open, and an adult mayfly (often called a dun) crawls out. The adult will be on the surface anywhere from seconds to minutes while it dries its newly formed wings before flying off to nearby vegetation.
With no mouthparts in this stage, the adult will usually not live for much more than a day. Its sole purpose is to mate. After this occurs, females will return to the water to lay their eggs. Upon completion, they finally lay spent on the water. So a mayfly’s only role in nature seems to be to feed trout.
But it’s not just trout that eat aquatic insects. Birds will get the lion’s share and most aquatic insects are naturally camouflaged with this in mind. Understanding this can give you a leg up when it comes to fly selection, even when you don’t know what’s hatching.
In the very early and very late seasons when there is no foliage on stream side trees, aquatic insects need to blend in with the actual branches. Consequently, most everything that hatches during that timeframe will be dark in color (Gray, black, etc.). In the late spring and summer when foliage is full and vegetation is thick, most everything that hatches will be lighter in color (yellows, greens, etc.). And in the fall – you guessed it – most of the bugs that hatch will be drab, rusty colors.
Learn more about Smoky Mountain hatches and flies in my hatch guide.
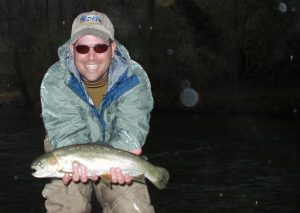
This is one of those flies that when you show it to an inexperienced angler (and many experienced ones too), the reaction will often be, “What size fish can you catch on that?!?” Whatever size fish is feeding on it. While there is sometimes a little truth to the big fly, big fish theory, fish are going to feed most on the most available food source.
In nearly every tailwater in the world, and certainly in every East Tennessee tailwater, midges are by far the most available food source. They are available to fish nearly 24 hours a day, 365 days a year. And while they may be small, they are abundant and big fish will eat them because they’re such an easy and available meal. More often than not, the first fly I tie on when fishing any tailwater, is some sort of midge.
Big fish on a small fly
In freestone streams like you find in the Smokies, we don’t fish midges as much because they’re not as prolific and they are often outnumbered by a variety of mayflies, caddis flies, and stoneflies. So it’s one of those weird ironies that we go to the mountains and fish larger flies for smaller fish and in the tailwaters, we fish smaller flies for larger fish! But they do have seasonal importance in the mountains. They are far more abundant in the late fall and winter than any other time of year.
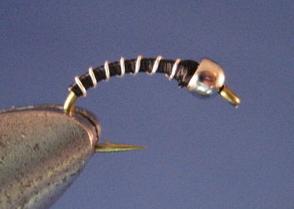
Midges do hatch into adults but the larval stage is of the most significance to the fly fisherman. You will regularly see trout in the Clinch River tailwater surface feeding on adult midges. However, my experience has been that for every one hit you can get on a topwater midge imitation, you can get about twenty on a nymph. And for me, the number one nymph imitation for a midge is the Zebra Midge.
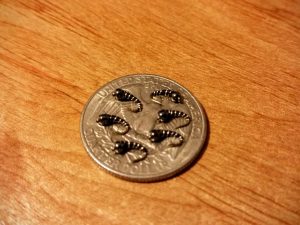
They can be REALLY small
Midges are rarely bigger than a size #18 and can get a whole lot smaller. I usually fish a size #18 Zebra Midge but will and have gone as small as a #24. You can go as small as you’d like but for me, if catching trout necessitates fishing size #28 flies… It’s time to go to the bar! The smaller the fly, the smaller the tippet you need. And at 45 years of age, I’ve come to the conclusion that trying to thread a #28 hook with 9X tippet and then land a 20”+ fish on that tiny hook and 9X tippet ceases to be fun. Most of the time, a #18 hook on 6X tippet is adequate.
Midges come in a variety of colors and that can vary on a daily basis. Mostly I tie Zebra Midges in red, brown, grey, olive, and black. I fish black more than any color and in the mountains, almost exclusively – maybe olive. I typically tie them with a tungsten bead to get them down quickly. Also, I like to have a few un-weighted ones on hand to fish in the film.
This fly is as simple as it gets. It’s just a bead, thread, and wire. But it is incredibly effective and a must have in any trout fly selection. Try it!
Learn more about Smoky Mountain hatches and flies in my hatch guide.
If you haven’t noticed by now, there are not a lot of “Hot New Flies” that I feature here. Most of the flies I fish with, particularly in the Smokies, are older, traditional patterns, or possibly an old staple that I’ve put a modern spin on. Maybe that makes me a curmudgeon. I don’t know. But until the old staples quit catching fish…
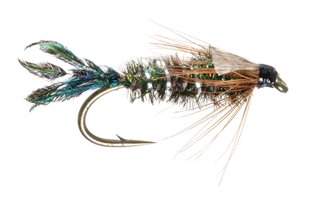
This month’s fly is no exception. Cliff Zug created the Zug Bug in Pennsylvania in the 1930’s. It originally imitated a cased caddis or caddis larvae but over the years has proven to be a highly successful generic or searching pattern. It’s popularity quickly spread through the Catskills and eventually to the American West. Today it is widely known around the world and is on the “must have” list of patterns for many fly fishermen.
While I have success with this fly throughout the year, it has been, for whatever reason, particularly productive for me in the late winter and early spring. During that time of year, I like to fish it deep and slow through slower pools, typically under a strike indicator. However, it also fishes well later in the year on a swing through pocket water.
It’s relatively easy to tie and is available almost anywhere that sells flies. Bead head versions are also available but I tend to stick with the original, mostly in sizes #16-12. If you don’t know this fly, you should! Play around with a few different sizes and variations and see what you think.
Learn more about Smoky Mountain hatches and flies in my hatch guide.
I recently saw a post on Facebook from a gentleman who had broken two fly rods on one trip. Another person commented about “having the record” for taking the most broken rods back to his local fly shop. They proceeded to boastfully go back and forth about this as if it was some sort of badge of honor. Accidents happen and rods do break from time to time, but I had guided one of these gentlemen and it was no secret why he had broken so many.
When we first met, I cringed as he pulled his rod from the trunk of his car. It was not in a tube and there were a variety of items piled on top of it. I’ve seen a lot of rods break over the years, but I’ve never seen a single one break while it was in the tube. If you knew him, it would come as no surprise that he forgot to bring a reel for the rod, so he ended up using one of mine.
When he caught his first fish, he removed the hook and literally threw the rod on a rocky bank about ten feet away in preparation for a photo. I let it slide but when it happened again on the second fish, he got the “lecture.” Not only was he damaging the rod every time he did that but also the reel. Actually, he wasn’t doing the fly line any favors either!
Whether it’s cars, tools, fly fishing gear, or anything else, I was always taught that if you take care of your gear, your gear will take care of you. While taking care of your gear often means simply handling it responsibly in the field, simple maintenance out of the field can greatly extend the life of valuable fishing gear and insure that it’s ready to perform when you need it to. And what better time than winter for inspection and a little preventive maintenance?
Rods:
Fly rods don’t require a lot of maintenance. Basically, don’t heave them into rocks every time you catch a fish and keep them in a tube for storage and travel. However, be careful not to store them wet for an extended amount of time in an airtight tube. Simple off-season maintenance includes checking rod guides and wraps for any damage. If you notice a loose guide or a wrap beginning to fail, you can send it back to the manufacturer for a preventive repair, rather than waiting for the guide to come off while you’re fishing. When you are doing this, also check the ferrules (where the rod pieces join) for a good, snug fit. If any seem loose, apply a small coating of wax to the male end.
Reels:
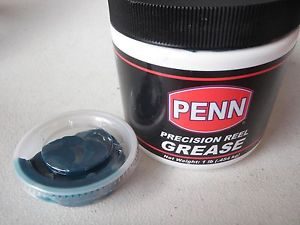
Reel Lube
Fly reels are pretty low maintenance, too. First, check to make sure the reel is turning smoothly. If it’s not, first be sure that there’s not too much line on it. Assuming excessive line isn’t preventing it from turning smoothly, you likely have a bent frame or dented spool. If it’s minor, your local fly shop might be able to fix that. Otherwise, it will need to go back to the manufacturer.
Assuming the reel is turning properly, all it really needs is a cleaning and “tune-up.” Remove the spool and rinse it and the frame with water. Wipe away any excessive grime build-up and apply a small amount of reel lube around the gears. Allow the reel to dry before putting back into storage.
Fly Lines:
Fly lines probably require more maintenance than any other piece of equipment. You don’t have to completely remove it from the reel, but pull out at least the first forty feet of fly line. You can pull out the entire amount if you wish, but most people don’t use more than the first forty feet and it’s what will need the most attention.
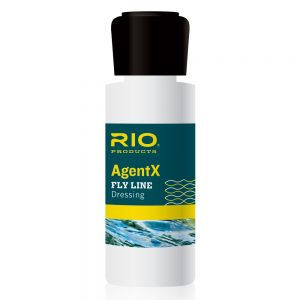
Fly Line Dressing
Spread it out someplace other than the ground, such as between a couple of trees in the back yard. Take a small container and fill it with water and a couple drops of dishwashing liquid. Dip a clean cloth or paper towel in the liquid and run the cloth back and forth over the fly line. You’ll likely see a dark, grimy stain on the cloth after you do. Repeat this process with a clean cloth until you no longer see a stain, then do it one more time with just water and no soap.
Now that your line is clean, you’ll want to treat it with something to keep it slick and prevent cracking. There are specific fly line treatments available at fly shops for this. Just rub into the line using the same method described above. Or something I like to use is ArmorAll. You buy the wipes and simply run the wipe up and down the line several times. Some fly line manufacturers claim that ArmorAll is not a good choice for line treatment. I have personally never had a problem with it.
These steps should keep your line floating better, allow it to shoot through the rod guides better, and simply make it last longer. It wouldn’t hurt to do this periodically throughout the year, but at least once a year. It depends on how much you fish and where you fish. Fly lines used on scummy lakes and ponds will need more frequent attention than lines used in clear mountain streams.
Waders:
Most wader care needs to happen throughout the season and that mostly involves being careful of thorns, etc. Probably the most damage occurs to waders when people are putting them on or taking them off at the truck. I regularly see fishermen put on their stockingfoot waders and then walk around looking for the boots or other items. This is just an invitation for gravel or other pointy objects to puncture the feet of the waders. The feet of my waders never touch the ground – boots are on the ground ready, foot goes into wader, wader goes into boot. If you’re not comfortable doing the “one leg hop,” keeping a mat to stand on is a great idea.
Also be sure not to store waders wet. Hang them to dry when you get home, preferably not in direct sunlight. Occasionally washing them through the year will help with their breathability and water repellency. Wash them on gentle cycle with a mild detergent. I recommend Ivory Snow, a detergent commonly used for baby clothing.
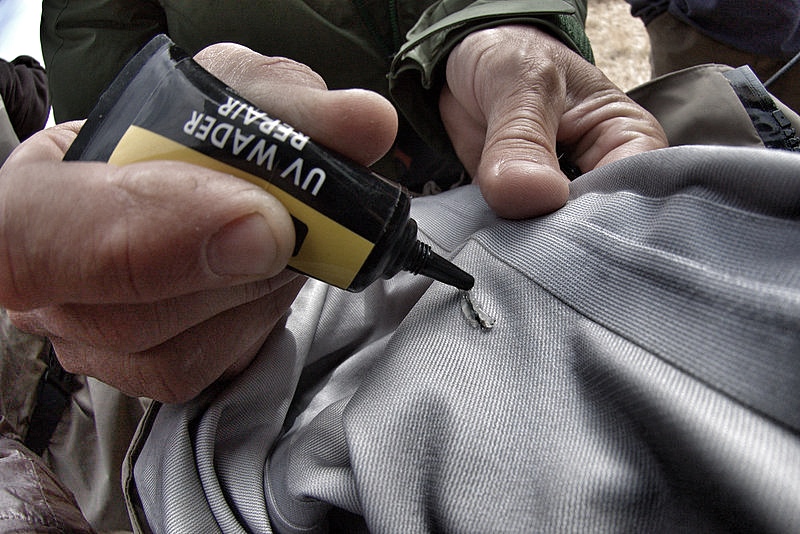
Winter is a great time to repair any leaks and/or treat with DWR. If you have major punctures or tears in your waders, you’re probably better off sending them to the manufacturer for repair or replacement. But most folks just encounter minor leakage caused by a pinhole or seam leak, and that’s pretty easy to fix yourself.
First, try to narrow down the location of the leak. For instance, if you’ve been getting damp on the inside of your right leg from the knee down, chances are pretty good that the leak is somewhere around the inside right knee. Sticking with that example, make sure the waders are completely dry, turn them inside out, and generously spray rubbing alcohol all around the suspected leak area. Still keeping the waders inside out, fill the right leg past the knee with water and look closely in the area where you sprayed the alcohol. You should see discoloration where the leak is. Mark that spot with a permanent marker.
Now that we know where the leak is, it’s time to repair. Again, allow the waders to dry completely. Where you made the mark with the marker, liberally smear Aquaseal on the area. Aquaseal is available at most fly shops and many camping/outdoor stores. Usually a small tube of it comes with your waders. Put the treated area of the waders in direct sunlight to cure. When the Aquaseal feels “solid,” the waders should be immediately ready to go. However, I’d move them inside to a dry place and wait 24 hours before using.
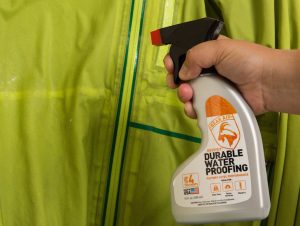
DWR water repellency
Treating your breathable waders with a DWR is a great winter project. As a matter of fact, if you have a breathable rain jacket, grab it and treat it at the same time. DWR (Durable Water Repellant) is basically going to allow the water to “bead” and roll off the fabric rather than absorb into it. I’ve had old waders and jackets that I never treated that, even though they were still waterproof, were absorbing so much water that they felt heavy and even clammy. DWR is good stuff. There are a few brands out there and can usually be found at camping/outdoor stores. I’ve personally had good luck with ReviveX Spray-on Repellant.
Treating fabric with DWR
Start by washing the waders and/or jacket with a mild detergent as described above. Hang the garment(s) and spray evenly and thoroughly with DWR while the garment is still wet. I usually apply a little heavier around seams and stress areas such as the knees and crotch area on waders. On jackets, I put a little more emphasis on the shoulder area. You can then simply allow it to air dry where it’s hanging or put it in the dryer on low/medium for about an hour.
That about covers the big stuff. I also like to use winter to go through fly boxes and remove rusty hooks. Those have a way of contaminating the entire box after a while. And it’s a great time to go through your first aid kit and make sure everything is up to date. You can also put new batteries in the flashlight, etc. Then, when spring rolls around, all you have to do is fish!
Dry fly fishing in the Smokies is productive almost year round. Presenting a dry fly that rides high on the water, not only tends to produce more strikes, it is much easier for you to see. Here are a few tips to keep your fly floating high in the fast moving currents of the Smoky Mountains.
First off, if you don’t tie your own flies, be sure buy high quality dry flies. It can be tempting to find Internet companies or box stores that offer really cheap prices on flies. They are cheap for a reason. These dry flies often have less hackle and/or use a very low-grade hackle. They are simply not going to float as well. Bushy, heavily hackled flies will float the best, as will flies that utilize foam and/or deer hair. These are all great for most of the riffles and pocket water you encounter in the Smokies. However, if you’re fishing to slow water risers in a slick pool, you may want to use a more slender, low profile fly like a parachute or comparadun pattern.
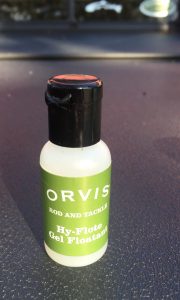
Treat your flies before you fish them. There are a number of great products on the market that accomplish this and are generically referred to as fly floatant. The most common are silicone based and have a gel consistency. Just squeeze a drop on your finger and rub it into your fly. Orvis, Aquel, Loon and Gink are probably the most common brands. They’re all probably about the same but everyone seems to have their favorite. I use Orvis Hy-Flote.
Fly Floatant
Once you’ve selected your high quality dry fly and gooped it up with fly floatant, the worst thing you can do to it is catch a fish! They take it under water and slime it up to the point where it doesn’t want to float as well, especially after you catch 2 or 3 fish. When this happens, a mistake a lot of anglers make is to re-apply the same gel floatant they used to pre-treat the fly. However, you’re often just trapping moisture in to the fly at this point. You need to remove as much of the moisture from the fly as possible.
On bigger rivers such as tailwaters, your false cast can keep a lot of moisture out of the fly, even after several fish. But in places like the Smokies, frequent false casting is often not an option due to the tighter quarters. It’s also not advised because of the increased risk of spooking fish. There are a number of methods I use to dry a saturated fly in these environments.
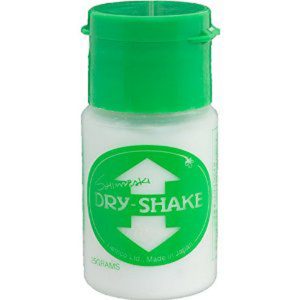
Dry Shake
One is to press the fly against an absorbent material. Amadou is a material sold at many fly shops that works great for this. You can carry a patch on your vest or pack and just squeeze the fly in it. Chamois cloth is another good option. If you’re in a pinch and don’t have either, just press the fly against your shirt. After employing this method, blow on your fly. Finally, consider carrying a second, powder based flotation product. These are desiccants, similar to what’s found in the small, “do not eat” pouches packaged with some clothing and electronics. Again, there are numerous brands. Frog’s Fanny is a favorite of many anglers. My favorite is Shimazaki Dry-Shake. It has a large-mouthed bottle that allows you to drop the fly in while still attached to the tippet. Close the lid, shake vigorously and remove. It will be floating like new.
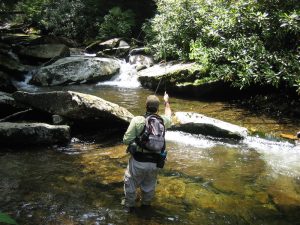
The final tip for keeping that fly floating high is technique. What causes flies to get waterlogged more than anything else, especially with novice anglers, is drag. When your fly doesn’t drift naturally, and pulls against the current, you have drag. When you have drag, you won’t catch many fish. And your fly will become more waterlogged, requiring far more maintenance to keep it floating.
Think about what you’re doing. Instead of dragging the fly through the run 2 or 3 times before making a good drift, read the water. Identify the varied currents that will pull your line at a different speed than the fly and try to position yourself where you can eliminate them. If you can’t eliminate them through position, think about how, when, and which direction you’ll need to mend BEFORE you make the first cast. And pick your fly up when it reaches the end of the target area, rather than letting it drift (drag) into the fast shallow riffle at the bottom of the run.
Keeping the line off the current lip at the rear of the pool provides a drag free drift through the sweet spot
Experienced anglers often do most of this instinctively, so it looks like they’re just casually moving around casting. The good ones always make it looks easy! If you’re newer to fly fishing or even if you’ve done it awhile but only get out a few times a year, it won’t be instinctive and you’ll have to think about it. This is just good advice, period. If you execute a good cast and drift in the right place the first time, you’ll not only keep your fly floating better, you’ll catch more fish!
Finally, on a similar note, carry your fly in your hand when you move from spot to spot. I see a lot of people who will let their fly drag behind them in the water as they wade up to the next pocket or run. If you do this, the best-case scenario is that you’re going to water-log your dry fly. More often than not, you’re also going to hang your fly up on every rock and stick in the river!
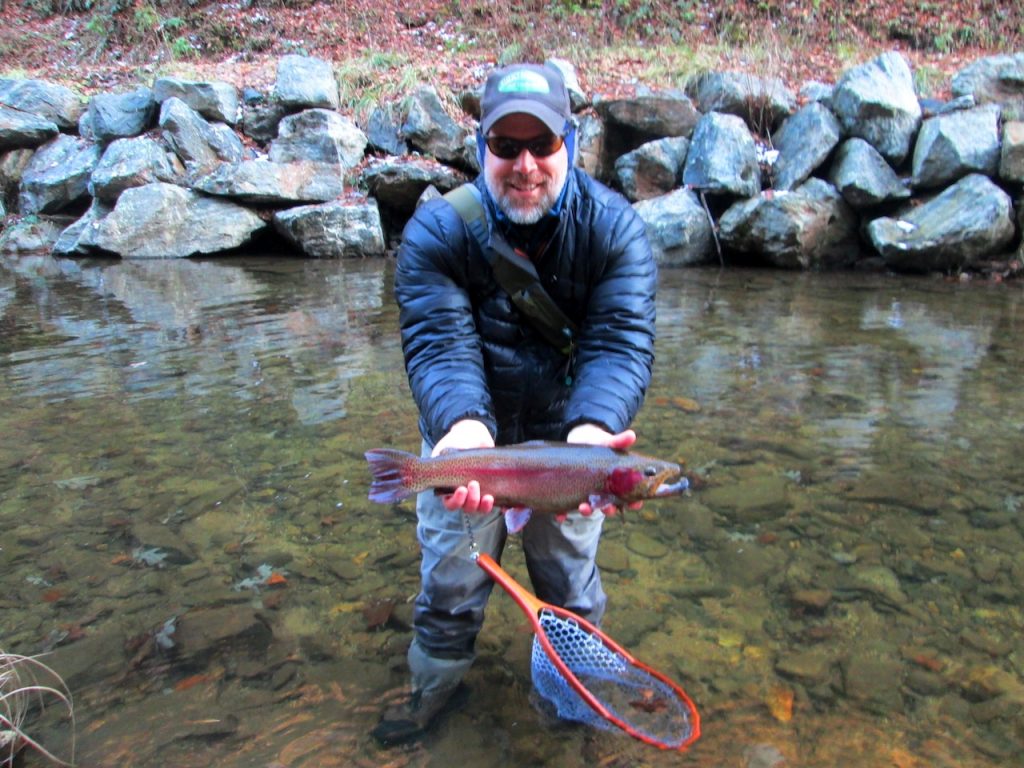
The arrival of November usually means cold weather is not too far off. But it doesn’t mean that you have to quit fishing. Certainly the fishing for wild, mountain trout can slow down significantly as water temperatures fall, but tailwater trout and really any stocked trout will continue to feed well, even in the coldest of temperatures. In recent years, winter guide trips to Delayed Harvest streams have become a favorite of many clients. This is probably because of the potential for really big trout!
In East Tennessee, the average winter day is not unbearably cold – at least not compared to many other places in the U.S. The coldest month of the year here is January where, in towns like Knoxville and Maryville, the average high is 46-degrees and the average low is 29-degrees. However, this is deceiving in a couple of ways.
When most folks view this forecast, they don’t take into consideration that you’re only going to experience that high temperature for a couple hours out of the day. Additionally, in the case of Delayed Harvest waters, we’re usually fishing mountainous areas where there’s a little more elevation and the sun spends a lot of the day low and behind the ridgeline. In other words, you can easily shave another 5-degrees off those highs and lows and when you throw in a little wind, you’ve got a pretty darn cold day on the water.
So, a typical full day trip in the winter will go from about 9 to 5. If the forecast is for a high of 46-degrees, that will be more like 40-degrees on the stream, and you’ll reach that high temperature probably around 3pm. That means for the majority of the day, you’ll be fishing in temperatures in the 30’s. Unless you grew up someplace like Alaska, North Dakota, or Maine, that’s cold! Don’t get me wrong, it can be a ton of fun and it never feels as cold when the fish are biting. But to better enjoy your day on the water, you better know how to dress. After all, there’s no such thing as bad weather, just bad clothing choices! Below are a few tips to prepare for a winter fly fishing trip.
Dress in Layers:
You hear this advice a lot from the weather person on your local news but I don’t think they usually understand the difference in dressing in layers and simply dressing warm. If I’m just going out in the cold for a while, I can just throw on a heavy coat and a hat and be set. However, when I’m going to spend the day outside in the cold, I’m likely to experience a variety of changing temperatures and conditions. Dressing in layers allows me the flexibility of adding or removing layers as conditions and activity levels change.
How to Layer:
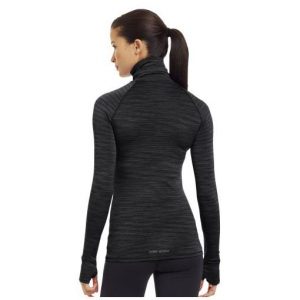
There are three basic layers to consider. The first are the
Long underwear with turtleneck top
garments closest to your body, and their main objective should be to wick moisture from your body. If your body gets wet, from perspiration or anything else, you’re going to be cold, no matter what you’re wearing as an outer layer. Consider wearing a thin, synthetic “liner sock” on your feet and synthetic long underwear for your legs, arms and torso. Long underwear with a turtleneck top is a bonus as it gives an added layer on your neck.
The next layer is the insulating layer that is designed to keep you warm. Depending on how cold it is, this could actually consist of multiple layers. For the feet, a thick, heavy wool or fleece sock should be sufficient. The 3mm neoprene foot on the wader is also going to serve as insulation. For the legs, a fleece pant designed for cold wading is great and I also like traditional fleece lined pants. Up top, I typically wear a mid-weight fleece pullover followed by a heavier fleece pullover or jacket. As the day warms, I might remove the heavier fleece. Again, it’s a bonus if one or both of these upper layers covers the neck.
The third and final layer is the shell. Its purpose is to protect from wind and moisture. For your lower half, the waders serve as your shell. Up top, I just add a light to mid-weight rain jacket. The hood will act as a shell layer for your head.
The Extremities:
By extremities, I’m mostly talking about your head and your hands. These can be the most challenging and most important to protect. The challenge with the head is to keep it warm without interfering too much with necessary senses like sight and sound. For that reason, I HATE wearing a hood, though sometimes it’s necessary on rainy days.
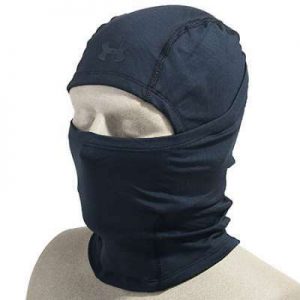
Under Armour Infrared Hood
I layer my head with a product from Under Armour called an infrared hood. It’s the same thin-layered garment you see football quarterbacks wearing under their helmets in cold weather games. It covers the entire head, including the ears, but doesn’t interfere with hearing like earmuffs do. It also has a piece that can be pulled up to cover the face on particularly cold, windy days. Because it is relatively thin, I can wear a traditional ball cap over it on milder days or a warm stocking cap on colder days. This is one of the best pieces of cold weather fishing gear I’ve found!
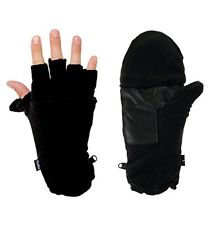
Fold-back Fingerless Mittens
The hands and fingers are the toughest part. Trying to keep warm while maintaining the necessary finger dexterity for fly fishing is one that I haven’t totally figured out. While there are fleece gloves and mitts with fold-back hand and finger pieces, they still leave your fingers exposed while fishing and the fold-back piece is just one more thing for your fly line to hang on. I prefer just standard wool or fleece fingerless gloves. They keep my hands warm and if the fingers start getting too cold, I take a break and put my hands in my pockets.
Adjusting Layers:
Most of this is common sense. If you’re cold, add a layer. But it’s important to pay attention to your activity level because you don’t want to be too insulated while active and start to perspire. Perspiration during cold weather can create a cold that’s hard to come back from once you become less active. It’s also a common cause of hypothermia when not addressed.
One of the biggest mistakes I see people make is overdressing for the car ride to the stream. Wearing too much in the car can cause you to perspire and you’re going to be cold all day. Wear the bare minimum of layers in the car and add the additional layers when you reach the stream. Pay particular attention to your feet!
Fabrics:
You may have noticed repeated references to fleece or synthetic fabrics. That’s a really important piece of the puzzle for staying warm, dry, and comfortable. Synthetic materials like fleece are not only more breathable, but offer insulating properties even when wet. Wool does the same thing though it is often heavier. This is important with all of your clothing in case you take a dunk in the stream. It is particularly important with your gloves, as your hands will constantly be exposed to water while fishing.


 When we first met, I cringed as he pulled his rod from the trunk of his car. It was not in a tube and there were a variety of items piled on top of it. I’ve seen a lot of rods break over the years, but I’ve never seen a single one break while it was in the tube. If you knew him, it would come as no surprise that he forgot to bring a reel for the rod, so he ended up using one of mine.