Adjusting Weight When Nymphing

Split Shot

Warning! This article contains terrible illustrations!

Several years ago, I was fishing a stream in the Smokies that I probably know better than any other. It was an early spring day and the water temperature was marginal at around 50-degrees, and the water level was a little high because of recent rainfall. I’d been fishing for two hours and hadn’t even had a strike. I knew it wasn’t a dry fly kind of day. Therefore, I continued to switch nymph patterns, trying to find something that would fool one trout.

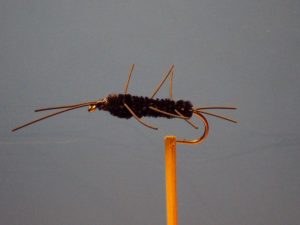
Eventually, I decided to stick with one fly pattern, a Pick Pocket, that I had a lot of faith in and to begin altering the way I fished it. Since it was an un-weighted wet fly, I already had one split shot about 8” above it. I began swinging the fly a little more, but the result was the same. Next, I added a second split shot and fished with a mix of swing and dead drift techniques. Nothing. Finally, I added a third split shot and hooked a fish on my second cast. I proceeded to catch another 30 fish or so over the next couple of hours.

I should have known better but we all seem to get too caught up in fly patterns and lose sight of other important factors like drift and depth. Well, I had been fishing good drifts all day, but these fish were hugging the bottom. My fly was not getting, or at least staying, down in their feeding zone.

Split Shot Assortment

Do you use split shot when you’re nymphing? There are definitely times when you need to. One of the best nymph fishermen I have ever fished with is Joe Humphreys. It is excruciating to watch him fish because every time he moves to a different spot, he adjusts the amount of weight on his line! But he often catches fish that others don’t because of those adjustments!

Being willing to add or remove split shot to your line is the first step. Knowing where and how to place those weights is the next. For instance, if you put three split shot right next to an already heavily weighted fly, you may have a hard time keeping it off the bottom. So, you have to figure a lot of things, like how heavy your fly is, how deep the water is and how fast the water is. Just the weight of the fly may be all you need to get the nymph near the bottom in slow water, but faster currents may move that fly all over the place. Extra weight can be used not only to get the fly deeper, but also to slow the drift and keep things where they should be.

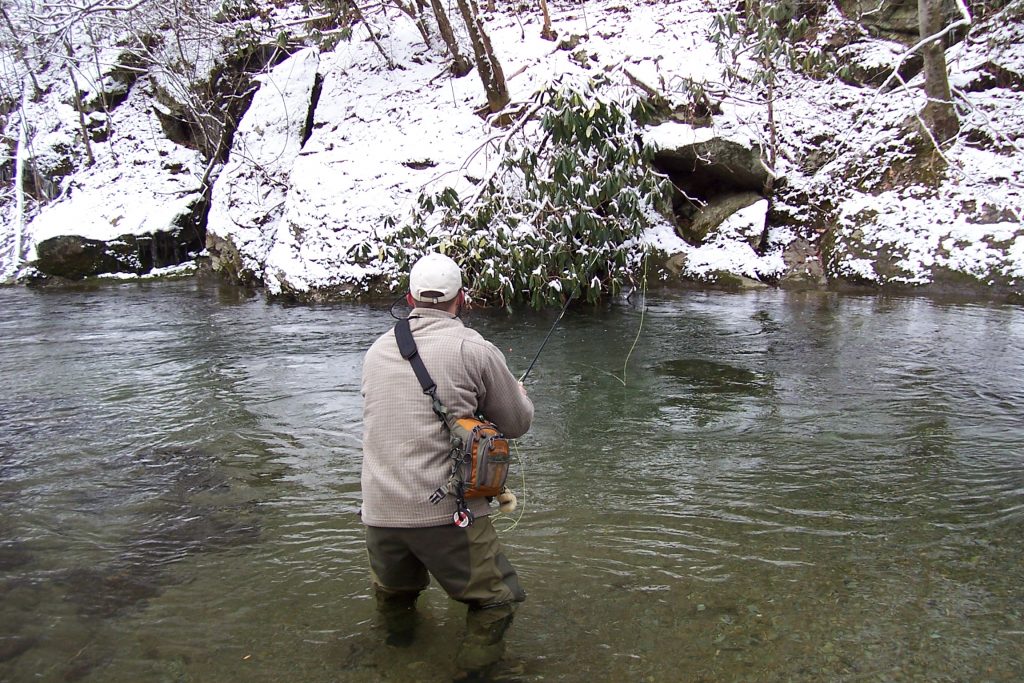
Shot placement is tricky in places like the Smokies where depth and current speed can vary significantly, even in the same run or pocket. Short casts and good line control can significantly help combat this. Strategic split shot placement can also make a big difference.

Split Shot Placement
Split shot placed at the fly

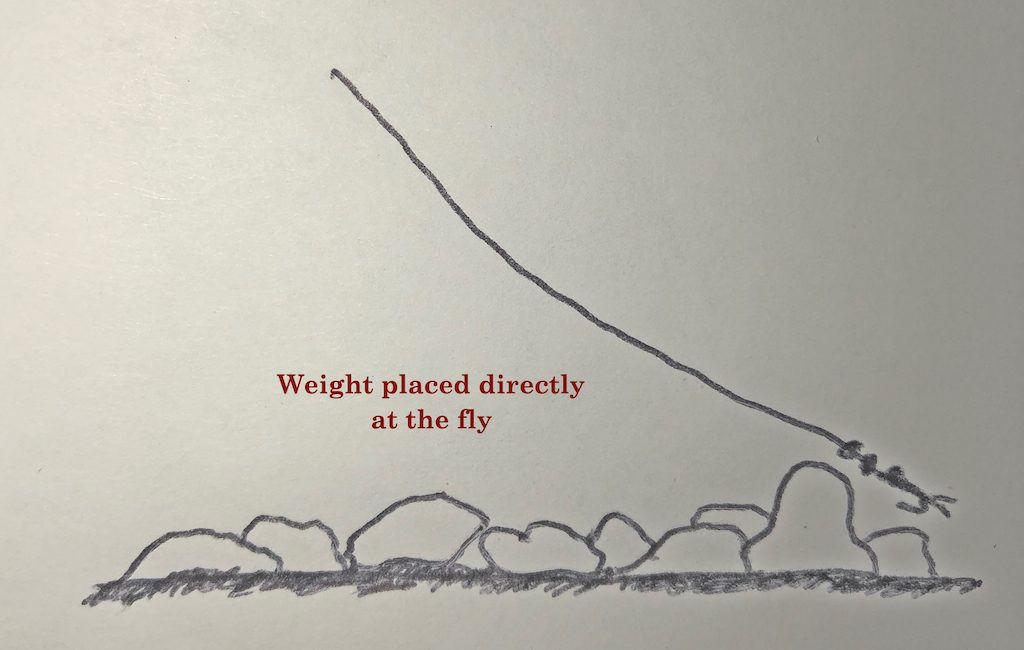
The closer you put the additional weight to the fly, the more you’re going to put the fly on the bottom. As a result, you’ll probably hang up more. But if you put a concentrated amount of weight on a section of leader above the fly, that portion of leader will be what drifts deepest, and the fly will ride above it. The farther the split shot is above the fly, the farther off the bottom the fly will drift.

Of course, there are variables like how heavy the fly is and how much split shot you use. Sometimes you just have to play with it a little bit. When you get as good as Joe Humphreys, you can make those calculations in your head and adjust perfectly for each new spot you fish. Here are a few examples of how you might want to adjust your setup. 

Split Shot Placement
Split shot placed above the fly

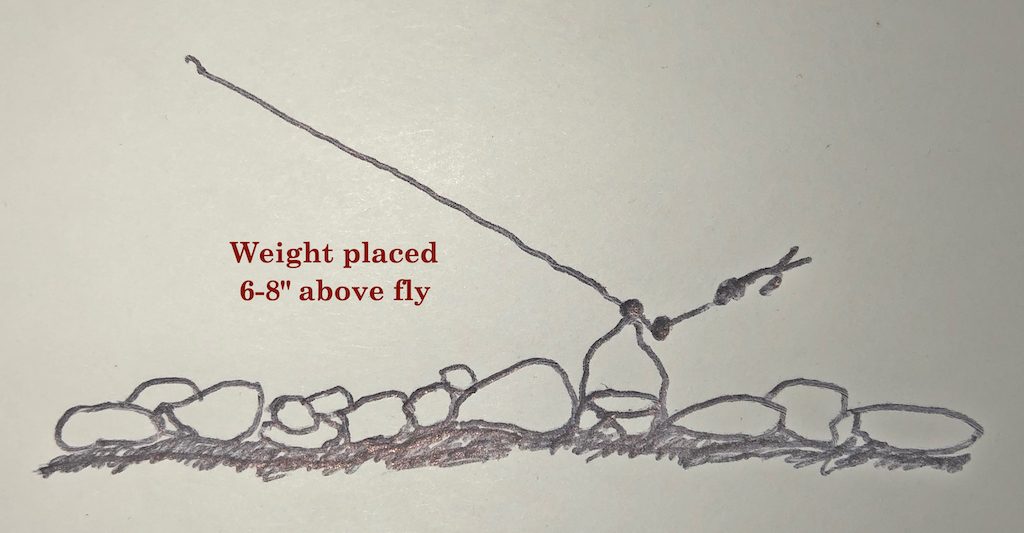
The Clinch River often has long, slow slicks that maintain fairly consistent depths. Consequently, the weight of the fly alone should be sufficient to get and keep the fly where I want it. In a 6’ deep plunge pool in the Smokies, I’m going to need a lot of weight to get my fly deep and keep it there because of the water depth and turbulence. I’ll likely use a heavily weighted fly plus a few pieces of split shot placed near the fly. But fishing pocket water in the Smokies, the depth in one pocket probably varies from 12-24”, with a lot of fast currents. Here, I would probably use a lightly weighted (or un-weighted) nymph with one or two split shot placed 6-8” above the fly. This will keep everything down but allow the fly to drift just off the bottom where it won’t hang up as much.

Split Shot Placement
Split shot placed below the fly

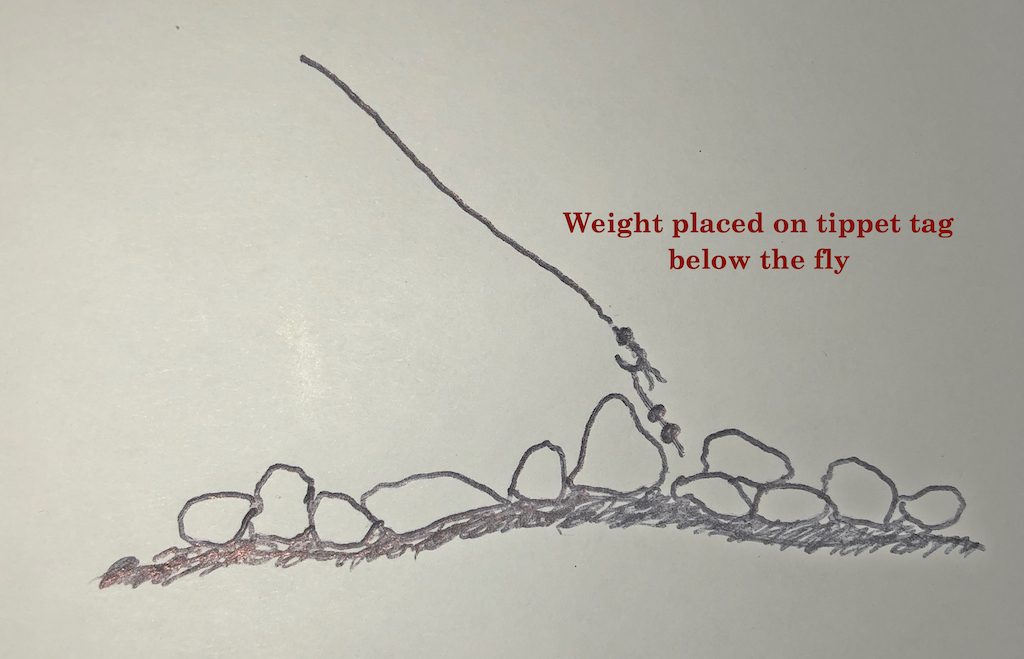
There is another method that some anglers use where a separate piece of tippet is added to the leader or to the back of the fly. The desired number of split shot are then added to that piece of tippet, allowing the fly to remain above the weight. It works, but I find that split shot hanging on a loose, vertical line like that have a greater tendency to get hung up and pulled off on rocks. As with most things, you sometimes have to play with a few methods and figure out what works best for you.

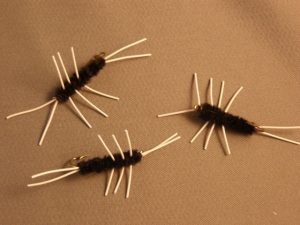
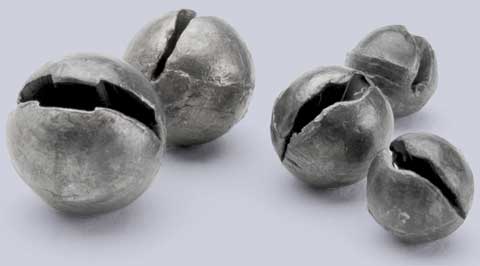
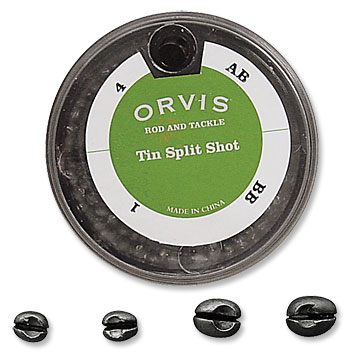
There are, of course, different sizes of split shot and what size you use can certainly determine how many you need to use. I typically use small to medium size shot because it gives me more flexibility and versatility to add or remove as needed.

In any case, if you are only nymphing with a weighted fly under a strike indicator, you are just scratching the surface of nymphing. I encourage you to experiment with different amounts of weight and different weight placements. You’ll probably start catching a few more fish… and maybe a few bigger ones, too!

Active Nymphing – Rethinking the Dead Drift

I could write thousands of tortured words on how to nymph fish. There are countless methods and variables. And they can be determined by anything from water conditions to the type of nymph you’re trying to imitate. Needless to say, it’s a little more than we can chew in a newsletter article. But consider this an introduction to what I like to call active nymphing.

I differentiate it with the word “active” because mostly, we are taught to fish our nymph(s) on a dead drift. In other words, we try to get our nymph to drift at the same speed as the current. This is usually with strike indicator, with no motion or “action” at all. In many situations, this is a highly effective method for catching trout and one that definitely shouldn’t be abandoned. But there are some situations when putting a little movement in the fly, “little” being the key word, may produce a few more fish.

If you’ve spent much time fishing nymphs, this has probably happened to you at some point. You dead-drift your nymph(s) under a strike indicator multiple times through a great run with no results. When you quit paying attention to do something else (probably change flies), the line and nymph(s) straightens downstream, dragging in the current, and a fish hits it.

Nymphs will sometimes deliberately “drift” to other parts of the stream in a sort of migration. Other times, nymphs may unintentionally become dislodged from a rock and find themselves drifting down the stream. In either case, they are most often not particularly good swimmers, and are basically at the mercy of the current. Your dead-drift nymphing technique replicates common scenarios like this. However, some nymphs, like the Isonychias mentioned in the other article in this newsletter, ARE good swimmers. They don’t drift helplessly with the current. Caddis especially tend to be good swimmers.

Soft Hackle Pheasant Tail Fly Pattern
Soft Hackle Pheasant Tail

And at certain times, such as when it’s time to hatch, even poor swimming nymphs will uses gases to “propel” themselves through the water column to reach the surface. These nymphs are often referred to as emergers. During these times, that upward, emerging motion of the nymph is often what triggers the fish to strike.   So, that fish you caught “by accident” when you let your line get tight and drag behind you may not have been such a fluke. When your drift ended and the line straightened, your nymph “swung” from the stream bottom to the surface, likely resembling an emerging nymph. The trick now, is to replicate that how and when you want to, rather than by accident when you’re not paying attention.

The best way to start with this technique is to find a good stretch of pocket water. Or a nice riffle with some deeper seams and cuts will do. With faster current, you’ll be able to get closer to the fish and employ a high-sticking method. Use a longer rod, probably 8-9’, and use a leader approximately the same length as the rod. Tie on a generic, all-purpose soft-hackle pattern, like a soft-hackle Pheasant Tail or Hares Ear, and put a small split shot about 8” above it. Forget the strike indicator.

In a smaller pocket, keep just a couple of feet of fly line out past the rod tip, and make a short cast up and across to the top of the pocket. You should be slightly more than a rod length away from your target, preferably with a faster current between you and the target (this will help to conceal you from the fish). Keep your rod tip up and out by extending your arm, and try to maintain an approximately 90-degree angle between the line and rod. By keeping your rod tip up, you can keep most of the leader off the water. If you want the nymph to go a little deeper, drop your rod a little lower. It depends on the depth of the water.

Move the rod with the drift at the pace of the current to maintain the 90-degree angle, and allow the drift to continue in front of and slightly below you. You may get a strike during this portion of the drift. If so, you’ll probably feel it since you have most of the slack out of your line, but keep a close eye on your leader. It will tighten if a fish strikes and be another cue for you to set the hook. When you reach the end of the drift (bottom of the pocket), quit moving the rod with the drift. This will force the fly to swing from the bottom to the surface. If the fish hits during this portion of the drift, you will likely feel a very hard tug.

The same method can be used when fishing a bigger pocket or a longer seam in a riffle. You may just be using slightly more line and have a little longer drift. You may also choose to try one more technique on these longer drifts. Start by doing everything as described above.  When the fly and line are passing in front of you, give your wrist 3 or 4 intermittent, slight upward twitches.   This will allow the fly to “jump” or “pulse” in the current. Keep in mind that you want those wrist twitches to be very slight. Quickly and aggressively “pulling” the fly from the bottom to top will not look natural.

Girdle Bug Fly Pattern
Girdle Bug

I suggested using a soft-hackle fly for this technique, mainly because the design of the fly lends itself well to the motion-based presentation. But I fish a variety of nymphs in this fashion. Definitely give it a try with your favorite caddis nymphs and emergers. And try it next time that water is a little high and stained from rain.  Use a dark Wooly Bugger or a dark, rubber-legged nymph like a Girdle Bug. What you find may surprise you!

More visible leaders with colored butt and mid sections can make this method of fishing  much easier.  They help a little with strike detection but mostly, they help you see and track the leader and better gauge the depth of the fly.  I make leaders specifically for these short-line techniques and they are available for purchase here.

Winter Fishing in the Mountains

Little River in the Snow
Little River in the snow

We’ve talked a lot about water temperature in many of these articles and for good reason. Things like approach, presentation, and fly selection can determine whether or not a fish will take your offering. Water temperature can determine whether or not a fish will take any offering! You can read in more detail about water temperature in A Matter of Degrees. To keep it simple here, wild trout in the Smokies just don’t do a lot of feeding when the water temperature is in the 30’s and low 40’s.

Tailwaters are different because the water comes from the deep, insulated layer of a lake. The water temperature remains relatively constant, regardless of air temperature. Stocked trout in a freestone stream are different because, well, they just don’t know any better. They were raised in hatcheries and were fed the same amount of food every day, regardless of temperature. But wild trout in freestone streams have never had that luxury. In order to survive, their metabolism changes and they become nearly dormant. This doesn’t mean that they won’t feed at all but if you’re going to fish the Smokies in the winter, come prepared with a great deal of patience.

I spend more time looking this time of year than I do actually fishing. Blind fishing a run in the spring can be very productive because all or most of the fish should be feeding. They’ll often move up and down and side to side for food. In the winter they typically won’t move much for food and you need to put the fly right on their nose. To do this most effectively, you really need to see the fish. Take your time and watch the water. Pay particular attention to the slower currents on the edges and lower parts of a run. Ideally, you want to locate fish that are up in the water column rather than hugging the bottom. Fish that are up a little in the column are more likely to be feeding.

If you can’t actually see the fish, look for flashes on the bottom. Any fish that is feeding will likely be picking nymphs off the bottom. When a trout eats a nymph off the bottom, they usually tilt their bodies sideways. When they do, you’ll see the flash of their lighter colored bellies. You may have to scope out several pools or runs before you see fish or fish activity. Experience will teach you the kind of water to focus on. But deeper, slower runs will usually produce better than fast riffles and pocket water this time of year. And try to pick the warmest part of the day, probably late morning to late afternoon.

Little River Brown Trout Smoky Mountains
Cold weather brown

Once you think you’ve located feeding fish, it’s time to think about fly selection. On warmer winter days, you may actually see some insects hatching. If you do, they’re likely to be small and dark: Blue Wing Olive mayflies, small black stoneflies or caddis, dark olive or black midges… Rarely anything bigger than a #18. On rare occasions, you may see fish feeding on the surface during one of these hatches. Small Parachute Adams or Griffith’s Gnats are a pretty good bet in those instances. Mostly though, they’re going to feed more on the nymphs, so black Zebra Midges, small Pheasant Tails, and small black or olive Hare’s Ears will be pretty good bets.

If I don’t see any kind of hatch, I may still try one of the above mentioned nymphs, but more likely I’m going with something big, like a stonefly nymph. It may be more psychological, but I feel like I’m more likely get that lethargic fish to eat if I show him a bigger mouthful. Girdle Bugs, black Wooly Buggers, Yuk Bugs, and Bitch Creek Nymphs in sizes #10 – # 4 are personal favorites.

Girdle Bug Fly Pattern
Girdle Bugs

Regardless of your nymph selection, you’re going to want it to drift as slowly and as near the bottom as possible. I like to use heavy flies and I like to use split shot. Take your time and adjust your weight regularly as you move to areas with different depths and current speeds. If you’re not hanging up on the bottom from time to time, you’re not deep enough. If you’re hanging the bottom every time, you’re too deep. Take the time to get it right. That fly needs to be right in their nose!

Adjusting your strike indicator (if you’re using one) can help too, but usually the answer is more weight. Most fishermen just don’t have their nymphs deep enough in the winter. A great way to learn about the effects of different current speeds vs. the amount of weight on your line is to spend some time fishing a fly you can see under water.  For instance, tie on a bright pink egg and watch how deep it sinks, how fast it sinks, and how it drifts with no weight, then 1 spit shot, then 2 split shot, etc. Try it with a strike indicator and without to learn how the indicator can impact the drift, too. This is just a great way in general to better understand nymphing, and sometimes you’ll even catch a fish on that trashy pink egg!

Again, don’t expect near the number of strikes that you might in spring. But if you’re just itching to get out of the house and are willing to be patient, you might just be surprised what you find.

Skills: Fishing High Water

The Smoky Mountains receive large amounts of rain in a season. When it comes in bunches, the result is often swollen, rough, intimidating, and dangerous streams and rivers. Good and bad things occur when the water rises in mountain streams. On the down side, streams become much more dangerous and sometimes impossible to wade. The faster current also makes it more difficult to control your drift. On the up side, a lot of food churns up in the stream. That factor, combined with a level of comfort and security in stained water, often results in more reckless feeding by some of the bigger trout on the block. There are brown trout exceeding 20” in many mountain streams. They don’t get caught often, but when they do, it’s usually when the water is up and off color.

The stream is going to look completely different under these conditions. It will help if you have intimate familiarity with the stream under normal flows. Regardless of how well you know the water, always use extreme caution under these conditions. Don’t try any heroic stream crossings. One wrong step can quickly get you in big trouble! In fact, it’s not a bad idea to wear a life vest when fishing under these conditions. Better safe than sorry!

Forget about finesse. You’re not going to coax rainbows to #16 dry flies with delicate casts. Bring a long rod for a heavier line. A 9’ 6-weight is a good choice. Plan on chucking large, heavy nymphs with a rosary of split shot and no strike indicator. Casting involves one flip behind you, a wait for the tug on the rod tip, and a forward chuck with an open loop. Long casts are not necessary and will be less effective.

Instead, wade the edges and look for slower seams on the edge of fast currents and eddies behind rocks. Position yourself as close to the feeding zone as you safely can and use the length of the rod to reach and hold your flies in position. Keep the rod tip up and try to keep as much of the fly line off the water as possible, allowing for a much slower, more controlled drift. Follow the flies with the rod tip as they drift through the feeding lane and keep an eye on the fly line between the rod tip and water.

You may feel a strike since you’re working with such a short line but most likely you’ll determine the strike when you see the fly line pull down or hesitate. If anything suspicious like this occurs, set the hook! With practice you’ll soon be able to differentiate between fish and rocks.

Don’t expect to catch large quantities of fish under these circumstances. It will be tough fishing to say the least. But if you stick with it, the rewards can be enormous!

How Stuff Works: Strike Indicators

There are few things in the fly fishing world that provoke as much debate as strike indicators. The mere existence of strike indicators in the sport of fly fishing can inspire rants from fly fishing purists that rival any political rant of that friend you just hid from your Facebook feed. But even among the firmly pro indicator crowd, nymphers will argue fiercely about the superiority of one type of indicator over another.

For newbies to the sport, a strike indicator is something often used when fishing with nymphs (sub surface flies). It is a brightly colored, floating object affixed to the leader. It gives the fisherman a visual indication when the fish hits his submerged fly. Since you can’t usually see the nymph under the water, and since it is usually fished with a slack line to achieve a dead drift, the strike is difficult to detect without the visual aid of a strike indicator. Strike indicators are also helpful in making sure the nymph drifts properly (without drag) and at the desired depth.

The obvious question usually arises when hearing this description, Isn’t that just a bobber? Pardon the bobber pun, but that opens a whole other can of worms. There are a number of fly fishermen who will stop just short of taking a swing at you if you call a strike indicator a bobber. I assume this animosity stems from the association of bobbers with bait fishermen and fishing live bait. Fly fishermen don’t like to think anything they do might resemble bait fishing. So they call them strike indicators. The truth is that while strike indicators are typically smaller, lighter, and made from different materials than bobbers, they pretty much accomplish the same thing.

I use the term strike indicator because I think there is enough of a difference to specify. It’s the same reason I don’t refer to a hamburger as a sandwich. It’s just different enough. But I won’t be offended if you call a hamburger a sandwich and it won’t offend me if you call a strike indicator a bobber!

Getting re-focused specifically on strike indicators, there are a lot of different kinds, and that’s what I want to focus on here. As mentioned before, most fly fishermen have their favorites, and a lot about selecting strike indicators will boil down to personal preference. I personally don’t think there is such a thing as the perfect strike indicator. They all have pros and cons and I use different ones for different situations. Often I don’t use one at all, but that’s a topic for another article. Below is a list of some of the more common or popular strike indicators with a description of how they work and some of their strengths and weaknesses.

Toothpick Style Fly Fishing Strike Indicators
Toothpick style indicators

Hard Toothpick Indicators: They usually make these with cork, balsa, or something similar. They are typically round or oval with a hole drilled in the center. You insert the leader through the hole move the indicator to any position on the leader. Once you select the desired position, insert the provided “toothpick” into the hole to hold the indicator in place.

These are great because they are buoyant, highly visible, reusable, and can easily be adjusted up and down the line to set the nymph at different depths. However, they tend to make more disturbance when they land on the water and can spook more skittish fish. Additionally, their mass makes them difficult to cast when placed on the tippet portion of the leader for shallow nymphing, though smaller ones can be purchased. They are best for deep to mid-depth nymphing and for quick and easy depth adjustment.

Rubber Band Twist-on Style Fly Fishing Strike Indicators
Twist-on style indicators

Hard Rubber Band Indicators: These are typically oval in shape and made from the same materials as the hard toothpick type indicators. Instead of having a hole and a toothpick, they have a slit that contains athick rubber band. You insert the leader into the slit and rotate the indicator. The rubber band twists around the leader and holds the indicator in place.

They have pretty much the same pros and cons as the toothpick indicators. One additional advantage is they can be added or removed while the fly is still attached. However, they have a tendency to kink the leader when twisted on, and they come off the line more easily than other indicators when casting.

Thingamabobber Balloon Style Fly Fishing Strike Indicator
Thingamabobber

Balloon Style Indicators: The best known versions of these are the Thingamabobber and Air Lock. These are basically small, plastic balloons. They float great, are highly visible, and adjust easily. They are particularly good if you need an indicator that will suspend larger, heavier flies. The Thingamaboober attaches by looping the leader through a hole and around the indicator. The Air Lock has a slot in the base where you insert the leader. A separate piece screws on to hold the indicator in place.

Air Lock Ballon Style Fly Fishing Strike Indicator
Air Lock

Much like the other hard indicators, when you set this indicator in the tippet section of the leader for shallow nymphing, it is difficult to cast and creates more tangles. It also lands hard on the water. It is more durable and floats better than the other hard indicators.

Palsa Foam Stick-on Style Fly Fishing Strike Indicators
Stick-on strike indicators

Stick-On Indicators: These are small round or oval pieces of foam that peel off and stick on to the leader. Their greatest value is that they cast easily, even when placed on the tippet and they make very little commotion on the water. So they are a great indicator for shallow nymphing. They float great and you can add multiple indicators to the line to support more weight.

The biggest downside to these is they are not reusable and they are not easily adjusted. When moved they lose a lot of their stick and then have a tendency to slide down the leader. You can usually move them a few times before replacement is necessary. Some complain that they also leave a sticky residue on the leader but I haven’t found that to be a problem.

Yarn Style Fly Fishing Strike Indicator
Yarn indicator

Yarn Indicators: They make these from a buoyant yarn, often pre-treated with a waterproofing agent. You can also apply floatant to them. There are a number of different versions of yarn indicators, but most attach by using some sort of slip knot or loop knot. Like the stick-ons, you can attach yarn to the tippet end of the leader without the worry of a hard landing or a lot of tangles. So this is another good choice for shallow nymphing. Yarn indicators are also very sensitive, so they are great for detecting subtle strikes.

On the downside, I find them difficult to add and remove from the line. When removed, they regularly leave kinks in the line. Larger yarn indicators can be wind resistant and difficult to cast in tight places and they require a little more maintenance to keep them floating.

Putty Style Fly Fishing Strike Indicator
Putty indicator

Putty Indicators: Strike putty comes in a small tub and resembles Play-Doh. You pull out a small gob or big gob depending on how big you want your indicator to be. You then smoosh and roll it on your leader. One of the benefits is you can smoosh more on if you need more flotation for bigger, heavier flies. You can pick some off for smaller flies and spookier fish.

I’m trying to be impartial here but I don’t like this stuff. It always comes off, especially in warm weather. It leaves a permanent indicator-colored smudge on your line when you remove it. Finally, every bit of dirt in the vicinity attaches to it. What starts as orange strike putty soon becomes a greyish, brownish, greenish, orange strike putty.

Dry Fly with a Nymph Dropper
Dry fly strike indicator

Dry Fly: In the right situations, a dry fly can serve as an edible strike indicator by adding a nymph “dropper” to it. For many, this is the go-to method because you’re essentially doubling your chances… or so it might seem. Just like any other strike indicator, a dry fly has its pros and cons.

Obviously, one of the big perks is that you have the potential to catch a fish on the nymph or the indicator, since the indicator is a fly. However, most dry flies aren’t nearly as buoyant as a strike indicator. If you need to fish heavier nymphs near the bottom, the dry fly will routinely sink. In such a scenario, you’re not fishing the dry fly or the nymph very well, and hardly doubling your chances.

The best scenario for fishing a dry fly with a dropper is when you don’t need to get your nymph very deep. You can fish a dry fly buoyant enough to support the nymph’s weight. I immediately think of pocket water. Another scenario might be in flatter water during a hatch, where you could put a nymph with little to no weight behind a dry fly to suggest an emerger.

The takeaway from all of this should be that there is not one strike indicator that is going to be perfect for every situation. You will likely need a variety to meet a variety of conditions. As with most things, much of it will boil down to personal preference. You should play around with a few different types to find what best meets your needs.